Facial-Fat-Transfer

Facial Fat Transfer: Natural Rejuvenation

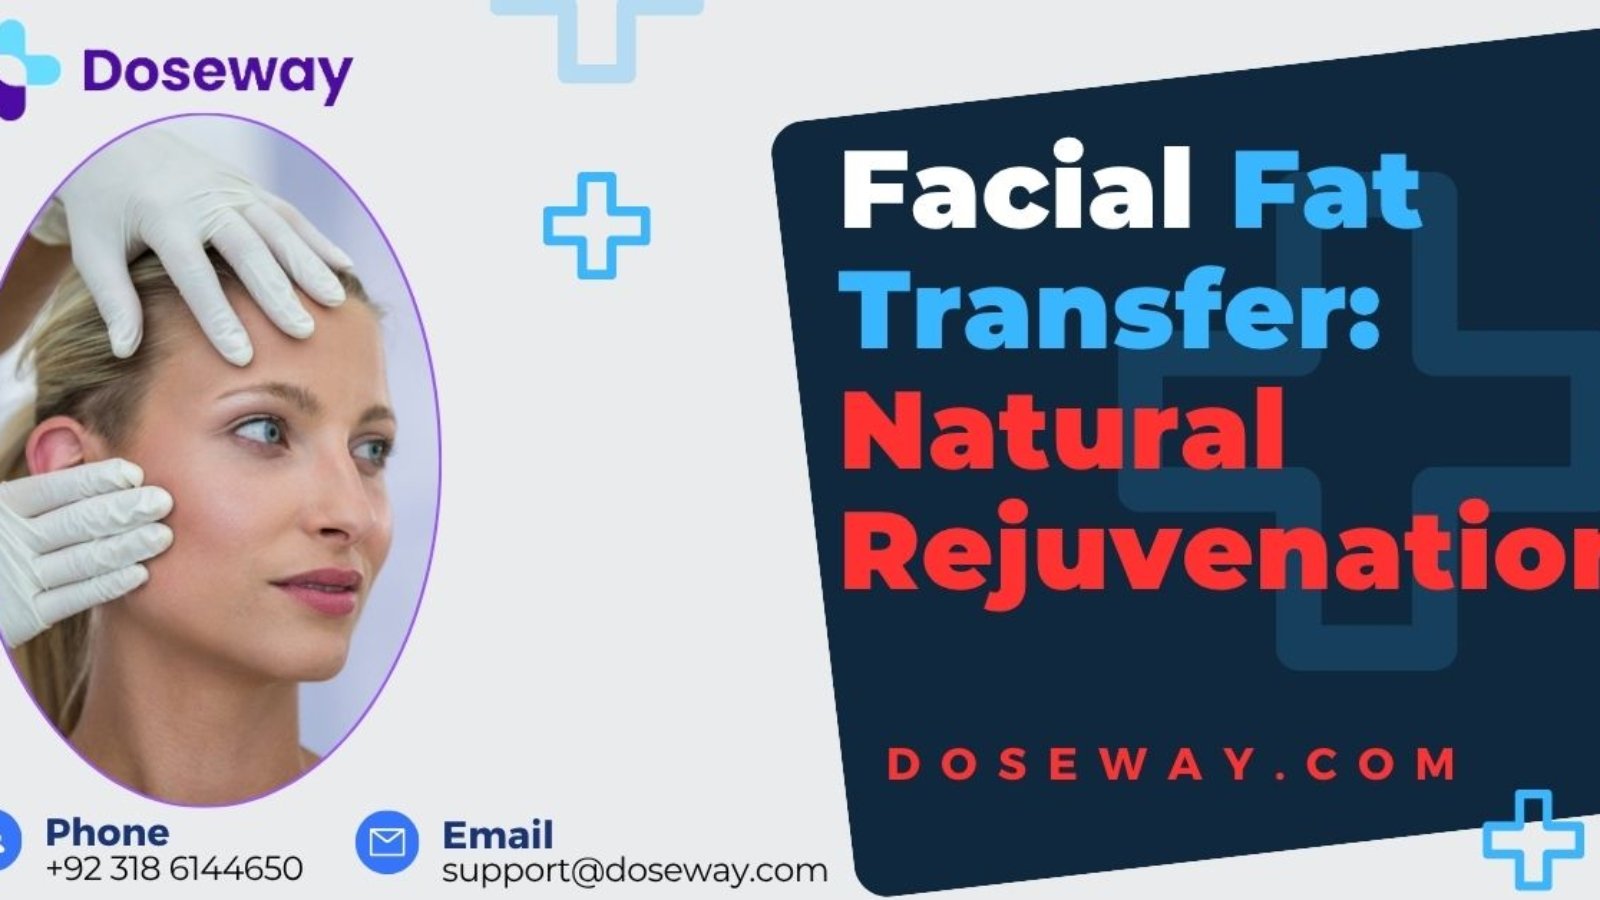
Facial fat transfer represents one of the most significant advancements in natural facial rejuvenation, offering a dual-purpose solution that restores lost volume while improving skin quality. This comprehensive guide explores every aspect of autologous fat grafting, from the basic science behind the procedure to advanced techniques that maximize results. Whether you’re considering facial volume restoration or simply researching natural anti-aging options, this article provides the detailed information you need to make an informed decision.

✓ Natural Facial Rejuvenation: Uses your own fat cells for completely natural results
✓ Dual-Action Benefits: Restores volume while improving skin texture and quality
✓ Long-Lasting Results: Surviving fat cells can provide permanent improvement
✓ Minimal Rejection Risk: Autologous material eliminates allergy concerns
✓ Comprehensive Solution: Addresses multiple aging concerns simultaneously

Fat Transfer Candidacy & Cost Calculator

Fat Transfer Candidacy & Cost Calculator

Assess your suitability for fat transfer procedures and estimate costs

1 Demographics
2 Medical History
3 Procedure Details
4 Results
300 cc

Your Fat Transfer Candidacy Assessment

0

Out of 100 Possible Points

Poor Candidate Moderate Candidate Excellent Candidate

Assessment Interpretation

Based on your inputs, we’re calculating your candidacy score…

Estimated Procedure Cost

$0

This is a rough estimate based on average market rates

Disclaimer: This calculator provides preliminary information only and is not a substitute for professional medical advice. Always consult with a qualified healthcare provider for personalized assessment.

Read More Guides & Try More Free Tools:

Skin-analysis-personalized-plan-and-transparent-pricing-at-doseway.com

What is Facial Fat Transfer and How Does It Work?

Facial fat transfer, medically known as autologous fat grafting or lipofilling, is a sophisticated cosmetic procedure that involves harvesting fat from one area of your body and strategically injecting it into your face to restore volume, improve contours, and enhance skin quality. This innovative technique represents a paradigm shift in facial rejuvenation, moving beyond simply tightening skin to actually replacing the volume that naturally diminishes with age. The procedure works on the principle that aging doesn’t just cause skin laxity but primarily involves the loss of subcutaneous fat pads that provide structural support to Facial features.

The science behind facial fat transfer revolves around the concept of autologous tissue transplantation – using your own biological material to enhance your appearance. When performed by skilled practitioners, this procedure can achieve remarkably natural-looking results because it works with your body’s natural anatomy rather than against it. The transferred fat contains adipose-derived stem cells that may improve skin quality through collagen stimulation and tissue regeneration, providing benefits beyond simple volume restoration.

The fundamental Facial process involves three critical phases:
✓ Harvesting: Gentle liposuction collects fat from donor sites like abdomen or thighs
✓ Processing: Purification and preparation of fat to isolate viable fat cells
✓ Reinjection: Strategic placement of processed fat into targeted facial areas

This tri-phase approach ensures maximum fat survival and optimal integration with existing facial tissues. The artistic aspect comes into play during the reinjection phase, where the surgeon must have a deep understanding of facial anatomy and aesthetics to place the right amount of fat in the precise anatomical planes to achieve natural, harmonious results.

Facial-Fat-Transfer
Facial-Fat-Transfer

Why Choose Facial Fat Transfer Over Synthetic Fillers?

The decision between facial fat transfer and synthetic dermal fillers represents a significant crossroads in facial rejuvenation planning. While both approaches aim to restore volume, they differ fundamentally in composition, longevity, mechanism of action, and overall impact on facial tissues. Understanding these differences is crucial for making an informed choice that aligns with your aesthetic goals, budget, and tolerance for downtime.

Facial fat transfer utilizes your own living tissue, which integrates permanently with your facial structures. The initial volume may decrease as some fat cells don’t establish blood supply, but the surviving cells typically remain for years, often permanently. In contrast, synthetic fillers made of hyaluronic acid, calcium hydroxylapatite, or poly-L-lactic acid are gradually broken down by your body over 6-24 months, requiring ongoing maintenance treatments. This fundamental difference in longevity makes fat transfer more cost-effective over the long term despite higher upfront costs.

The biological benefits of Facial fat transfer extend beyond simple volume replacement. Adipose tissue contains stem cells that may stimulate collagen production, improve skin quality, and promote overall tissue health. This regenerative aspect is absent with synthetic fillers, which primarily occupy space without actively improving the biological environment of your skin. The stem cells in transferred fat can enhance skin texture, elasticity, and tone – benefits that synthetic fillers cannot replicate.

Safety profiles also differ significantly between the two approaches. As an autologous procedure, fat transfer carries virtually no risk of allergic reaction or rejection. The main risks involve technical aspects of the procedure itself. Synthetic fillers, while generally safe, carry risks of allergic reactions, granuloma formation, and vascular complications if injected into blood vessels. The reversibility of hyaluronic acid fillers with hyaluronidase represents an advantage in case of unsatisfactory results, whereas fat transfer results are more permanent and challenging to reverse.

Financial considerations reveal interesting long-term dynamics. While the initial cost of fat transfer is substantially higher than filler treatments, the permanence of results can make it more economical over a 5-10 year period when compared to the cumulative cost of maintenance filler sessions. The table below illustrates this cost comparison over time:

Time FrameFat TransferHyaluronic Acid FillersCalcium-Based Fillers
Initial Cost$4,000-$8,000$600-$1,200 per session$700-$1,400 per session
1-Year Total$4,000-$8,000$1,200-$2,400$1,400-$2,800
3-Year Total$4,000-$8,000$3,600-$7,200$4,200-$8,400
5-Year Total$4,000-$8,000$6,000-$12,000$7,000-$14,000

The decision ultimately depends on your specific circumstances, including your age, aesthetic goals, budget, availability for downtime, and tolerance for maintenance. Younger patients in their 30s-40s often benefit more from fat transfer as it addresses the early signs of volume loss that will continue progressing with age. Older patients with more significant volume depletion may achieve more dramatic improvement with fat transfer compared to fillers alone.

Doseway-aesthetic-procedures-andonline-booking-details

How Does Facial Fat Transfer Combat Signs of Aging?

Facial aging is a complex multidimensional process involving volume loss, skin texture changes, and structural descent. Facial fat transfer addresses these aging components through multiple mechanisms that work synergistically to restore a more youthful appearance. Understanding how this procedure counteracts specific aging changes helps set realistic expectations and appreciate the comprehensive nature of this treatment.

Volume restoration represents the most obvious anti-aging mechanism of fat transfer. As we age, the fat pads in our face gradually diminish and descend, leading to hollowing in specific areas. The temples develop concavity, the cheeks lose their apple-like fullness, the under-eye area reveals hollows, and the lips thin considerably. By strategically replenishing these depleted fat compartments, fat transfer restores the structural foundation of youth. The artistic placement of fat must replicate the natural fat distribution of a younger face rather than simply filling wrinkles or lines.

Beyond simple volume replacement, the stem cell component of transferred fat provides regenerative benefits that improve skin quality. Adipose-derived stem cells stimulate collagen production, enhance elastin fiber network organization, and promote angiogenesis (new blood vessel formation). This biological revitalization leads to measurable improvements in skin thickness, elasticity, and overall texture. Patients often report that their skin looks healthier, more radiant, and better hydrated following fat transfer – benefits that extend beyond what would be expected from volume correction alone.

The procedural approach to different aging areas requires customized techniques:

Midface Rejuvenation
✓ Restores malar fat pad volume
✓ Lifts nasolabial folds indirectly
✓ Improves cheek prominence and contour
✓ Creates natural-looking elevation of facial features

Periorbital Rejuvenation
✓ Fills tear trough depressions
✓ Camouflages under-eye bags
✓ Restores orbital rim support
✓ Reduces hollowed appearance

Lip Enhancement
✓ Adds volume to thinning lips
✓ Restores vermilion border definition
✓ Improves lip texture and hydration
✓ Creates natural-looking fullness

Jawline and Chin
✓ Augments receding chin profile
✓ Fills prejowl sulcus
✓ Improves jawline definition
✓ Creates smoother transitions

The comprehensive nature of facial fat transfer allows for addressing multiple aging concerns in a single procedure, creating harmonious rejuvenation rather than piecemeal improvement. This holistic approach often yields more natural results than treating individual areas in isolation.

Who is an Ideal Candidate for Facial Fat Transfer?

Determining candidacy for facial fat transfer involves evaluating multiple medical, anatomical, and psychological factors that influence both safety outcomes and aesthetic results. The ideal candidate possesses specific characteristics that maximize the likelihood of successful fat survival and satisfactory aesthetic improvement. Our free candidacy calculator incorporates these factors to provide personalized assessment, but understanding the underlying principles helps contextualize your results.

The most fundamental requirement for facial fat transfer is having adequate donor fat available for harvesting. Patients with very low body fat may not have sufficient reserves for meaningful transfer. Preferred donor sites include the abdomen, flanks, thighs, and inner knees – areas that typically maintain fat stores even in relatively slim individuals. The quality of donor fat also matters, with younger, healthier fat cells having better survival rates post-transfer. Patients with significant weight fluctuations may have compromised fat quality that affects longevity of results.

Age and skin condition significantly influence candidacy. While there’s no strict upper age limit, younger patients (30s-50s) typically achieve better results because their skin has better elasticity and regenerative capacity. However, properly selected older patients can still benefit tremendously, particularly when fat transfer is combined with other procedures like facelifting. Skin quality assessment includes evaluation of elasticity, thickness, and presence of significant sun damage – factors that affect how well the skin will redrape over the newly added volume.

Health status constitutes another critical dimension of candidacy assessment. Ideal candidates are non-smokers in good general health without conditions that impair healing or blood circulation. Diabetes, autoimmune disorders, and significant cardiovascular issues may increase complication risks or compromise fat survival. Certain medications like blood thinners must typically be adjusted before the procedure. The psychological aspect is equally important – realistic expectations and understanding of the procedure’s limitations are essential for satisfaction.

Specific indicators of strong candidacy include:
✓ Noticeable facial volume loss in specific areas
✓ Adequate donor fat availability
✓ Good overall health without healing impairments
✓ Non-smoker status or willingness to quit
✓ Realistic expectations about outcomes
✓ Stable weight maintenance
✓ Absence of active facial skin infections
✓ No history of radical weight loss recently

Our facial fat transfer candidacy calculator evaluates these factors through a sophisticated scoring algorithm that considers your unique combination of characteristics. The results provide guidance on whether you’re an excellent, good, or poor candidate, along with specific factors that may need optimization before proceeding with the procedure.

Skin-and-aesthetic-procedures-online-appointments-doseway.com

What Medical Conditions Affect Fat Transfer Candidacy?

Certain medical conditions can significantly impact your suitability for facial fat transfer, either by increasing procedural risks or compromising results. Understanding how specific health issues affect candidacy helps in preoperative planning and risk mitigation. Our calculator incorporates these medical factors into its assessment algorithm to provide personalized risk evaluation.

Cardiovascular conditions represent an important consideration in candidacy assessment. Hypertension, particularly if poorly controlled, can increase bleeding risks during the procedure and may compromise healing. Coronary artery disease and other cardiac conditions may affect your ability to tolerate the procedure and anesthesia. Patients with pacemakers or implantable cardiac devices require special precautions during electrocautery use. A thorough cardiac evaluation is typically recommended for patients with significant cardiac history.

Metabolic disorders like diabetes mellitus can profoundly impact fat transfer outcomes. Poorly controlled diabetes impairs microcirculation and wound healing, which are crucial for fat cell survival after transfer. Diabetic patients typically require tighter glycemic control in the perioperative period to optimize results. Thyroid disorders, particularly hypothyroidism, can affect healing and should be well-controlled before proceeding with the procedure.

Autoimmune conditions present complex considerations for fat transfer candidacy. Conditions like lupus, rheumatoid arthritis, or scleroderma may affect healing and increase complication risks. Some autoimmune disorders specifically target fat tissue (like lupus panniculitis), which would contraindicate fat transfer. Patients on immunosuppressive medications for autoimmune conditions may have impaired fat survival due to reduced healing capacity.

Connective tissue disorders like Ehlers-Danlos syndrome can affect tissue integrity and healing, potentially compromising results. Patients with these conditions require careful evaluation and adjusted techniques if proceeding with fat transfer. Bleeding disorders or use of anticoagulant medications significantly increase bruising and hematoma risks, requiring careful management in the perioperative period.

The table below summarizes how common medical conditions affect fat transfer candidacy:

Medical ConditionImpact on CandidacySpecial Considerations
Diabetes MellitusModerate impactRequires optimal glycemic control; may affect fat survival
HypertensionMild impactNeeds preoperative control; may increase bruising
Autoimmune DisordersVariable impactCase-dependent; some conditions contraindicate procedure
Thyroid DisordersMild impactRequires optimal hormone level control
Bleeding DisordersSignificant impactRequires hematology consultation; increased bruising risk
Skin ConditionsVariable impactActive infections contraindicate; eczema may increase infection risk

Our candidacy calculator incorporates your specific medical history to provide personalized risk assessment. This information helps you have informed discussions with your surgeon about optimizing your health status before the procedure and implementing appropriate precautions during your treatment.

How Does Smoking and Alcohol Consumption Affect Results?

Tobacco use and alcohol consumption represent modifiable lifestyle factors that significantly impact facial fat transfer outcomes. Understanding the specific mechanisms through which these substances affect results empowers you to make informed decisions about preoperative preparation and postoperative care. Our calculator incorporates these factors into its assessment to provide personalized recommendations.

Smoking constitutes one of the most significant negative factors for fat transfer success. Nicotine causes vasoconstriction, reducing blood flow to the delicate transferred fat cells during the critical period when they’re establishing new blood supply. Carbon monoxide in cigarette smoke reduces oxygen-carrying capacity of hemoglobin, further compromising oxygenation of healing tissues. The numerous toxic compounds in tobacco smoke impair cellular function and collagen production, essential for fat survival and skin quality improvement.

The impact of smoking on fat survival rates is substantial. Studies indicate that smokers may experience 30-50% greater fat resorption compared to non-smokers. The quality of results is also compromised, with increased risks of irregularities, poorer skin texture improvement, and suboptimal aesthetic outcomes. Most surgeons strongly recommend complete smoking cessation for at least 4-6 weeks before surgery and 2-4 weeks postoperatively to optimize results. Nicotine replacements may still affect outcomes, so complete abstinence is ideal.

Alcohol consumption affects fat transfer through multiple mechanisms. Alcohol causes dehydration, which can compromise tissue perfusion and healing. Chronic heavy alcohol use can impair liver function, affecting protein synthesis essential for healing and potentially increasing bleeding risks. Alcohol also interacts with medications used during and after the procedure, potentially increasing sedation risks and complicating pain management.

The timing and pattern of alcohol consumption influence its impact. Occasional moderate alcohol consumption likely has minimal effect on outcomes, while heavy regular drinking significantly compromises results. Most surgeons recommend avoiding alcohol for at least 2 weeks before surgery and 2-4 weeks afterward to optimize healing and fat survival. Patients with alcohol use disorders should address these issues before considering elective cosmetic procedures.

Optimal preoperative preparation includes:
✓ Complete smoking cessation 4-6 weeks preoperatively
✓ Alcohol avoidance for 2 weeks before procedure
✓ Balanced nutrition with adequate protein intake
✓ Proper hydration maintenance
✓ Avoidance of other substances that affect bleeding or healing

Our calculator assesses your smoking status and alcohol consumption patterns to provide personalized risk modification recommendations. Addressing these modifiable factors before your procedure can significantly improve your outcomes and reduce complication risks.

What is the Science Behind Fat Cell Survival After Transfer?

The biological journey of transferred fat cells represents a fascinating process that determines the longevity of your results. Understanding the science behind fat cell survival helps set realistic expectations and explains why certain techniques and postoperative care protocols are essential for optimal outcomes. The survival rate of transferred fat typically ranges from 30-80%, depending on multiple technical and biological factors.

The initial 72 hours post-transfer constitute the most critical period for fat survival. During this phase, the transferred fat cells exist in a state of oxygen and nutrient diffusion from the surrounding tissues, as they haven’t yet developed their own blood supply. This period of plasmatic imbibition sustains the cells temporarily while angiogenesis (new blood vessel formation) begins. Techniques that minimize trauma to fat cells during harvesting and processing help preserve cellular integrity during this vulnerable period.

Revascularization represents the next critical phase, typically occurring between days 3-7 post-transfer. New capillaries begin growing into the transferred fat parcels, establishing permanent blood supply. The process of neovascularization is stimulated by growth factors and cytokines released by the fat cells and surrounding tissues. The strategic placement of small fat parcels in multiple tissue planes maximizes surface area contact with vascularized tissue, enhancing revascularization potential.

Long-term integration occurs over subsequent weeks and months as the transferred fat becomes fully incorporated into the facial tissues. Surviving fat cells behave like native fat cells, responding to weight fluctuations and hormonal changes. The stem cell component of transferred fat may differentiate into new fat cells or stimulate regenerative processes in surrounding tissues. This biological integration explains why successfully transferred fat can provide permanent volume restoration.

Factors influencing fat cell survival include:

Technical Factors
✓ Harvesting technique (low-pressure aspiration preserves cell integrity)
✓ Processing method (removal of oil, blood, and broken cells)
✓ Injection technique (small aliquots in multiple tissue planes)
✓ Cannula size and design (blunt-tipped reduces trauma)

Biological Factors
✓ Donor site selection (certain areas may have better quality fat)
✓ Patient age and health status
✓ Skin quality and vascularity in recipient area
✓ Surgical trauma and inflammation control

Postoperative Factors
✓ Pressure avoidance on treated areas
✓ Nutritional status and hydration
✓ Smoking and alcohol avoidance
✓ Gentle mobilization and activity resumption

Understanding this biological process highlights why technical expertise matters tremendously in fat transfer procedures. The artistic placement of fat must align with the biological requirements for survival to achieve optimal, long-lasting results.

Board-certified-aesthetic-specialist-at-doseway.com-ready-to-discuss-your-skin-goals

How Much Does Facial Fat Transfer Cost?

The cost of facial fat transfer varies significantly based on geographic location, surgeon expertise, facility fees, anesthesia costs, and the extent of treatment required. Understanding the cost components and factors that influence pricing helps in financial planning and evaluating the value proposition of this procedure. Our cost calculator provides personalized estimates based on your specific requirements and location.

The typical cost range for facial fat transfer in the United States falls between $4,000 and $8,000, while European prices generally range from €3,500 to €7,000. UK patients can expect to pay £3,000 to £6,500 for comprehensive facial fat transfer. These price ranges reflect the complete procedure including surgeon’s fee, anesthesia, facility costs, and follow-up care. The wide variation accounts for differences in case complexity, surgeon experience, and geographic pricing norms.

The surgeon’s fee typically constitutes 40-60% of the total cost and reflects their expertise, training, and reputation. Board-certified plastic surgeons with specific experience in facial fat transfer typically command higher fees, but this investment often translates to better technique and more predictable results. The artistic aspect of fat transfer means that surgeon skill significantly impacts outcomes, making this an area where cost shouldn’t be the primary deciding factor.

Anesthesia fees vary based on the type of anesthesia used. Local anesthesia with sedation typically costs less than general anesthesia. The complexity of your procedure and your medical status determine the safest anesthesia approach. Facility fees account for the surgical facility costs, which vary significantly between hospital operating rooms, ambulatory surgical centers, and office-based surgical suites. Accredited facilities with appropriate safety equipment typically charge higher fees.

Additional cost considerations include:
✓ Preoperative laboratory testing and medical clearance
✓ Postoperative garments for donor sites
✓ Prescription medications for pain and infection prevention
✓ Possible touch-up procedures (typically needed in 10-20% of cases)
✓ Time off work during recovery (1-2 weeks typically)

The value proposition of fat transfer becomes clearer when comparing long-term costs against temporary fillers. While the upfront cost of fat transfer is higher, the permanence of results often makes it more cost-effective over a 5-10 year period compared to maintenance filler treatments. The additional benefits of skin quality improvement and more comprehensive rejuvenation further enhance the value equation.

Our cost calculator incorporates your geographic location, procedure extent, and specific requirements to generate personalized cost estimates. This information helps you budget appropriately and understand the financial investment required for this procedure.

What is the Recovery Process Like After Facial Fat Transfer?

The recovery journey after facial fat transfer involves predictable stages with specific milestones and care requirements. Understanding the recovery timeline and postoperative instructions helps ensure optimal healing and fat survival. Proper recovery management significantly influences your final results and satisfaction with the procedure.

The immediate postoperative period (first 3 days) involves the most significant swelling and discomfort. Your face will appear noticeably overfilled due to surgical swelling and the initial volume of transferred fat. Donor sites may feel bruised and tender, similar to how you would feel after liposuction. Pain is typically manageable with prescribed medications, and most patients describe the discomfort as moderate rather than severe. Head elevation and cold compresses (carefully applied) help manage swelling during this phase.

The first week marks a gradual improvement in swelling and comfort. By days 4-7, bruising typically peaks then begins to fade. Swelling gradually decreases, though you’ll still appear fuller than your final results. Most patients feel comfortable returning to sedentary work after 7-10 days, though social activities may still be limited due to visible swelling. Gentle walking is encouraged to promote circulation, but strenuous activities must be avoided.

Weeks 2-4 bring significant resolution of visible swelling and bruising. The initial overfilled appearance gives way to more natural contours as temporary swelling subsides. About 30-50% of the initial volume may disappear during this period as non-viable fat cells are absorbed and edema resolves. This volume reduction is normal and expected – the remaining fat represents the foundation of your long-term results. Most social activities can be resumed during this period, though vigorous exercise should still be avoided.

The 1-3 month period reveals increasingly stable results as the transferred fat establishes permanent blood supply. The final contour becomes more apparent, though subtle changes continue occurring. Skin quality improvements from the stem cell effect may begin becoming noticeable during this phase. Most patients feel completely back to normal activities and are enjoying their new appearance by the end of this period.

Long-term stabilization occurs between 3-6 months postoperatively, when the fat survival has stabilized and final results are apparent. The volume at this point typically remains stable long-term, with normal aging progression thereafter. Some patients may consider touch-up procedures if they desire additional volume, though this decision should wait until full results are evident at the 6-month mark.

Key recovery guidelines include:
✓ Head elevation during sleep for first 2 weeks
✓ Gentle facial movements; avoid excessive manipulation
✓ Donor site garment use as recommended
✓ Medication compliance for pain and infection prevention
✓ Gradual return to activities based on surgeon guidance
✓ Sun protection to protect healing skin
✓ Proper nutrition and hydration to support healing

Understanding this recovery timeline helps set appropriate expectations and plan for the postoperative period. Our calculator incorporates recovery considerations into its assessment to provide personalized guidance based on your specific situation.

How Does the Facial Fat Transfer Candidacy Calculator Work?

Our facial fat transfer candidacy calculator employs a sophisticated algorithm that evaluates multiple medical, anatomical, and lifestyle factors to generate your personalized assessment. Understanding how the calculator processes your information helps contextualize your results and appreciate the comprehensive nature of the evaluation. The algorithm weights different factors based on their clinical significance in predicting outcomes and safety.

The demographic assessment forms the foundation of your candidacy evaluation. Age factors into the algorithm because younger patients typically have better skin elasticity and healing capacity, though properly selected older patients can still achieve excellent results. Gender influences fat distribution patterns and hormonal considerations that may affect fat survival. Height and weight measurements calculate your BMI, which impacts both donor fat availability and surgical risk assessment.

Medical history evaluation represents the most complex component of the algorithm. The calculator assesses both specific conditions and their severity or control status. Well-controlled hypertension has less impact than uncontrolled hypertension, for instance. The presence of multiple conditions compounds risk assessment, as comorbidities often have synergistic effects on healing and procedural risks. Medication review helps identify potential bleeding risks or healing impairments.

Lifestyle factors carry significant weight in the algorithm due to their modifiable nature and profound impact on outcomes. Smoking status receives heavy weighting because of its substantial negative effects on fat survival. Alcohol consumption patterns influence risk assessment, with heavy regular drinking significantly impacting candidacy scores. Physical activity levels and dietary patterns provide insight into overall health status and healing capacity.

Procedure-specific factors tailor the assessment to your aesthetic goals and anatomical considerations. The desired treatment area influences technical complexity – periorbital fat transfer requires more precision than cheek augmentation, for instance. Donor site availability and quality affect the feasibility of obtaining adequate fat for transfer. Previous surgeries in the treatment area may impact tissue compliance and blood supply.

The algorithm generates three primary outputs:
✓ Candidacy Score (0-100): Numerical representation of your overall suitability
✓ Risk Assessment: Identification of specific factors affecting your safety or results
✓ Recommendations: Personalized guidance for optimizing your candidacy

The color-coded results provide immediate visual feedback on your candidacy level:
• Green (70-100): Excellent candidate with optimal factors for success
• Yellow (50-69): Moderate candidate with some factors that may affect outcomes
• Red (0-49): Poor candidate with significant concerns requiring attention

Our calculator serves as an educational tool to enhance your understanding of the factors influencing fat transfer success. It provides a foundation for informed discussions with your surgeon rather than replacing professional medical evaluation.

What Are the Potential Risks and Complications?

Like any surgical procedure, facial fat transfer carries specific risks and potential complications that every prospective patient should understand. Awareness of these risks facilitates informed consent and appropriate preoperative planning to minimize their occurrence. The majority of patients experience straightforward recoveries, but understanding potential complications ensures you’re prepared for all possible outcomes.

The most common complications involve expected postoperative symptoms like swelling, bruising, and discomfort. These typically resolve within 1-2 weeks with proper care. Asymmetry represents another common issue, as fat may settle slightly differently on each side of the face. Minor asymmetries often resolve as swelling subsides, while more significant asymmetries might require touch-up procedures. The initial overcorrection technique accounts for expected fat resorption, but unpredictable survival can lead to volume irregularities.

Infection represents an uncommon but serious risk, occurring in less than 1% of cases. Proper sterile technique, preoperative antibiotics, and careful postoperative care minimize this risk. Signs of infection include increasing redness, warmth, pain, or discharge from incision sites. Prompt treatment with antibiotics typically resolves infections without long-term consequences, though severe infections could compromise fat survival.

Vascular complications represent the most serious risks associated with facial fat transfer. Accidental injection into blood vessels can cause embolization, where fat blocks blood flow to critical tissues. This rare complication can lead to skin necrosis or, in extremely rare cases, vision loss if retinal arteries are affected. The risk is minimized by using blunt cannulas, understanding safe injection planes, and applying constant pressure during injection to avoid intravascular placement.

Fat necrosis occurs when clusters of fat cells die without proper blood supply, forming firm nodules that may be palpable or visible. Small nodules typically resolve spontaneously or can be gently massaged away, while larger areas might require steroid injections or surgical removal. Oil cysts may form as liquefied fat collects in pockets, sometimes requiring aspiration if they persist.

Donor site complications resemble those from liposuction procedures. contour irregularities, persistent swelling, numbness, or pigment changes may occur at harvest sites. These typically improve over several months, though permanent changes are possible. Proper technique and postoperative garments minimize these risks.

The table below summarizes complication frequencies and management approaches:

ComplicationFrequencyTypical Management
Asymmetry10-15%Observation; possible touch-up procedure
Volume Irregularity5-10%Massage; possible fat dissolution or addition
Infection<1%Antibiotics; wound care
Fat Necrosis2-5%Observation; massage; possible excision
Vascular Compromise<0.1%Emergency management; possible hyperbaric oxygen
Donor Site Issues5-10%Garments; massage; time

Understanding these potential complications helps establish realistic expectations and reinforces the importance of choosing an experienced, qualified surgeon. Our candidacy calculator incorporates risk assessment based on your specific health profile to provide personalized complication risk evaluation.

How Can I Optimize My Results Before and After the Procedure?

Strategic preparation and proper postoperative care significantly influence your facial fat transfer outcomes. Implementing specific optimization strategies during the preoperative and recovery periods can enhance fat survival, improve healing, and maximize your satisfaction with results. Our calculator provides personalized recommendations based on your unique profile.

Preoperative optimization begins 4-6 weeks before your procedure. Nutrition plays a crucial role in preparing your body for surgery and healing. A balanced diet rich in protein, vitamins C and A, zinc, and iron supports optimal healing capacity. Hydration maintenance ensures good tissue perfusion. Some surgeons recommend specific supplements like arnica Montana or bromelain to potentially reduce bruising, though these should be discussed with your surgeon as some supplements can increase bleeding risks.

Lifestyle modifications significantly impact results. Complete smoking cessation at least 4 weeks preoperatively improves microcirculation essential for fat survival. Alcohol avoidance for 2 weeks before surgery reduces bleeding risks and dehydration. Regular moderate exercise improves overall circulation and health status, though intense workouts should be avoided immediately before surgery. Stress management through adequate sleep and relaxation techniques optimizes hormonal balance for healing.

Medical optimization involves ensuring any chronic conditions are well-controlled. Diabetic patients should aim for optimal glycemic control. Hypertensive patients need stable blood pressure management. Medication adjustments may be necessary, particularly for blood thinners, under guidance of your prescribing physician. Preoperative clearance from your primary care physician or relevant specialists ensures you’re medically optimized for the procedure.

Postoperative care begins immediately after your procedure. Head elevation reduces swelling by promoting venous and lymphatic drainage. Gentle walking promotes circulation without increasing blood pressure significantly. Cold compresses applied carefully to treated areas (not directly pressing on transferred fat) help manage swelling in the first 48 hours. Proper nutrition and hydration continue to be essential during recovery.

Activity progression follows a careful timeline. Light activities can resume within days, while strenuous exercise should wait 3-4 weeks to avoid increased swelling or blood pressure that could compromise fat survival. Sun protection is crucial as healing skin is more susceptible to pigment changes. Gentle facial massage may be recommended after the first week to help resolve swelling and prevent irregularities, though specific techniques should follow your surgeon’s guidance.

Long-term maintenance strategies include:
✓ Sun protection with broad-spectrum sunscreen
✓ Healthy lifestyle with balanced nutrition and hydration
✓ Avoidance of significant weight fluctuations
✓ Regular follow-up with your surgeon
✓ Possible non-surgical maintenance treatments
✓ Skincare regimens to support skin health

Our calculator generates personalized optimization recommendations based on your specific health profile, lifestyle factors, and procedure plans. Implementing these strategies can significantly enhance your outcomes and satisfaction with facial fat transfer.

What Are the Latest Advancements in Fat Transfer Technology?

The field of facial fat transfer continues evolving with technological innovations that improve outcomes, reduce downtime, and expand applications. Understanding these advancements helps you appreciate the sophistication of modern fat transfer techniques and discuss options with your surgeon. Our calculator incorporates current best practices that reflect these technological improvements.

Harvesting technology has seen significant refinements in recent years. Traditional liposuction techniques have been supplemented with specialized low-pressure aspiration systems designed specifically for fat harvesting. These systems minimize trauma to adipocytes by using larger cannulas with optimized port designs and controlled negative pressure. Water-jet assisted harvesting represents another innovation that uses gentle fluid streams to loosen fat cells before aspiration, potentially improving cell viability.

Processing methods have evolved considerably from simple decanting to more sophisticated approaches that optimize fat quality. Centrifugation remains common but with refined protocols regarding speed and duration to balance cell survival versus impurity removal. Filtration systems using specialized meshes or fabrics provide gentle processing alternatives. The popular Coleman technique involves specific centrifugation parameters and transfer to smaller syringes for precise placement.

Stem cell enrichment represents one of the most exciting advancements in fat transfer technology. Techniques like nanofat processing or mechanical emulsification break down fat to isolate the stromal vascular fraction rich in stem cells. This concentrated regenerative material can be injected separately to improve skin quality or mixed with traditional fat grafts to potentially enhance survival rates. The biological mechanisms are still being researched, but early results show promise for improved skin rejuvenation.

Injection technology has seen innovations in cannula design and placement techniques. Blunt-tipped cannulas with varying diameters, lengths, and tip configurations allow surgeons to access precise anatomical planes with minimal tissue trauma. The use of specialized injection guns enables consistent parcel size deposition, which may improve revascularization. Some systems incorporate real-time imaging guidance for precise placement in complex anatomical areas.

Adjunctive technologies enhance fat transfer outcomes in specific scenarios. Platelet-rich plasma (PRP) added to fat grafts may improve survival through growth factor stimulation. External volume expansion devices create a controlled negative pressure environment that may enhance recipient site vascularity before fat transfer. Laser or energy-based devices can be combined with fat transfer to address skin quality issues simultaneously.

The future of fat transfer technology includes:
✓ Advanced imaging for precise planning and execution
✓ Bioengineering approaches to create enhanced fat constructs
✓ Pharmacological interventions to improve fat survival
✓ Personalized approaches based on individual biological factors
✓ Minimally invasive techniques with improved precision

Our calculator reflects current standard practices while acknowledging that specific technological approaches may vary between surgeons. Discussing the specific techniques your surgeon uses helps ensure alignment with your expectations and goals.

Womans-with-glowing-skin-after-successful-aesthetic-treatment-Book-a-free-consultation-at-doseway.com.

Frequently Asked Questions

How long do facial fat transfer results last?
Successfully integrated fat cells after facial fat transfer typically provide permanent volume restoration. The initial volume decreases as non-viable fat is absorbed (30-70% survival rate), but the remaining fat cells establish blood supply and behave like native facial fat. These surviving cells respond to weight fluctuations and aging similarly to your natural fat, meaning results are long-lasting but will still follow your natural aging process.

Can fat transfer replace a facelift?
Fat transfer and facelifts address different aspects of facial aging and often work best in combination. Fat transfer primarily restores volume that has been lost with aging, while facelifts address skin laxity and tissue descent. Many patients achieve optimal results by combining both procedures – the facelift tightens and repositions tissues while fat transfer replenishes volume for more comprehensive rejuvenation.

What is the difference between fat transfer and fillers?
The fundamental difference lies in the material used and longevity of results. Fat transfer uses your own living tissue that integrates permanently with your facial structures, while fillers use synthetic or biological materials that are gradually absorbed over months to years. Fat transfer requires a surgical procedure with downtime but provides permanent volume, while fillers are office-based with minimal downtime but require ongoing maintenance.

Is there an age limit for facial fat transfer?
There’s no strict upper age limit for facial fat transfer, as candidacy depends more on health status and tissue quality than chronological age. Well-selected patients in their 60s and 70s can benefit significantly from the procedure. The assessment focuses on skin elasticity, healing capacity, and overall health rather than age alone. Younger patients typically have better regenerative capacity, but older patients can still achieve meaningful improvement.

Can fat transfer improve skin quality?
Yes, fat transfer can significantly improve skin quality beyond simple volume restoration. The transferred fat contains adipose-derived stem cells that stimulate collagen production, improve skin thickness and elasticity, and enhance overall skin texture. Many patients report that their skin looks healthier, more radiant, and better hydrated following fat transfer – benefits that extend beyond what would be expected from volume correction alone.

How many sessions are typically needed?
Most patients achieve their desired results with a single facial fat transfer session. However, some patients opt for a touch-up procedure 6-12 months later to address areas where fat absorption was greater than anticipated or to add additional volume. The need for touch-ups depends on individual fat survival rates and aesthetic goals. Overcorrection during the initial procedure accounts for expected absorption, but results can still be somewhat unpredictable.

What happens if I gain or lose weight after the procedure?
Transferred fat cells behave like native fat cells in response to weight fluctuations. Significant weight gain can cause the transferred fat to enlarge, potentially creating asymmetries or overfilled appearance. Significant weight loss can cause the transferred fat to diminish, reducing your results. Maintaining stable weight after the procedure helps preserve your results long-term. Moderate weight fluctuations typically have minimal impact.

Affiliate Product Recommendations

  1. Skincare Systems: Recommend medical-grade skincare lines like SkinMedica, Obagi, or Zo Skin Health that complement fat transfer results
  2. Recovery Products: Promote specialized recovery kits from brands like Embrace Scar Therapy or similar postoperative care systems
  3. Nutritional Supplements: Affiliate with premium supplement brands offering surgical support formulas with arnica, bromelain, and healing nutrients
  4. Sun Protection: High-quality medical sunscreens from EltaMD, Colorescience, or SkinCeuticals with high affiliate commissions
  5. Facial Tools: Microcurrent devices like NuFACE or ZIIP that maintain results after fat transfer
  6. Compression Garments: Postoperative garments for donor sites from Marena or similar medical garment companies
  7. Cosmetic Brands: Temporary camouflage makeup from Dermablend or similar lines for the recovery period

Eye-Bag-Removal.jpg

Eye Bag Removal: Surgery vs. Filler Treatments

Are you considering treatment for under-eye bags but unsure whether to choose surgery or fillers? This comprehensive guide compares blepharoplasty (surgical eye bag removal) with dermal filler treatments, helping you make an informed decision. We’ll break down the pros and cons, costs, recovery times, and suitability for different cases.

In this article, you’ll discover:

✓ The key differences between surgical and non-surgical eye bag treatments
✓ How to determine which option is best for your specific case
✓ A detailed cost comparison between surgery and fillers
✓ The recovery process and what to expect from each treatment
✓ Important factors to consider before making your decision

Eye Bag Removal: Surgery vs. Filler Cost Calculator

Eye Bag Removal Cost Calculator

Compare Surgery vs. Filler Treatments

1
2
3
4

Personal Information

cm
ft/in
kg
lbs

Medical History

mmHg
mmHg

Eye Bag Details

5 / 10
Mild Moderate Severe

Your Eye Bag Treatment Analysis

Based on your inputs, here’s a comparison of treatment options

Surgical Treatment (Blepharoplasty)

$4,200 – $6,800
Suitability for You High
  • Permanent or long-lasting results
  • More invasive procedure
  • Recovery: 1-2 weeks
  • Higher upfront cost
  • Best for moderate to severe cases

Filler Treatment

$600 – $1,200 per session
Suitability for You Medium
  • Results last 6-18 months
  • Minimally invasive
  • Recovery: 1-2 days
  • Lower initial cost
  • Best for mild to moderate cases

Our Recommendation

Based on your profile, surgical treatment may provide the most satisfactory long-term results for your eye bag concerns. However, filler treatment could be a good option if you prefer a less invasive approach with shorter recovery time.

Disclaimer: This calculator provides estimates only and is not a substitute for professional medical advice. Consult with a qualified healthcare provider for personalized treatment recommendations. Individual results may vary based on specific anatomical factors and practitioner expertise.

Read More Guides & Try More Free Tools:

Skin-analysis-personalized-plan-and-transparent-pricing-at-doseway.com

What Are Under-Eye Bags and What Causes Them?

Under-eye bags refer to the mild swelling or puffiness that occurs beneath the eyes. They’re commonly associated with aging, but multiple factors can contribute to their development. Understanding the root cause of your under-eye concerns is essential for selecting the appropriate treatment approach.

The anatomical structure beneath your eyes consists of fat pads that provide cushioning for your eyes. With age, the tissues and muscles supporting these fat pads weaken, allowing the fat to protrude forward and create the appearance of “bags.” Simultaneously, the space beneath the eyes can lose volume, creating hollows that cast shadows and accentuate the appearance of puffiness.

Common causes of under-eye bags include:

✓ Aging and genetic predisposition
✓ Fluid retention due to dietary factors or sleep position
✓ Allergies that cause inflammation and swelling
✓ Sun exposure that breaks down collagen
✓ Smoking that accelerates skin aging
✓ Lack of sleep that causes blood vessels to dilate
✓ Natural facial structure and bone anatomy

The distinction between different types of under-eye concerns is crucial for treatment selection. Puffy bags caused by protruding fat typically respond better to surgical correction, while hollow troughs often benefit more from filler augmentation. Many people experience a combination of both issues, which may require a combined approach for optimal results.

What Is the Difference Between Surgical and Non-Surgical Eye Bag Treatments?

Understanding the fundamental differences between surgical and non-surgical approaches to eye bag correction is essential for making an informed decision. These treatments work through completely different mechanisms and address varying aspects of the under-eye area.

Surgical eye bag removal, known medically as lower blepharoplasty, is a cosmetic surgical procedure that involves the physical removal or repositioning of fat pads and excess skin beneath the eyes. This approach directly addresses the anatomical structures creating the puffiness, providing a permanent solution to protruding under-eye fat.

Non-surgical treatments primarily involve dermal fillers, which are gel-like substances injected beneath the skin to add volume, smooth contours, and reduce the appearance of shadows that accentuate under-eye bags. This approach doesn’t remove existing tissue but instead camouflages the appearance of bags by filling hollow areas.

Key differences between these approaches:

✓ Invasiveness: Surgery involves incisions and tissue manipulation, while fillers use fine needles for injection
✓ Results duration: Surgical results typically last a lifetime, while fillers require maintenance every 6-18 months
✓ Downtime: Surgery involves 1-2 weeks of recovery, while fillers have minimal downtime
✓ Cost structure: Surgery has a higher upfront cost, while fillers involve recurring expenses
✓ Treatment focus: Surgery removes excess tissue, while fillers add volume to depressions

The mechanism of action differs significantly between these treatments. Blepharoplasty physically removes herniated fat pads through an incision inside the lower eyelid (transconjunctival approach) or just below the lash line (subciliary approach). The surgeon may also tighten muscles and remove excess skin. Dermal fillers, typically composed of hyaluronic acid, work by attracting water and adding volume to the tear trough area, effectively raising the hollows to the same level as the protruding bags, which minimizes the shadowing effect.

Eye-Bag-Removal.jpg
Eye-Bag-Removal.jpg

Who Is a Good Candidate for Eye Bag Surgery Versus Fillers?

Determining whether you’re better suited for surgical or non-surgical eye bag treatment depends on multiple factors including your anatomical concerns, age, health status, expectations, and lifestyle considerations. Each treatment approach has distinct ideal candidate profiles.

The ideal candidate for lower blepharoplasty typically has moderate to severe under-eye bags caused primarily by protruding fat pads, with or without excess skin. These individuals are usually in their late 30s to 60s, in good general health, non-smokers, and have realistic expectations about surgical outcomes. Good surgical candidates understand the recovery process and can accommodate the necessary downtime.

Ideal candidates for dermal filler treatments typically have mild to moderate under-eye concerns characterized primarily by hollow tear troughs rather than significant fat protrusion. These individuals are often in their late 20s to 40s, seeking minimal downtime, and prefer a gradual, reversible approach to aesthetic enhancement. Filler candidates may have early signs of aging or genetically determined tear trough deformities.

Factors that determine candidacy:

✓ Severity of concerns: Severe puffiness typically requires surgery, while mild hollowing responds well to fillers
✓ Skin quality: Significant skin laxity requires surgical excision, while fillers don’t address loose skin
✓ Age considerations: Younger patients often benefit from fillers, while older patients may need surgery
✓ Health status: Certain medical conditions may contraindicate surgery but allow filler treatments
✓ Budget constraints: Patients with limited budgets may prefer the lower initial cost of fillers
✓ Recovery time availability: Those with limited downtime may prefer filler treatments

A clinical assessment by a qualified provider is essential for determining the most appropriate treatment. During consultation, your provider will evaluate your facial anatomy, skin quality, and the specific nature of your under-eye concerns. They may perform a “snap test” to assess skin elasticity or gently push on the eye bags to determine whether they’re primarily caused by fat herniation or fluid accumulation. This professional evaluation is crucial since self-assessment can be misleading, and inappropriate treatment selection can lead to unsatisfactory results.

How Much Does Eye Bag Removal Cost? Surgical vs Filler Price Comparison

The cost of eye bag treatment varies significantly between surgical and non-surgical approaches, with multiple factors influencing the final price. Understanding the complete financial picture helps in making an informed decision that aligns with your budget and expectations.

Lower blepharoplasty (surgical eye bag removal) typically costs between $3,000 and $8,000 in the United States, with an average price of approximately $4,500. This cost usually includes the surgeon’s fee, anesthesia, and facility fees. Additional expenses may include pre-operative tests, prescription medications, and post-operative garments or supplies. The final cost varies based on geographic location, surgeon expertise, surgical technique, and whether the procedure is combined with other treatments.

Dermal filler treatments for under-eye concerns typically cost between $600 and $1,500 per syringe, with most patients requiring one to two syringes per treatment session. Results last between 6 and 18 months, depending on the product used and individual metabolism, necessitating maintenance treatments to sustain results. Over a 5-year period, the cumulative cost of filler maintenance may exceed the one-time cost of surgical correction.

Cost comparison table:

Cost FactorSurgical BlepharoplastyDermal Fillers
Initial Treatment$3,000 – $8,000$600 – $1,500
Anesthesia/Facility FeesIncluded in quoteTypically not applicable
Maintenance NeedsNone typically requiredEvery 6-18 months
5-Year Projection$3,000 – $8,000$2,000 – $7,500
Additional CostsPre-op tests, medicationsNone typically
Revision CostsAdditional fee if neededIncluded in session fee

Factors that influence cost for both procedures include:

✓ Geographic location and local market rates
✓ Provider expertise and reputation
✓ Technique complexity and time required
✓ Type of facility where procedure is performed
✓ Type of anesthesia used for surgery
✓ Brand and type of fillers selected

It’s important to note that health insurance typically does not cover cosmetic eye bag treatments unless the bags significantly impair vision, which is relatively uncommon. Some providers offer financing options for both surgical and non-surgical treatments, making them more accessible through payment plans. When comparing costs, consider the long-term financial commitment, especially for fillers which require ongoing maintenance, versus the higher upfront investment for surgery with potentially permanent results.

Doseway-aesthetic-procedures-andonline-booking-details

What Is the Recovery Process Like After Eye Bag Treatments?

The recovery experience differs dramatically between surgical and non-surgical eye bag treatments, impacting your daily life, work schedule, and social commitments. Understanding the recovery timeline helps you plan appropriately and set realistic expectations.

After lower blepharoplasty, patients typically experience swelling, bruising, and discomfort for the first 3-7 days. Most people take approximately 7-10 days off work, depending on the physical demands of their job and the extent of their procedure. Strenuous activities, heavy lifting, and exercises that increase blood pressure should be avoided for 2-4 weeks. Visible bruising typically resolves within 10-14 days, while residual swelling may persist for several weeks to months, with final results becoming apparent after 3-6 months.

Recovery after dermal filler treatments is significantly quicker, with most patients returning to normal activities immediately or within 1-2 days. Common immediate side effects include mild swelling, redness, and possible bruising at injection sites, which typically resolve within 24-72 hours. Patients can usually apply makeup the same day and resume exercise within 24-48 hours. Results are visible immediately, though optimal appearance is achieved after any minor swelling subsides, usually within 1-2 weeks.

Surgical recovery timeline:

✓ Days 1-3: Significant swelling and bruising, possible blurred vision, discomfort managed with medication
✓ Days 4-7: Swelling and bruising begin to subside, may feel comfortable appearing in public with sunglasses
✓ Weeks 2-3: Most bruising resolves, swelling continues to decrease, may return to non-strenuous work
✓ Months 1-3: Residual swelling gradually resolves, incision lines begin to fade
✓ Months 3-6: Final results become apparent as swelling completely resolves

Filler recovery timeline:

✓ Hours 0-6: Mild swelling and redness at injection sites, possible minor bruising
✓ Days 1-2: Any bruising becomes more apparent, swelling subsides significantly
✓ Days 3-7: Minor residual swelling resolves, final results become visible
✓ Weeks 1-2: Treatment area settles completely, optimal results apparent

Post-treatment care recommendations for surgery include:

✓ Sleeping with head elevated to reduce swelling
✓ Applying cold compresses for the first 48 hours
✓ Using prescribed ointments and eye drops as directed
✓ Avoiding strenuous activity, bending, and heavy lifting
✓ Wearing sunglasses for protection from sun and wind
✓ Attending all follow-up appointments for monitoring

Post-treatment care for fillers includes:

✓ Avoiding rubbing or massaging the treated area for 24-48 hours
✓ Applying cool compresses if swelling occurs
✓ Avoiding strenuous exercise for 24 hours
✓ Sleeping on your back the first night after treatment
✓ Avoiding excessive heat (saunas, hot tubs) for 48 hours

What Are the Risks and Potential Complications of Each Treatment?

All medical procedures carry potential risks and complications, and understanding these is essential for informed consent. Both surgical and non-surgical eye bag treatments have distinct risk profiles that should be carefully considered.

Surgical blepharoplasty carries risks associated with any surgical procedure, including anesthesia complications, infection, bleeding, scarring, and asymmetry. Specific to eyelid surgery, potential complications include ectropion (lower eyelid turning outward), entropion (eyelid turning inward), dry eyes, difficulty closing eyes completely, visible scarring, and the need for revision surgery. Serious but rare complications include vision changes or blindness, though these are extremely uncommon when performed by a qualified surgeon.

Dermal filler risks include bruising, swelling, redness, and tenderness at injection sites—these are common and typically resolve within days. More significant complications include asymmetry, lumps or irregularities, overcorrection or undercorrection, Tyndall effect (bluish discoloration from superficial placement), and vascular complications. The most serious risk with under-eye fillers is accidental intravascular injection which can cause tissue necrosis (skin death) or blindness, though this is rare when performed by experienced injectors.

Common surgical complications:

✓ Temporary blurred or double vision
✓ Difficulty closing eyes completely
✓ Eyelid malposition (ectropion/entropion)
✓ Visible or thickened scars
✓ Asymmetry between eyes
✓ Persistent swelling or numbness
✓ Need for revision surgery

Common filler complications:

✓ Bruising and swelling at injection sites
✓ Lumps, nodules, or irregularities
✓ Blue tint (Tyndall effect) from superficial placement
✓ Migration of filler material
✓ Allergic reaction to filler components
✓ Infection at injection sites
✓ Vascular complications (rare but serious)

Risk reduction strategies for surgery:

✓ Choose a board-certified plastic surgeon or oculoplastic specialist
✓ Discuss your complete medical history and medications
✓ Follow all pre-operative and post-operative instructions carefully
✓ Ensure your procedure is performed in an accredited facility
✓ Have realistic expectations about outcomes and recovery

Risk reduction strategies for fillers:

✓ Select an experienced, qualified injector with anatomical expertise
✓ Ensure use of FDA-approved hyaluronic acid fillers specifically indicated for tear trough
✓ Ask about the provider’s emergency protocols for vascular complications
✓ Discuss any history of cold sores or autoimmune conditions
✓ Consider a test spot if you have concerns about allergic reactions

It’s important to note that hyaluronic acid fillers have the advantage of being reversible with hyaluronidase, an enzyme that dissolves the filler if complications occur or results are unsatisfactory. Surgical results are largely permanent and more difficult to revise, though some complications can be corrected with additional procedures.

Skin-and-aesthetic-procedures-online-appointments-doseway.com

How Long Do Results Last for Each Treatment?

The longevity of results is a significant differentiating factor between surgical and non-surgical eye bag treatments, impacting long-term planning, maintenance requirements, and overall cost-effectiveness.

Surgical blepharoplasty provides permanent removal of fat pads that cause under-eye bags. Once these fat pads are excised or repositioned, they do not regenerate. However, the natural aging process continues, and patients may develop additional skin laxity or changes in facial volume over time. Many patients enjoy their surgical results for decades, with some requiring minor touch-ups after 10-15 years. The permanent nature of surgical correction makes it a cost-effective long-term solution for appropriate candidates.

Dermal filler results are temporary, lasting between 6 and 18 months depending on the product used, injection technique, and individual metabolic factors. Thicker, more cross-linked hyaluronic acid fillers tend to last longer in the tear trough area. Lifestyle factors such as sun exposure, smoking, and overall health can also affect filler longevity. Maintenance treatments are required to sustain results, making fillers a recurring expense rather than a one-time investment.

Factors affecting surgical longevity:

✓ Skin quality and elasticity: Better skin quality typically correlates with longer-lasting results
✓ Sun protection: Consistent sun protection helps maintain skin quality and delay aging
✓ Lifestyle factors: Smoking accelerates skin aging and can compromise long-term results
✓ Surgical technique: Certain techniques may provide more durable results
✓ Individual aging process: Genetics play a significant role in how we age

Factors affecting filler longevity:

✓ Filler product characteristics: Molecular structure and cross-linking affect duration
✓ Metabolic rate: Individuals with faster metabolisms may break down fillers more quickly
✓ Injection technique: Precise placement in the appropriate tissue plane enhances longevity
✓ Lifestyle factors: Sun exposure, smoking, and alcohol consumption can decrease longevity
✓ Product amount: Appropriate volume correction typically lasts longer than under-correction

Realistic expectations for surgical results:

✓ Permanent removal of protruding fat pads
✓ Possible need for future procedures to address continued aging
✓ Gradual changes in facial appearance as part of natural aging process
✓ Potential for touch-up procedures after many years
✓ Long-term satisfaction rates typically high

Realistic expectations for filler results:

✓ Temporary improvement requiring maintenance treatments
✓ Possible need for product adjustment at subsequent sessions
✓ Gradual dissipation of results rather than sudden loss of effect
✓ Cumulative costs over time should be considered
✓ Flexibility to adjust treatment approach as needs change

The temporary nature of fillers can be advantageous for those who prefer the flexibility to adjust their treatment as their preferences or facial structure changes. The permanence of surgery appeals to those who want a definitive solution and prefer to avoid ongoing maintenance treatments and expenses.

What Should I Look for in a Provider for These Treatments?

Selecting the right provider is one of the most critical factors in achieving safe, satisfactory results from either surgical or non-surgical eye bag treatments. The qualifications, experience, and approach of your provider significantly impact your outcomes and safety.

For surgical blepharoplasty, your provider should be a board-certified plastic surgeon, oculoplastic surgeon, or facial plastic surgeon with specific training and experience in eyelid surgery. These specialists have completed rigorous training in facial anatomy, surgical techniques, and management of potential complications. Board certification ensures that the surgeon has met specific education, training, and ethical standards in their specialty.

For dermal filler treatments, your provider may be a board-certified dermatologist, plastic surgeon, or oculoplastic surgeon, or alternatively a nurse injector or physician assistant working under appropriate supervision. The most important consideration is the provider’s specific experience with tear trough filler injections, as this is considered one of the most technically challenging injection areas due to the thin skin and proximity to important anatomical structures.

Credentials to verify for surgeons:

✓ Board certification in plastic surgery, oculoplastic surgery, or facial plastic surgery
✓ Membership in professional societies such as ASPS, ASAPS, or ASOPRS
✓ Hospital privileges to perform blepharoplasty procedures
✓ Before-and-after photos of actual patients with similar concerns
✓ Positive patient testimonials and reviews
✓ Clear communication about risks, benefits, and alternatives

Credentials to verify for filler providers:

✓ Medical license and appropriate training in aesthetic injections
✓ Specific experience with tear trough filler treatments
✓ Understanding of facial anatomy and potential complications
✓ Before-and-after photos of tear trough treatments
✓ Use of FDA-approved hyaluronic acid fillers
✓ Emergency protocols for managing complications

Important questions to ask any provider:

✓ How many of these procedures do you perform annually?
✓ What is your approach to the under-eye area?
✓ Can I see before-and-after photos of similar cases?
✓ What are the most common complications you see?
✓ How do you manage complications if they occur?
✓ What is your revision policy if needed?
✓ What should I expect during recovery?

During your consultation, observe the practice environment, staff professionalism, and cleanliness of the facility. The provider should spend adequate time listening to your concerns, performing a thorough assessment, and explaining your options without pressure. Trust your instincts—if something feels rushed or you don’t feel comfortable with the provider, seek additional opinions until you find the right match.

Can Eye Bags Return After Treatment?

Understanding the potential for recurrence of under-eye concerns after treatment helps set realistic expectations and plan for long-term maintenance. The likelihood of eye bags returning differs significantly between surgical and non-surgical approaches.

After surgical blepharoplasty, the specific fat pads that are removed do not grow back, providing a permanent solution to that particular anatomical concern. However, the natural aging process continues, and patients may notice changes in their under-eye appearance over time due to factors such as skin laxity, volume loss in other areas of the face, or development of new concerns unrelated to the original fat pads. These aging-related changes might create the appearance of “returning” eye bags, though technically they represent new manifestations of the ongoing aging process.

After dermal filler treatment, eye bags don’t “return” in the traditional sense but rather become visible again as the filler material gradually metabolizes and dissipates. Since fillers don’t remove the underlying fat pads but instead camouflage them by filling hollow areas, the original anatomy remains unchanged beneath the temporary enhancement. As the filler breaks down, the contrast between protruding fat and hollow troughs gradually reappears, necessitating maintenance treatments to sustain the improved appearance.

Factors that can create the appearance of returning eye bags after surgery:

✓ Development of new skin laxity due to continued aging
✓ Volume loss in surrounding facial areas that changes shadow patterns
✓ Weight fluctuations that affect facial fat distribution
✓ Fluid retention issues that cause temporary puffiness
✓ Development of malar bags (swelling at the top of cheeks)
✓ Changes in bone structure due to aging

Factors that affect how quickly filler results diminish:

✓ Type of filler product used (some last longer than others)
✓ Individual metabolic rate and lifestyle factors
✓ Injection technique and placement in tissue planes
✓ Amount of filler used in initial treatment
✓ Sun exposure and skincare routine
✓ General health and hydration status

To maintain optimal results after surgery:

✓ Practice consistent sun protection with broad-spectrum sunscreen
✓ Maintain a stable weight through balanced nutrition
✓ Avoid smoking, which accelerates skin aging
✓ Establish a good skincare routine with proven ingredients
✓ Consider non-surgical maintenance treatments as needed
✓ Stay hydrated and manage allergies that cause puffiness

To maintain results after filler treatment:

✓ Schedule maintenance treatments before complete dissipation of results
✓ Consider complementary treatments such as skin resurfacing
✓ Use appropriate skincare to maintain skin quality
✓ Protect the under-eye area from sun damage
✓ Discuss with your provider whether different products might offer longer duration

Understanding that both approaches require some form of long-term maintenance—whether through lifestyle choices, skincare, or occasional touch-up treatments—helps create realistic expectations about the ongoing commitment to maintaining your results.

Board-certified-aesthetic-specialist-at-doseway.com-ready-to-discuss-your-skin-goals

What Are the Alternatives to Surgery and Fillers for Eye Bags?

While surgical blepharoplasty and dermal fillers are the most direct approaches to addressing under-eye concerns, several alternative treatments may be appropriate for mild cases or as complementary approaches. Understanding the full spectrum of options helps you make a comprehensive decision.

Topical treatments including eye creams with proven ingredients can provide modest improvement in under-eye appearance, particularly for concerns related to skin quality, pigmentation, and mild puffiness. Effective ingredients include retinoids to thicken skin and improve elasticity, vitamin C to brighten and protect against oxidative damage, peptides to support collagen production, and caffeine to temporarily constrict blood vessels and reduce puffiness. While topical products cannot address significant fat protrusion or volume loss, they can enhance overall eye area appearance.

Professional treatments such as laser resurfacing, chemical peels, and radiofrequency devices can improve skin texture, tone, and tightness around the eyes. These treatments address surface concerns rather than the underlying fat pads or volume loss, but can significantly enhance the overall appearance when combined with other approaches or used as standalone treatments for mild concerns.

Alternative approaches to consider:

✓ Skincare regimens: Targeted eye creams with retinoids, vitamin C, peptides, and caffeine
✓ Laser treatments: Fractional lasers to improve skin texture and stimulate collagen
✓ Radiofrequency: Devices that use heat to tighten skin and improve elasticity
✓ Chemical peels: Superficial peels to improve skin tone and texture
✓ Platelet-rich plasma (PRP): Injections of concentrated growth factors to improve skin quality
✓ Fat repositioning: Surgical technique that repositions rather than removes fat
✓ Fat grafting: Transfer of patient’s own fat to add volume to hollow areas

Lifestyle modifications that can improve under-eye appearance:

✓ Adequate hydration to maintain skin plumpness and reduce fluid retention
✓ Consistent sleep schedule to minimize puffiness and dark circles
✓ Allergy management to reduce inflammatory puffiness
✓ Sun protection to prevent collagen breakdown and pigmentation
✓ Dietary adjustments to reduce salt intake and fluid retention
✓ Sleep position elevation to prevent fluid accumulation overnight
✓ Cold compresses to temporarily reduce puffiness

Combination approaches often yield the best results, addressing multiple aspects of under-eye concerns simultaneously. For example, a patient might benefit from surgical fat removal combined with laser skin resurfacing, or filler treatment complemented with a targeted skincare regimen. A comprehensive assessment by an experienced provider can help identify which combination of approaches would be most effective for your specific concerns.

How Does the Eye Bag Removal Calculator Work?

Our eye bag removal calculator is designed to help you estimate costs, compare treatment options, and determine which approach might be best suited to your specific situation. This tool analyzes multiple factors to provide personalized insights.

The calculator collects information about your demographics, medical history, and specific eye bag characteristics to generate a customized assessment. This comprehensive approach ensures that the recommendations consider your overall health profile, lifestyle factors, and aesthetic goals rather than providing generic information.

Key inputs the calculator evaluates:

✓ Age and gender: These factors influence skin elasticity, healing capacity, and typical aging patterns
✓ Medical conditions: Certain health issues may affect treatment options or recommendations
✓ Eye bag severity: The extent of puffiness and hollowing guides treatment selection
✓ Budget considerations: Financial parameters help determine feasible options
✓ Recovery time availability: Your schedule constraints influence treatment recommendations
✓ Previous treatments: Your history with eye bag treatments provides context for new recommendations

The calculator’s algorithm processes these inputs through a decision matrix that weighs clinical factors, statistical data on treatment outcomes, and cost considerations. The system compares your profile against established treatment parameters to determine which approaches are most likely to achieve your desired outcomes while accommodating your constraints.

How the calculator determines suitability scores:

✓ Anatomical factors: Severity of fat herniation versus hollowing
✓ Age considerations: Typical treatment patterns by age group
✓ Health status: Medical contraindications for certain procedures
✓ Lifestyle factors: Recovery time availability and activity levels
✓ Budget alignment: Cost considerations relative to treatment options
✓ Expectation matching: Likelihood of satisfying desired outcomes

The calculator provides two primary outputs: cost estimates for surgical and filler approaches, and suitability scores that indicate how well each option aligns with your specific situation. These scores help you understand not just the financial investment, but also the clinical appropriateness of each approach for your case.

Interpreting your calculator results:

✓ High suitability score (70-100): This treatment aligns well with your profile and is likely to meet your expectations
✓ Medium suitability score (40-69): This treatment may work but has some limitations for your specific case
✓ Low suitability score (0-39): This treatment has significant mismatches with your profile and may not be ideal

The calculator results should be used as a starting point for discussions with qualified providers rather than as definitive treatment recommendations. Individual anatomy, preferences, and provider assessment may lead to different conclusions than the calculator suggests, but the tool provides valuable preliminary guidance.

What Results Can I Expect from the Eye Bag Removal Calculator?

Using our eye bag removal calculator provides you with specific, actionable information to guide your treatment decision process. Understanding how to interpret these results helps you make the most of this tool.

The calculator generates several key pieces of information:

First, you’ll receive cost estimates for both surgical and filler approaches, presented as ranges that reflect typical pricing in your geographic region. These estimates include the primary procedure costs but may not encompass all potential ancillary expenses, so they should be considered approximate figures for planning purposes.

Second, you’ll see suitability scores for each treatment option, indicating how well each approach aligns with your specific situation based on the factors you provided. These scores help you understand which option might be more appropriate from a clinical perspective, though final determination should always come from an in-person consultation.

Third, the calculator provides a personalized recommendation that synthesizes the cost and suitability information into actionable guidance. This recommendation considers the balance between clinical appropriateness, financial considerations, and lifestyle factors to suggest a potential path forward.

Typical calculator outputs:

✓ Surgical cost estimate: Range of expected costs for blepharoplasty
✓ Filler cost estimate: Range for initial treatment and projected maintenance costs
✓ Surgical suitability score: Numerical indicator of how appropriate surgery is for you
✓ Filler suitability score: Numerical indicator of how appropriate fillers are for you
✓ Personalized recommendation: Written summary guiding next steps
✓ Comparative analysis: Side-by-side evaluation of both approaches

Understanding cost projections:

The calculator’s cost estimates are based on aggregated data from various sources including professional societies, provider surveys, and regional pricing databases. These figures represent typical ranges but may not reflect specific quotes from providers in your area, which can vary based on individual practice pricing, technique selection, and case complexity.

Interpreting suitability scores:

Suitability scores are calculated based on how closely your profile matches ideal candidate criteria for each treatment. Higher scores indicate stronger alignment with typical successful outcomes, while lower scores suggest potential challenges or limitations with that approach. These scores should be considered guidance rather than absolute determinations of candidacy.

Using your results:

Your calculator results provide an excellent foundation for discussions with potential providers. Sharing these results during consultations can help focus the conversation on options that are clinically appropriate and financially feasible for your situation. The comparative information helps you ask informed questions about why one approach might be recommended over another.

Womans-with-glowing-skin-after-successful-aesthetic-treatment-Book-a-free-consultation-at-doseway.com.

Frequently Asked Questions About Eye Bag Removal

What is the best age for eye bag removal surgery?
There is no specific “best age” for eye bag removal, as the procedure is based on anatomical concerns rather than chronological age. Most patients seeking surgical correction are between 35 and 60 years old, but appropriate candidacy depends on the severity of concerns, skin quality, and overall health rather than age alone. Younger patients with hereditary eye bags may be good candidates in their 20s, while older patients may benefit well into their 70s if they are in good health.

Can eye bags be removed without surgery?
While non-surgical treatments cannot remove protruding fat pads that cause eye bags, they can significantly improve their appearance. Dermal fillers can camouflage eye bags by filling hollow tear troughs, reducing the shadowing that makes bags noticeable. Other non-surgical approaches like laser treatments, radiofrequency, and specialized skincare can improve skin quality and reduce puffiness, but cannot eliminate significant fat herniation.

How painful is eye bag removal surgery?
Blepharoplasty is typically performed under local anesthesia with sedation, meaning you’re comfortable but awake during the procedure. Most patients report minimal discomfort during surgery, with mild to moderate discomfort during the initial recovery period that is well-controlled with prescribed or over-the-counter pain medication. The eyelids tend to heal quickly with relatively minimal pain compared to other surgical areas.

Are the results of eye bag fillers immediate?
Yes, results from dermal filler treatments are visible immediately, though the initial appearance may be affected by swelling from the injection process. Optimal results become apparent after 1-2 weeks when any minor swelling has resolved and the product has fully integrated with your natural tissues. Some providers prefer a conservative approach initially, with possible touch-up appointments after 2-4 weeks to refine results.

Can eye bag removal affect vision?
Temporary blurred vision is possible in the early recovery period after blepharoplasty due to swelling, ointments, and eye dryness, but this typically resolves within days to weeks. Permanent vision changes are extremely rare when the procedure is performed by a qualified surgeon. With fillers, vision complications are also rare but possible if filler is accidentally injected into blood vessels, emphasizing the importance of choosing an experienced injector.

How do I know if I need surgery or fillers for my eye bags?
The determination between surgery and fillers depends on the primary cause of your under-eye concerns. If you have significant protruding fat pads, especially when looking downward, surgery is typically more effective. If your main concern is hollowing beneath the eyes that creates dark shadows, fillers may be sufficient. An in-person consultation with a qualified provider is the best way to determine which approach is most appropriate for your specific anatomy.

Is there any way to prevent eye bags from forming?
While genetics play a significant role in eye bag development, certain preventive measures can help minimize their appearance or delay their progression. These include consistent sun protection, avoiding smoking, managing allergies, maintaining stable hydration, sleeping with your head elevated, and establishing a good skincare routine with proven ingredients. However, some degree of under-eye aging is inevitable for most people.

Affiliate Product Recommendations

  1. Skincare Products: Recommended brands with high commission rates include SkinMedica TNS Eye Repair, Neocutis Lumiere Firm Riche, and Revision Skincare D.E.J. Eye Cream
  2. Recovery Products: Consider partnering with companies offering post-procedure kits from brands like Rejuvenating and Healthy Aging
  3. Supplement Lines: Collagen supplements from Vital Proteins or Sports Research have strong affiliate programs
  4. Medical-Grade Devices: NuFACE Trinity Facial Toning Device and Foreo UFO Smart Mask Treatment Device
  5. Sun Protection: EltaMD UV Clear Broad-Spectrum and Supergoop! Unseen Sunscreen offer recurring commission opportunities
  6. Concealers and Correctors: High-end cosmetic lines like Dior Forever Skin Correct and NARS Radiant Creamy Concealer
  7. Specialized Tools: Jade rollers, Gua sha tools, and hydrogel eye patches from reputable brands

Cheek-Filler-Treatment

Cheek Filler Treatment: Achieving Natural Volume

Are you considering cheek fillers to restore youthful volume and enhance your facial contours? This comprehensive guide covers everything from dermal filler types and injection techniques to recovery and long-term maintenance. Discover how to achieve natural-looking results that complement your unique facial anatomy while avoiding the overfilled look that plagues many cosmetic procedures.

In this definitive guide, you’ll learn:
✓ The science behind facial aging and volume loss
✓ Different types of dermal fillers and their specific applications
✓ Advanced injection techniques used by top practitioners
✓ How to calculate your ideal filler volume using our simulator
✓ Recovery protocols for optimal results
✓ Maintenance strategies for long-lasting outcomes
✓ How to choose the right provider for your aesthetic goals

Cheek Filler Volume & Placement Simulator | Doseway

Cheek Filler Volume & Placement Simulator

Calculate personalized cheek filler recommendations based on your facial anatomy, aesthetic goals, and medical history

1
Demographics
2
Medical History
3
Facial Assessment
4
Results

Patient Demographics

Medical History

/ mmHg

Facial Assessment

5 / 10

Your Cheek Filler Recommendation

0.0 ml
Recommended Total Volume

Volume Interpretation

Based on your facial assessment, we recommend a conservative approach to cheek augmentation.

Placement Recommendations

    Additional Considerations

      Disclaimer: This calculator provides estimated recommendations for educational purposes only. It is not a substitute for professional medical advice. Always consult with a qualified healthcare provider before undergoing any cosmetic procedure.

      Read More Guides & Try More Free Tools:

      Skin-analysis-personalized-plan-and-transparent-pricing-at-doseway.com

      What Are Cheek Fillers and How Do They Work?

      Cheek fillers are injectable treatments designed to restore volume, enhance contour, and lift the midface area using dermal fillers composed of various biocompatible materials. As we age, we experience significant fat pad atrophy, bone resorption, and collagen depletion in the cheek region, leading to flattened appearance, sagging skin, and prominent nasolabial folds. Cheek filler injections address these concerns by replenishing lost volume, providing structural support, and stimulating natural collagen production through carefully placed hyaluronic acid or other filler substances in the deep facial planes.

      The mechanism of action varies by filler type but generally involves:

      • Immediate volume restoration through space-occupying gel matrices
      • Hydration attraction and retention in the case of hyaluronic acid fillers
      • Collagen stimulation through controlled inflammatory responses
      • Structural support to facial fat pads and skin tissues
      • Lift creation through strategic placement in key anatomical areas

      What Is the Science Behind Facial Volume Loss and Aging?

      Facial volume depletion follows predictable patterns governed by anatomical changes, genetic factors, and environmental influences. Understanding these processes is crucial for effective cheek restoration. The aging face experiences multifactorial volume loss including fat pad descent, bony resorption, and connective tissue degradation. Research indicates that midface volume decreases by approximately 15-20% between ages 30-60, with accelerated decline post-menopause due to hormonal changes affecting fat distribution and skin thickness.

      Key anatomical changes in cheek aging include:

      • Malar fat pad descent and atrophy
      • Zygomatic bone resorption and remodeling
      • Ligamentous laxity allows tissue descent
      • Deflation of the submalar space, creating hollowing
      • Thinning of the dermis and epidermal layers
      • Decreased hyaluronic acid concentration in skin

      Cheek-Filler-Treatment
      Cheek-Filler-Treatment

      What Are the Different Types of Cheek Fillers Available?

      The dermal filler market offers numerous options for cheek augmentation, each with distinct properties, longevity, and indications. Choosing the appropriate filler requires understanding material characteristics, degradation profiles, and compatibility with individual facial anatomy. The ideal cheek filler provides natural-looking volume restoration with minimal downtime and predictable longevity while maintaining safety through reversible options when possible.

      Hyaluronic Acid Based Fillers

      Hyaluronic acid fillers represent the gold standard for cheek augmentation due to their safety profile, reversibility, and natural results. These gels consist of cross-linked hyaluronic acid chains suspended in a carrier gel, creating volumizing properties with water-binding capabilities. Different HA fillers feature unique particle sizes, cross-linking technologies, and viscosity profiles specifically engineered for various facial layers and volume requirements.

      Popular HA cheek filler brands include:

      • Juvederm Voluma XC – Specifically FDA-approved for cheek augmentation
      • Restylane Lyft – Designed for lifting and contouring
      • Belotero Balance – For more superficial refinement
      • Teosyal Redensity II – European formula with high elasticity
      • Revolax Sub-Q – Korean filler with high viscosity

      Calcium Hydroxylapatite Fillers

      Calcium hydroxylapatite microspheres suspended in carboxymethylcellulose gel provide both immediate volume and long-term collagen stimulation. Radiesse works through a dual mechanism: immediate correction from the gel carrier followed by neocollagenesis triggered by the CaHA microspheres. This filler typically lasts 12-18 months and creates natural tissue integration ideal for patients with significant volume loss or thinner skin quality.

      Poly-L-Lactic Acid Fillers

      Poly-L-lactic acid represents a biostimulatory approach to cheek volumizing through gradual collagen induction rather than immediate filling. Sculptra works by stimulating fibroblast activity and new collagen deposition over several months, creating natural-looking volume restoration that develops gradually. Treatment typically requires multiple sessions spaced 4-6 weeks apart but offers results lasting up to 2 years through true tissue regeneration.

      Polymethylmethacrylate Fillers

      PMMA fillers contain microscopic polymethylmethacrylate spheres suspended in collagen gel, offering permanent volume restoration through non-biodegradable microspheres that become encapsulated in the body’s own collagen. Bellafill provides permanent cheek enhancement but lacks reversibility, making proper technique and placement critical. This option suits patients seeking long-term solution who have previously tolerated temporary fillers well.

      Doseway-aesthetic-procedures-andonline-booking-details

      How Does Cheek Filler Placement Affect Final Results?

      Strategic filler placement represents the most critical factor determining natural-looking versus artificial cheek augmentation outcomes. Expert injectors understand three-dimensional facial anatomy, fat compartment boundaries, and gravitational effects to create harmonious restoration. Proper placement considers individual facial proportions, existing volume distribution, and gender-specific aesthetic ideals while avoiding over-correction in single areas.

      Key placement zones for natural cheek enhancement include:

      • Anterior cheek for central projection and support
      • Lateral cheek for width and angularity
      • Submalar region for lower cheek fullness
      • Zygomatic arch for structural definition
      • Tear trough transition for seamless blending

      What Are the Key Factors That Determine Ideal Filler Volume?

      Calculating appropriate cheek filler volume requires multifactorial assessment beyond simple age or gender categorizations. Our cheek filler calculator incorporates numerous variables to generate personalized recommendations that account for anatomical differences, aging patterns, and aesthetic goals. Understanding these determining factors helps patients set realistic expectations and practitioners develop customized treatment plans.

      Primary volume determinants include:

      Facial Anatomy and Bone Structure

      Underlying facial skeleton provides the foundation upon which filler creates aesthetic enhancement. Patients with strong zygomatic arches require less volume for definition than those with flatter midface structures. The calculator assesses:

      • Zygomatic bone prominence and width
      • Maxillary projection and support
      • Orbital rim position and contour
      • Facial width-to-height ratios
      • Genetic ethnic variations in skeletal structure

      Age-Related Volume Loss Patterns

      Volume depletion follows predictable patterns that change treatment strategy across different decades. The calculator adjusts recommendations based on:

      • Degree of malar fat pad descent and deflation
      • Presence of jowling indicating ligament laxity
      • Nasolabial fold depth and marionette line formation
      • Temple hollowing and brow descent
      • Skin quality and elasticity measurements

      Skin Quality and Elasticity

      Skin mechanical properties significantly impact filler behavior and longevity. The calculator evaluates:

      • Fitzpatrick skin type and photodamage level
      • Dermal thickness and collagen content
      • Presence of dynamic versus static rhytids
      • Previous sun exposure and elastosis
      • Genetic disorders affecting connective tissue

      Gender-Specific Aesthetic Ideals

      Male versus female cheek enhancement follows different aesthetic principles regarding angularity, projection, and softness. The calculator incorporates:

      • Masculine preference for stronger lateral projection
      • Feminine preference for rounded anterior projection
      • Different ideal ogee curve configurations
      • Varied expectations regarding cheek prominence
      • Gender-specific aging patterns

      How to Use Our Cheek Filler Volume Calculator?

      Our proprietary cheek filler calculator incorporates clinical parameters, aesthetic principles, and anatomical science to generate personalized treatment recommendations. The tool analyzes multiple data points through validated algorithms developed from aesthetic medicine research and clinical experience. Following proper data input ensures accurate volume calculations and placement recommendations tailored to individual facial characteristics.

      Step-by-Step Guide to Calculator Inputs

      The calculator interface guides users through sequential data collection organized by category relevance. Complete information entry ensures optimal algorithm performance and personalized output generation.

      Demographic inputs include:

      • Age with validation for appropriate candidacy
      • Gender selection for aesthetic preference alignment
      • Height and weight for facial proportion calculations
      • Ethnic background for anatomical pattern recognition

      Medical history assessment covers:

      • Current medications affecting bleeding or healing
      • Autoimmune conditions impacting inflammation
      • Previous filler treatments and response patterns
      • Allergy history particularly to lidocaine or bacterial proteins

      Facial analysis parameters evaluate:

      • Cheek volume loss using validated scale assessment
      • Skin elasticity through pinch test simulation
      • Facial symmetry measurements and asymmetry quantification
      • Photodamage level using Glogau scale classification

      Understanding Your Calculator Results

      The calculator generates comprehensive output including volume recommendations, product suggestions, and placement guidance. Results interpretation requires understanding the underlying principles and clinical rationale for each recommendation.

      Volume recommendations include:

      • Total syringe volume range for initial treatment
      • Bilateral distribution accounting for asymmetry
      • Staging recommendations for multiple session approaches
      • Maintenance volume estimates for long-term planning

      Product selection guidance covers:

      • Filler rheology matching to tissue needs
      • Brand recommendations based on longevity data
      • Cost-effectiveness calculations for budget considerations
      • Safety profiles aligned with medical history

      Placement strategy outlines:

      • Injection depth recommendations by facial zone
      • Cannula versus needle technique suggestions
      • Layering approaches for multidimensional correction
      • Avoidance areas with higher complication risks

      What Are the Latest Advanced Injection Techniques for Cheek Fillers?

      Modern cheek augmentation has evolved beyond simple volume addition to incorporate sophisticated techniques that restore youthful anatomy while maintaining natural movement and expression. Expert practitioners utilize multiple approaches tailored to individual facial dynamics, tissue characteristics, and aging patterns. These advanced methods prioritize structural support over simple filling, creating more natural and longer-lasting results.

      Supraperiosteal Placement Technique

      Deep supraperiosteal injection places filler directly on bone surface to recreate skeletal support and lift descended tissues. This technique:

      • Provides structural foundation for midface lifting
      • Mimics natural facial skeleton support
      • Creates natural projection with minimal product
      • Reduces risk of vascular complications
      • Allows precise control over augmentation shape

      Layering Technique for Multidimensional Correction

      Layering combines deep structural support with superficial refinement for comprehensive rejuvenation. This approach:

      • Addresses volume loss at multiple tissue depths
      • Creates natural transition between treated areas
      • Allows customization of different facial zones
      • Provides both lift and surface smoothness
      • Enhances natural light reflection patterns

      Microdroplet Technique for Precise Contouring

      Microdroplet deposition uses tiny filler amounts placed strategically for subtle refinements. This method:

      • Creates gradual transitions between facial zones
      • Allows precise control over facial contours
      • Minimizes risk of overcorrection
      • Provides natural-looking enhancement
      • Ideal for patients seeking subtle changes

      What Is the Typical Cheek Filler Procedure Timeline?

      Understanding the complete cheek filler journey helps patients prepare appropriately and set realistic expectations for the process from consultation to final results. The procedure follows a structured timeline with distinct phases, each requiring specific patient cooperation and practitioner expertise.

      Pre-Treatment Preparation Phase

      Proper preparation significantly impacts outcomes and reduces complication risks. The pre-treatment phase includes:

      • 2 weeks before: Discontinuation of blood thinners and supplements
      • 1 week before: Hydration optimization and skincare preparation
      • 48 hours before: Avoidance of alcohol and intense exercise
      • Day of treatment: Clean skin without makeup or products

      In-Office Procedure Experience

      The injection appointment typically follows a standardized protocol for safety and comfort. The process includes:

      • Consultation review and consent confirmation
      • Photographic documentation from multiple angles
      • Marking of injection sites and anatomical landmarks
      • Cleansing with antiseptic solution application
      • Topical anesthetic application if required
      • Strategic injection using chosen techniques
      • Immediate massage and contour assessment
      • Post-treatment instructions and follow-up scheduling

      Recovery and Results Timeline

      Cheek filler results evolve over several weeks as swelling resolves and integration occurs. The typical timeline includes:

      • Day 1-3: Initial swelling with visible augmentation
      • Day 4-7: Swelling reduction with some residual firmness
      • Week 2: Final contour establishment and tissue integration
      • Week 4: Optimal results visible with natural movement
      • Month 3-6: Peak results period before gradual degradation

      Skin-and-aesthetic-procedures-online-appointments-doseway.com

      What Are the Potential Risks and Complications of Cheek Fillers?

      While generally safe when performed by qualified practitioners, cheek filler treatments carry potential risks ranging from common temporary side effects to rare serious complications. Understanding these possibilities enables informed consent and prompt recognition should issues arise. Proper technique, anatomical knowledge, and adherence to safety protocols significantly minimize most risks.

      Common Temporary Side Effects

      Expected post-treatment reactions typically resolve spontaneously within days to two weeks. These include:

      • Swelling and edema at injection sites
      • Bruising and erythema from needle trauma
      • Tenderness and sensitivity to pressure
      • Asymmetry due to uneven swelling patterns
      • Lumpiness requiring gentle massage

      Rare Serious Complications

      Infrequent but significant complications require prompt recognition and management. These encompass:

      • Vascular occlusion leading to tissue compromise
      • Infection requiring antibiotic treatment
      • Nodule formation from inflammatory responses
      • Material migration from improper placement
      • Allergic reactions to filler components

      Prevention and Management Strategies

      Risk reduction begins with proper patient selection and continues through technique and aftercare. Essential safety measures include:

      • Comprehensive medical history assessment
      • Anatomical knowledge of facial vasculature
      • Aspiration technique before injection
      • Cannula use in high-risk areas
      • Hyaluronidase availability for HA fillers
      • Clear emergency protocols for complications

      How Much Do Cheek Fillers Typically Cost?

      Cheek filler pricing varies significantly based on geographic location, practitioner expertise, product selection, and volume requirements. Understanding cost components helps patients budget appropriately and compare value across providers. The investment encompasses both the product itself and the artistic skill required for optimal outcomes.

      Cost Breakdown by Filler Type

      Different filler categories command varying price points based on manufacturing complexity and longevity. Typical cost ranges include:

      • Hyaluronic acid fillers: $600-$1,200 per syringe
      • Calcium hydroxylapatite: $700-$900 per syringe
      • Poly-L-lactic acid: $900-$1,500 per treatment session
      • PMMA fillers: $1,000-$1,800 per syringe

      Geographic Pricing Variations

      Practitioner location significantly influences pricing structures due to overhead differences. Regional averages include:

      • Major metropolitan areas: 20-30% premium pricing
      • Suburban practices: Moderate pricing with good value
      • Rural locations: Lower prices but potentially limited selection
      • Medical spa versus dermatology office variations

      Value Considerations Beyond Price

      The cheapest option rarely provides optimal value in aesthetic medicine. Important considerations include:

      • Practitioner experience and artistic skill
      • Product authenticity and proper storage
      • Comprehensive consultation and follow-up care
      • Emergency management capabilities
      • Natural-looking versus overfilled results

      How to Choose the Right Practitioner for Cheek Filler Treatments?

      Selecting an appropriate injector represents the most critical decision determining cheek filler safety and satisfaction. Beyond technical skill, the ideal practitioner demonstrates artistic sensibility, anatomical knowledge, and ethical practice standards. Thorough vetting ensures alignment between patient goals and provider capabilities while minimizing complication risks.

      Essential Practitioner Qualifications

      Credentials verify formal training and oversight while experience indicates practical skill development. Essential qualifications include:

      • Medical license in good standing
      • Board certification in relevant specialty
      • Advanced injectable training certifications
      • Demonstration of anatomical knowledge
      • Portfolio showcasing natural results

      Consultation Red Flags and Green Flags

      The initial consultation reveals much about practice standards and approach. Warning signs include:

      • Pressure to purchase additional services
      • Discounted pricing for immediate commitment
      • Limited before-and-after portfolio
      • Vague answers to safety questions
      • Poor communication about risks

      Positive indicators encompass:

      • Comprehensive facial assessment
      • Discussion of alternative options
      • Clear pricing without pressure
      • Realistic outcome expectations
      • Emergency protocols explanation

      Questions to Ask During Consultation

      Prepared questions help assess practitioner suitability and approach. Essential inquiries include:

      • How many cheek filler treatments do you perform monthly?
      • What is your approach to managing complications?
      • Can you explain your technique for natural results?
      • What percentage of patients require touch-up treatments?
      • How do you determine appropriate volume and placement?

      What Is the Recovery Process After Cheek Filler Treatment?

      Post-treatment care significantly influences final results, swelling duration, and complication risks. Following proper recovery protocols ensures optimal filler integration and patient satisfaction. The recovery period involves specific activities to embrace and avoid during critical healing phases.

      Immediate Post-Treatment Period (First 24 Hours)

      The initial hours after injection require careful attention to minimize swelling and bruising. Essential protocols include:

      • Intermittent ice application for 15-minute intervals
      • Sleeping with head elevated at 30-45 degrees
      • Avoiding strenuous activity and heat exposure
      • Gentle facial movements without aggressive massage
      • Taking prescribed arnica supplements if recommended

      First Week Recovery Guidelines

      The initial week establishes proper healing and optimal results. Important considerations include:

      • Avoiding pressure on treated areas during sleep
      • Resuming normal activities while avoiding intense exercise
      • Gentle cleansing without aggressive rubbing
      • Makingup application after 24 hours if desired
      • Monitoring for unusual pain or color changes

      Long-Term Recovery Considerations

      Beyond the initial week, certain precautions support lasting results. These include:

      • Sun protection with mineral-based sunscreen
      • Avoiding facial treatments for 2-4 weeks
      • Scheduling follow-up assessment at 2-4 weeks
      • Documenting results with photographs
      • Planning maintenance schedule if desired

      How Long Do Cheek Filler Results Typically Last?

      Filler longevity varies based on product characteristics, individual metabolism, injection technique, and lifestyle factors. Understanding duration expectations helps patients plan maintenance and budget appropriately. Most fillers follow predictable degradation patterns, though individual variation exists.

      Longevity by Filler Type

      Different materials exhibit characteristic degradation timelines based on their composition. Typical duration ranges include:

      • Hyaluronic acid fillers: 9-18 months depending on cross-linking
      • Calcium hydroxylapatite: 12-18 months with collagen stimulation
      • Poly-L-lactic acid: 18-24 months through neocollagenesis
      • PMMA fillers: Permanent with some gradual volume diminishment

      Factors Influencing Filler Longevity

      Individual characteristics significantly impact how long results persist. Key influencing factors include:

      • Metabolic rate and physical activity level
      • Skin quality and collagen production capacity
      • Sun exposure and photodamage history
      • Lifestyle factors including smoking and nutrition
      • Injection technique and product placement

      Maintenance Strategies for Prolonged Results

      Strategic approaches can extend aesthetic benefits between treatments. Effective methods include:

      • Touch-up treatments before complete degradation
      • Collagen-stimulating skincare regimens
      • Healthy lifestyle supporting tissue health
      • Combination treatments addressing multiple aging factors
      • Proper sun protection preventing accelerated breakdown

      Board-certified-aesthetic-specialist-at-doseway.com-ready-to-discuss-your-skin-goals

      What Are the Alternatives to Cheek Fillers for Volume Restoration?

      While dermal fillers represent a popular minimally invasive option, several alternatives exist for cheek augmentation with different mechanisms, longevity, and indications. Understanding these options enables informed decision-making based on individual goals, budget, and tolerance for downtime.

      Surgical Cheek Augmentation Options

      Surgical approaches provide permanent solutions for significant volume restoration. These include:

      • Malar cheek implants in various shapes and materials
      • Fat transfer using autologous tissue for natural integration
      • Midface lift addressing both volume and position
      • Combination procedures for comprehensive rejuvenation

      Energy-Based Devices for Collagen Stimulation

      Non-invasive technologies stimulate natural collagen production without foreign materials. Popular options include:

      • Ultrasound therapy for deep tissue heating
      • Radiofrequency devices for dermal remodeling
      • Laser treatments for surface improvement
      • Combination devices addressing multiple tissue layers

      Topical and Professional Skincare Options

      While limited for significant volume loss, certain approaches provide modest improvement. These encompass:

      • Prescription retinoids for collagen enhancement
      • Growth factor serums for tissue quality improvement
      • Professional treatments including microneedling
      • Peptide formulations for structural support

      How Do Cheek Fillers Complement Other Facial Rejuvenation Treatments?

      Cheek augmentation rarely exists in isolation within comprehensive facial rejuvenation planning. Strategic combination with other procedures often produces superior results compared to single-modality treatments. Understanding these synergistic relationships enables holistic approach to facial aging.

      Combination with Neuromodulators

      Botox and other neurotoxins address dynamic wrinkles while fillers restore volume. Strategic pairing includes:

      • Brow elevation enhancing cheek projection
      • Masseter reduction emphasizing cheek prominence
      • Lip flip balancing midface enhancement
      • DAO relaxation improving marionette lines

      Integration with Skin Quality Treatments

      Procedures improving skin surface enhance filler results. Effective combinations involve:

      • Laser resurfacing for texture improvement
      • Chemical peels for brightness and clarity
      • Microneedling for collagen induction
      • Hydration boosters for plumping effect

      Synergy with Surgical Procedures

      Fillers can enhance surgical outcomes or provide interim improvement before surgery. These approaches include:

      • Pre-surgical simulation of potential results
      • Post-surgical refinement of minor asymmetries
      • Non-surgical maintenance between surgical procedures
      • Combination treatments addressing different aging components

      What Are the Psychological Benefits of Natural-Looking Cheek Augmentation?

      Beyond physical transformation, successful cheek restoration provides significant psychological benefits through improved self-perception and social confidence. Research demonstrates measurable improvements in quality of life metrics following natural-looking facial rejuvenation that maintains personal identity while refreshing appearance.

      Self-Perception and Confidence Impacts

      Studies indicate specific psychological benefits including:

      • Improved self-esteem in social and professional settings
      • Enhanced perceived age alignment with internal sense of self
      • Reduced self-consciousness about aging appearance
      • Increased willingness to engage in social activities
      • Positive feedback reinforcement from social circles

      Social and Professional Implications

      Research identifies measurable social advantages including:

      • Perceived increased competence in professional settings
      • Enhanced first impressions in social encounters
      • Improved nonverbal communication through facial expressivity
      • Positive association with health and vitality signals
      • Increased approachability and engagement with others

      Managing Expectations for Psychological Benefits

      Realistic understanding prevents disappointment and supports satisfaction. Important considerations include:

      • Acknowledging limitations of physical changes on overall wellbeing
      • Understanding that natural results typically provide greatest satisfaction
      • Recognizing that subtle changes often yield disproportionate benefits
      • Appreciating that maintenance of personal identity supports positive adjustment
      • Valuing the process of self-care alongside physical outcomes

      What Does the Future Hold for Cheek Filler Technologies and Techniques?

      The field of injectable aesthetics continues evolving with advancements in materials science, injection technologies, and anatomical understanding. Emerging trends promise improved safety profiles, longer-lasting results, and more natural outcomes through scientific innovation and refined techniques.

      Next-Generation Filler Materials

      Research and development focuses on improved biomaterials with enhanced properties. Promising developments include:

      • Bio-stimulatory fillers with improved collagen induction
      • Smart hydrogels with responsive degradation profiles
      • Composite materials combining immediate and long-term effects
      • Personalized fillers based on genetic tissue characteristics

      Advanced Injection Technologies

      Delivery system innovations improve precision and safety. Emerging technologies include:

      • Imaging-guided injection for real-time placement verification
      • Robotic assistance for unparalleled precision
      • Micro-cannula designs reducing trauma and bruising
      • Sensing needles detecting tissue planes and vessels

      Personalized Aesthetic Medicine Approaches

      The future moves toward customized treatments based on individual characteristics. This includes:

      • Genetic profiling predicting aging patterns and treatment response
      • 3D imaging and simulation for precise planning
      • Predictive analytics for optimal product selection
      • Digital monitoring of results and degradation patterns

      Womans-with-glowing-skin-after-successful-aesthetic-treatment-Book-a-free-consultation-at-doseway.com.

      Frequently Asked Questions About Cheek Fillers

      What Is the Best Age to Start Getting Cheek Fillers?

      There’s no universal ideal age for beginning cheek fillers, as this decision depends on individual aging patterns rather than chronological age. Most practitioners recommend considering treatment when visible volume depletion occurs, typically between late 20s to mid-40s. Early intervention with minimal product can prevent more significant correction later by supporting tissue structure before substantial descent occurs. The calculator assesses multiple factors beyond age to determine appropriate timing and volume.

      How Painful Are Cheek Filler Injections?

      Discomfort levels vary considerably based on individual pain tolerance, practitioner technique, and anesthetic approaches. Most modern fillers contain lidocaine which significantly reduces injection discomfort. Additional pain management options include topical anesthetics, ice application, and vibration devices that disrupt pain signals. The anterior cheek area typically causes more discomfort than lateral placements due to increased nerve density. Most patients describe the sensation as manageable pressure and brief pinching rather than sharp pain.

      Can Cheek Fillers Be Combined with Other Facial Fillers?

      Yes, cheek fillers are frequently combined with other facial fillers for comprehensive rejuvenation. Common combination treatments include temple fillers to support lateral facial framework, jawline fillers for lower face balance, and lip fillers for proportional enhancement. Strategic combination requires understanding facial proportions and prioritizing structural areas before addressing smaller features. The calculator can provide recommendations for multi-area treatment planning when appropriate.

      What Happens If I Don’t Like My Cheek Filler Results?

      Hyaluronic acid fillers offer the advantage of reversibility through hyaluronidase injection, which dissolves the product within 24-48 hours. Other filler types cannot be reversed but typically improve as swelling subsides over 2-4 weeks. Massage techniques can sometimes reshape misplaced product, and time will naturally degrade all filler types. Choosing an experienced injector and starting conservatively minimizes dissatisfaction risk. The calculator’s conservative recommendations help prevent over-treatment.

      How Do I Know If I’m a Good Candidate for Cheek Fillers?

      Ideal candidates have realistic expectations, good overall health, and specific concerns related to cheek volume loss. The calculator incorporates medical history assessment to identify potential contraindications. Generally suitable candidates demonstrate visible midface flattening, nasolabial folds, or facial contour concerns without active skin infections, bleeding disorders, or certain autoimmune conditions. A consultation with a qualified practitioner provides definitive candidacy assessment beyond calculator recommendations.

      Do Cheek Fillers Look Natural in Real Life?

      When properly performed by skilled practitioners using appropriate volumes and placement, cheek fillers can appear completely natural in movement and at rest. The “overdone” look typically results from excessive volume, improper placement, or poor product selection rather than the treatment itself. Natural results preserve individual facial characteristics while restoring youthful proportions and support. The calculator emphasizes techniques and volumes that maintain natural appearance and expression.

      How Much Cheek Filler Will I Need for Noticeable Results?

      The volume required for noticeable yet natural improvement varies significantly based on existing anatomy and the degree of volume loss. Most patients achieve meaningful enhancement with 1-2 syringes total, distributed between both cheeks. The calculator provides personalized recommendations based on your specific facial assessment, with conservative initial suggestions that can be built upon gradually. Starting with a minimal product and assessing results before additional treatment prevents overcorrection.

      Affiliate Product Recommendations

      1. Juvederm Voluma XC – Premium hyaluronic acid filler specifically FDA-approved for cheek augmentation with proven longevity and natural results
      2. Restylane Lyft – Versatile HA filler ideal for cheek enhancement and midface lifting with excellent safety profile
      3. Sculptra Aesthetic – Biostimulatory collagen stimulator for gradual, natural-looking volume restoration
      4. Radiesse – Calcium hydroxylapatite filler providing immediate volume and long-term collagen benefits
      5. Belotero Balance – Softer HA filler perfect for subtle refinements and transition zones around cheeks
      6. Revolax Deep – Cost-effective Korean HA filler with high viscosity ideal for cheek volumizing
      7. Teosyal Redensity II – European formula with exceptional elasticity and integration properties
      Laser-Liposuction

      Laser Liposuction: Cost, Recovery, and Results Timeline

      Laser liposuction represents one of the most significant advancements in cosmetic surgery, combining cutting-edge technology with minimally invasive techniques to reshape and contour the body. This comprehensive guide explores every aspect of laser liposuction, from cost considerations and recovery expectations to long-term results and alternative treatments.

      ✓ Advanced Technology: Laser-assisted lipolysis uses thermal energy to precisely target and remove stubborn fat
      ✓ Minimally Invasive: Smaller incisions and targeted approach reduce trauma and downtime
      ✓ Dual Benefits: Simultaneous fat removal and skin tightening for comprehensive body contouring
      ✓ Predictable Results: Advanced planning tools and proven techniques deliver consistent outcomes
      ✓ Personalized Treatment: Customized approaches based on individual anatomy and goals

      Laser Liposuction Cost Calculator

      Laser Liposuction Cost Calculator

      Estimate your treatment cost and evaluate candidacy factors

      1
      Demographics
      2
      Medical History
      3
      Treatment Details
      4
      Results
      1.5 liters

      Your Laser Liposuction Estimate

      $0

      Estimated procedure cost range

      Low Risk Medium Risk High Risk

      Risk Assessment

      Based on your medical profile, you appear to be a good candidate for laser liposuction with standard risk factors.

      Cost Breakdown

      The estimated cost includes the procedure, anesthesia, facility fees, and follow-up care. Additional costs may apply for compression garments and medications.

      Recommendations

      Consult with a board-certified plastic surgeon to discuss your specific goals and receive a personalized treatment plan.

      Disclaimer: This calculator provides estimates only. Actual costs may vary based on individual factors and geographic location. Consult with a qualified medical professional for accurate assessment and treatment recommendations.

      Read More Guides & Try More Free Tools:

      Skin-analysis-personalized-plan-and-transparent-pricing-at-doseway.com

      What is Laser Liposuction and How Does It Differ from Traditional Methods?

      Laser liposuction, clinically known as laser-assisted lipolysis, represents a significant evolution beyond traditional liposuction techniques. This advanced body contouring procedure utilizes laser energy to liquefy fat cells before removal while simultaneously stimulating collagen production for skin tightening effects. The fundamental difference lies in the mechanism of action – where traditional liposuction relies solely on mechanical disruption and suction of fat cells, laser liposuction employs thermal energy to pre-treat the targeted adipose tissue.

      The procedure involves inserting a small laser fiber through tiny incisions, typically less than 3-4 millimeters in length. This laser energy specifically targets fat cells, causing them to rupture and release their contents while leaving surrounding tissues largely unaffected. The liquefied fat is then gently removed through cannulas, requiring less physical force and resulting in reduced trauma to the treatment area. This technological advancement translates to several clinical benefits that distinguish laser liposuction from conventional approaches.

      Key Differentiating Factors:
      ✓ Precision Targeting: Laser energy selectively affects fat cells while preserving other tissues
      ✓ Dual-Action Results: Combines fat removal with collagen stimulation for skin tightening
      ✓ Reduced Trauma: Smaller instruments and gentler technique minimize tissue damage
      ✓ Local Anesthesia Option: Many procedures can be performed under local anesthesia only
      ✓ Faster Recovery: Less bruising and swelling enable quicker return to normal activities

      How Does Laser Liposuction Technology Work at the Cellular Level?

      The scientific foundation of laser liposuction revolves around the principle of selective photothermolysis, where specific wavelengths of laser light are absorbed by fat cells, causing controlled thermal damage. Different laser systems operate at varying wavelengths, with common systems using 1064nm, 1320nm, 1440nm, or 980nm diodes, each with unique absorption characteristics in adipose tissue. The laser energy interacts with fat cells through multiple mechanisms that collectively enhance treatment outcomes.

      At the cellular level, the laser energy is absorbed by the fat cells, creating microscopic bubbles of steam that disrupt the cell membranes. This process, known as photomechanical disruption, causes the fat cells to release their triglyceride contents while the cellular debris is naturally processed by the body’s lymphatic system. Simultaneously, the thermal effect stimulates fibroblasts in the dermis to produce new collagen and elastin fibers, leading to gradual skin tightening over several months following the procedure.

      Biological Effects of Laser Energy:
      ✓ Adipocyte Destruction: Laser energy ruptures fat cell membranes through thermal mechanisms
      ✓ Collagen Remodeling: Heat stimulation triggers neocollagenesis for skin tightening
      ✓ Vascular Coagulation: Small blood vessels are sealed, reducing bleeding and bruising
      ✓ Lymphatic Activation: Enhanced lymphatic drainage assists in waste removal
      ✓ Tissue Stimulation: Controlled inflammation promotes healing and tissue regeneration

      Laser-Liposuction
      Laser-Liposuction

      What Are the Primary Benefits of Choosing Laser Liposuction Over Other Fat Reduction Methods?

      Laser liposuction offers a compelling combination of benefits that position it as an attractive option for individuals seeking body contouring with minimal downtime. The procedure’s ability to address both excess fat and skin laxity simultaneously provides a comprehensive solution that many alternative treatments cannot match. This dual-action approach makes it particularly valuable for areas where skin tightening is as important as fat reduction, such as the neck, arms, and abdomen.

      One of the most significant advantages is the precision offered by laser technology. The ability to target specific fat deposits with millimeter accuracy allows for detailed contouring that can enhance natural anatomical features. This precision, combined with the hemostatic effect of the laser (sealing blood vessels as it works), results in significantly less bleeding, bruising, and swelling compared to traditional methods. The reduced trauma translates to faster recovery times, with many patients returning to light activities within 24-48 hours and more strenuous activities within 1-2 weeks.

      Comprehensive Benefit Analysis:
      ✓ Enhanced Safety Profile: Reduced risk of contour irregularities and tissue damage
      ✓ Local Anesthesia Suitability: Often performed without general anesthesia risks
      ✓ Minimal Scarring: Tiny incisions become virtually invisible over time
      ✓ Immediate Results: Visible improvement immediately after procedure
      ✓ Progressive Improvement: Continued skin tightening over 3-6 months
      ✓ Long-Lasting Outcomes: Permanent fat cell removal in treated areas
      ✓ Versatile Applications: Effective on multiple body areas and skin types

      What Factors Determine Laser Liposuction Cost and How Can You Estimate Your Investment?

      The cost of laser liposuction varies significantly based on multiple factors, making personalized assessment essential for accurate financial planning. Our laser liposuction cost calculator incorporates these variables to provide customized estimates, but understanding the underlying cost drivers helps patients make informed decisions. The primary cost components include the surgeon’s expertise, geographic location, facility fees, anesthesia costs, and the technical complexity of the procedure.

      Surgeon expertise represents one of the most substantial cost variables, with board-certified plastic surgeons typically commanding higher fees due to their extensive training and experience. Geographic location dramatically influences pricing, with procedures in major metropolitan areas generally costing 20-40% more than in smaller cities. The type of facility also impacts cost, with hospital-based procedures typically more expensive than those performed in accredited surgical centers or office-based surgical suites.

      Primary Cost Determinants:
      ✓ Treatment Areas: Number and size of areas being treated
      ✓ Fat Volume: Amount of fat to be removed
      ✓ Surgeon Expertise: Qualifications and experience level
      ✓ Geographic Location: Regional pricing variations
      ✓ Facility Type: Hospital, surgical center, or office facility
      ✓ Anesthesia Type: Local vs. general anesthesia requirements
      ✓ Technology Used: Specific laser system and accessories
      ✓ Compression Garments: Post-operative garments and supplies

      Doseway-aesthetic-procedures-andonline-booking-details

      How Does Our Laser Liposuction Cost Calculator Work and What Factors Does It Consider?

      Our proprietary laser liposuction cost calculator employs a sophisticated algorithm that analyzes multiple clinical and demographic factors to generate personalized cost estimates. The calculator processes information across three primary categories: patient demographics, treatment specifications, and geographic variables. This comprehensive approach ensures that the estimated cost reflects the unique combination of factors specific to each individual’s situation and goals.

      The calculator begins by assessing basic demographic information including age, gender, height, and weight, which helps determine overall treatment complexity and potential risk factors. The treatment specification section collects detailed data about the areas to be treated, estimated fat volume, skin quality, and previous surgical history. Finally, geographic and facility preferences complete the picture, accounting for regional cost variations and practice type selections that significantly influence final pricing.

      Calculator Input Categories and Clinical Relevance:

      Input CategorySpecific FactorsImpact on Cost Estimation
      DemographicsAge, BMI, GenderDetermines anatomical considerations and potential risk adjustments
      Treatment AreasNumber, location, sizeAffects procedure time and technical complexity
      Fat VolumeEstimated liters to removeInfluences surgical time and resource requirements
      Skin QualityElasticity, laxityDetermines if additional skin tightening needed
      Geographic RegionCountry, urban vs ruralAccounts for regional price variations
      Facility TypeHospital, clinic, privateReflects overhead and accreditation differences

      What Constitutes an Ideal Candidate for Laser Liposuction Procedures?

      Ideal candidacy for laser liposuction involves a combination of physical characteristics, health status, and realistic expectations that collectively predict successful outcomes. The procedure works best for individuals at or near their ideal body weight who struggle with localized fat deposits resistant to diet and exercise. These stubborn areas typically include the abdomen, flanks, thighs, arms, chin, and back, where fat cells may be genetically programmed to retain lipids despite overall weight management efforts.

      Health status represents a critical consideration, with ideal candidates being non-smokers in good general health without significant underlying medical conditions that could compromise healing. Realistic expectations are equally important – while laser liposuction can dramatically improve body contour, it is not a weight loss solution and cannot correct significant skin laxity or replace healthy lifestyle habits. A comprehensive evaluation by a qualified surgeon remains essential to determine individual candidacy and treatment appropriateness.

      Optimal Candidate Profile:
      ✓ Stable Weight: Within 10-15 pounds of ideal body weight
      ✓ Localized Fat Deposits: Specific areas resistant to diet/exercise
      ✓ Good Skin Elasticity: Adequate collagen for contraction after fat removal
      ✓ Non-Smoker: Or willing to stop smoking before and after procedure
      ✓ Realistic Expectations: Understanding of achievable outcomes
      ✓ Commitment to Maintenance: Willingness to maintain results through lifestyle
      ✓ Overall Good Health: No contraindications to elective surgery

      What is the Typical Laser Liposuction Procedure Timeline from Consultation to Final Results?

      The laser liposuction journey follows a predictable timeline with distinct phases, each with specific milestones and expectations. Understanding this timeline helps patients prepare appropriately and maintain realistic expectations throughout their transformation process. The complete timeline typically spans 6-12 months from initial consultation to final results, with the most dramatic changes occurring in the first 6-8 weeks followed by gradual refinement as swelling resolves and skin tightening progresses.

      The process begins with a comprehensive consultation where the surgeon evaluates the patient’s concerns, examines the treatment areas, discusses options, and develops a customized treatment plan. Pre-operative preparations may include laboratory tests, medication adjustments, and lifestyle modifications in the weeks leading up to the procedure. The surgery itself typically takes 1-3 hours depending on the number and size of areas being treated, performed under local or general anesthesia based on the specific clinical situation.

      Comprehensive Procedure Timeline:

      Pre-Operative Phase (2-4 weeks)
      ✓ Initial consultation and treatment planning
      ✓ Medical clearance and laboratory testing
      ✓ Pre-operative instructions and medication management
      ✓ Arranging time off work and post-operative assistance

      Procedure Day (1-3 hours)
      ✓ Marking and photography of treatment areas
      ✓ Anesthesia administration
      ✓ Laser liposuction procedure
      ✓ Application of compression garments
      ✓ Recovery room monitoring

      Immediate Recovery (First 72 hours)
      ✓ Management of swelling and discomfort
      ✓ Limited activity with frequent short walks
      ✓ Drainage of tumescent fluid from incision sites
      ✓ Strict use of compression garments

      Early Recovery (Weeks 1-2)
      ✓ Gradual return to light activities
      ✓ Management of swelling and bruising
      ✓ Follow-up appointments with surgeon
      ✓ Beginning of lymphatic massage if recommended

      Intermediate Recovery (Weeks 3-6)
      ✓ Significant reduction in swelling
      ✓ Return to most normal activities
      ✓ Beginning of visible contour improvements
      ✓ Continued garment use as directed

      Long-Term Recovery (Months 2-6)
      ✓ Resolution of residual swelling
      ✓ Progressive skin tightening
      ✓ Final contour becoming apparent
      ✓ Full return to exercise and strenuous activities

      Final Results (Months 6-12)
      ✓ Complete healing and scar maturation
      ✓ Maximal skin tightening effect
      ✓ Stable long-term contour
      ✓ Maintenance through healthy lifestyle

      How Does the Recovery Process Unfold Week by Week After Laser Liposuction?

      The recovery process following laser liposuction follows a predictable pattern, though individual experiences may vary based on the extent of treatment, individual healing characteristics, and adherence to post-operative instructions. Understanding what to expect during each phase of recovery helps patients navigate the healing process with confidence and recognize normal versus concerning symptoms. The first week typically involves the most significant limitations, with gradual improvement occurring throughout the subsequent weeks.

      During the first 24-48 hours, patients can expect swelling, bruising, and discomfort managed with prescribed or recommended pain medication. The drainage of tumescent fluid from the small incision sites is normal during this period and typically diminishes significantly after the first 2-3 days. Wearing compression garments as directed is crucial during this phase to control swelling, support the treated tissues, and promote optimal contouring results. Light walking is encouraged to promote circulation, but strenuous activities must be avoided.

      Detailed Weekly Recovery Guide:

      Week 1: Initial Healing Phase
      ✓ Days 1-3: Maximum swelling and discomfort, drainage from incisions, limited mobility
      ✓ Days 4-7: Significant reduction in drainage and discomfort, increased mobility
      ✓ Key Activities: Rest, garment use, light walking, proper hydration and nutrition
      ✓ Follow-up: Typically first post-operative appointment around day 3-7

      Weeks 2-3: Early Recovery Phase
      ✓ Symptoms: Decreasing bruising and swelling, itching as healing progresses
      ✓ Activity Level: Return to sedentary work, light household activities, driving
      ✓ Garment Use: Continued wear as directed, possibly transitioning to lighter garments
      ✓ Appearance: Initial contour changes visible though obscured by swelling

      Weeks 4-6: Intermediate Recovery Phase
      ✓ Symptoms: Majority of swelling resolved, numbness or hypersensitivity possible
      ✓ Activity Level: Return to most normal activities, beginning of light exercise
      ✓ Garment Use: May transition to part-time wear, typically 8-12 hours daily
      ✓ Appearance: Significant contour improvement becoming visible

      Months 2-3: Advanced Recovery Phase
      ✓ Symptoms: Minimal residual swelling, continued sensation changes
      ✓ Activity Level: Full return to exercise and strenuous activities
      ✓ Garment Use: Typically discontinued unless otherwise directed
      ✓ Appearance: Major contour improvements with ongoing skin tightening

      Months 4-6: Near-Final Results Phase
      ✓ Symptoms: Resolution of most swelling and sensation changes
      ✓ Appearance: Contour approaching final results, continued subtle refinement
      ✓ Maintenance: Established healthy lifestyle to maintain results

      Skin-and-aesthetic-procedures-online-appointments-doseway.com

      What Results Can You Realistically Expect from Laser Liposuction and When Will You See Them?

      Realistic expectations are crucial for patient satisfaction with laser liposuction outcomes. While the procedure produces significant and permanent improvements in body contour, understanding the timeline and extent of these changes helps align expectations with clinical reality. The results unfold progressively over several months, with immediate improvements visible once swelling begins to subside, followed by continued refinement as the skin contracts and adapts to the new contour.

      Initially, results may be obscured by post-operative swelling, with the treated areas potentially appearing larger than before the procedure during the first 1-2 weeks. As swelling gradually resolves over 4-8 weeks, the improved contour becomes increasingly apparent. The skin tightening effects continue to develop over 3-6 months as new collagen forms and reorganizes, further enhancing the results. The final outcome represents a permanent removal of fat cells from the treated areas, though remaining fat cells can still expand with significant weight gain.

      Realistic Outcome Expectations by Timeframe:

      Time After ProcedureVisible ResultsLimitations and Considerations
      Immediately AfterInitial contour change obscured by swellingSignificant swelling and fluid retention present
      2-4 Weeks40-60% of final result visibleSwelling masks finer contour details
      6-8 Weeks70-80% of final result apparentResidual swelling still affects appearance
      3-4 Months90% of final contour achievedSkin tightening continues to progress
      6 MonthsNear-final results stableMaximal skin tightening effect achieved
      12 MonthsFinal permanent resultsComplete healing and scar maturation

      What Are the Potential Risks and Complications Associated with Laser Liposuction?

      Like any surgical procedure, laser liposuction carries inherent risks and potential complications, though the minimally invasive nature and advanced technology have significantly reduced their incidence and severity. Understanding these potential adverse outcomes helps patients make informed decisions and recognize early warning signs that warrant medical attention. The majority of complications are minor and temporary, resolving with appropriate management without long-term consequences.

      Common temporary side effects include swelling, bruising, discomfort, numbness, and temporary fluid accumulation. These expected responses typically resolve spontaneously within days to weeks as the healing process progresses. More significant complications, while rare, can include infection, hematoma, seroma, contour irregularities, skin injury, and adverse reactions to anesthesia. Choosing an experienced, board-certified surgeon and following all pre- and post-operative instructions meticulously significantly reduces these risks.

      Comprehensive Risk Analysis:

      Common Temporary Effects (≥10% of cases)
      ✓ Swelling and edema lasting 2-8 weeks
      ✓ Bruising resolving within 1-3 weeks
      ✓ Temporary numbness or altered sensation
      ✓ Mild to moderate discomfort managed with medication
      ✓ Fluid drainage from incision sites for 24-72 hours

      Less Common Complications (1-10% of cases)
      ✓ Persistent swelling beyond expected timeline
      ✓ Contour irregularities requiring massage or minor revision
      ✓ Hyperpigmentation or temporary skin color changes
      ✓ Seroma formation requiring drainage
      ✓ Extended recovery time due to individual factors

      Rare Serious Complications (<1% of cases)
      ✓ Infection requiring antibiotic treatment
      ✓ Significant hematoma requiring intervention
      ✓ Thermal injury to skin or deeper structures
      ✓ Deep vein thrombosis or pulmonary embolism
      ✓ Anesthesia-related complications
      ✓ Significant asymmetry requiring surgical correction

      The landscape of body contouring options has expanded dramatically in recent years, making informed comparisons between laser liposuction and alternative treatments essential for selecting the most appropriate approach. Each method offers distinct advantages and limitations based on the technology employed, invasiveness, downtime, cost, and specific indications. Understanding these differences enables patients to align their choices with individual goals, tolerance for downtime, and expectations for results.

      Traditional liposuction remains the gold standard for removing larger volumes of fat but typically involves more trauma, longer recovery, and less skin tightening than laser-assisted techniques. Non-invasive options like cryolipolysis (CoolSculpting) and radiofrequency treatments offer no downtime but provide more modest, gradual improvements without surgical skin tightening effects. Laser liposuction occupies a middle ground, offering more dramatic results than non-invasive treatments with less downtime than traditional liposuction.

      Comparative Analysis of Fat Reduction Methods:

      Treatment MethodMechanism of ActionBest ForDowntimeResults Timeline
      Laser LiposuctionLaser energy liquefies fat + skin tighteningPrecise contouring with skin tightening3-7 daysImmediate improvement, final at 3-6 months
      Traditional LiposuctionMechanical fat disruption and suctionLarger volume fat removal7-14 days3-6 months for final results
      CryolipolysisFreezing and apoptosis of fat cellsSmall, stubborn fat pocketsNone2-4 months for full results
      RadiofrequencyThermal heating and fat reductionMild fat reduction with skin tighteningNone2-3 months for optimal results
      Injectable TreatmentsChemical destruction of fat cellsVery small, localized areasMinimal4-8 weeks for visible changes

      What Pre-Operative Preparations Are Essential for Optimal Laser Liposuction Outcomes?

      Proper preparation before laser liposuction significantly influences both the safety of the procedure and the quality of the final results. The pre-operative period typically involves medical evaluations, lifestyle adjustments, and practical preparations that collectively create optimal conditions for successful surgery and smooth recovery. Beginning these preparations 4-6 weeks before the scheduled procedure allows adequate time for necessary changes to take effect and minimizes potential complications.

      Medical preparations include a comprehensive health assessment, necessary laboratory tests, and adjustments to medications or supplements that could increase surgical risks. Lifestyle modifications often involve smoking cessation, alcohol reduction, and optimization of nutrition to support healing. Practical preparations include arranging time off work, organizing help during recovery, preparing the recovery space, and purchasing necessary supplies. Following the surgeon’s specific instructions during this period lays the foundation for an optimal outcome.

      Essential Pre-Operative Checklist:

      Medical Preparation (4-6 weeks before)
      ✓ Complete medical history review and physical examination
      ✓ Laboratory testing including blood count and chemistry panels
      ✓ Adjustment or temporary discontinuation of certain medications
      ✓ Smoking cessation and reduction of alcohol consumption
      ✓ Discussion of anesthesia plan and preferences

      Lifestyle Optimization (2-4 weeks before)
      ✓ Balanced nutrition with emphasis on protein and vitamins
      ✓ Hydration optimization with increased water intake
      ✓ Beginning recommended supplements if advised
      ✓ Gradual introduction of light exercise if not previously active
      ✓ Weight stabilization at desired target

      Practical Preparations (1-2 weeks before)
      ✓ Arrangement of time off work and responsibilities
      ✓ Organization of help for first 3-5 days after procedure
      ✓ Preparation of recovery area with necessary supplies
      ✓ Filling prescriptions for post-operative medications
      ✓ Purchase of compression garments as recommended
      ✓ Planning and preparing easy meals for recovery period

      What Post-Operative Care Maximizes Healing and Optimizes Final Results?

      The post-operative period represents a critical phase where proper care significantly influences healing quality, comfort during recovery, and ultimate aesthetic results. Following specific guidelines for wound care, activity modification, garment use, and lifestyle supports optimal outcomes while minimizing potential complications. The first 48 hours are particularly important for establishing a positive recovery trajectory, with each subsequent week building upon this foundation.

      Immediate post-operative care focuses on managing discomfort, controlling swelling, monitoring incision sites, and maintaining hydration. The use of compression garments as directed represents one of the most important elements of early recovery, providing support to treated tissues, reducing swelling, and promoting optimal contouring. Gradual reintroduction of activity follows a specific progression, with light walking encouraged immediately but strenuous activities restricted for several weeks. Proper nutrition and hydration support the healing process from a cellular level.

      Comprehensive Post-Operative Care Protocol:

      First 48 Hours: Critical Recovery Phase
      ✓ Strict rest with legs elevated when possible
      ✓ Consistent use of compression garments
      ✓ Management of discomfort with prescribed medication
      ✓ Light walking every 1-2 hours while awake
      ✓ Monitoring of incision sites and drainage
      ✓ Adequate hydration and light nutrition

      Week 1: Early Healing Phase
      ✓ Continued garment use with removal only for showering
      ✓ Gradual increase in walking and light activities
      ✓ Beginning of lymphatic massage if recommended
      ✓ Attention to incision care and hygiene
      ✓ Avoidance of strenuous activities, bending, lifting
      ✓ Maintenance of proper hydration and nutrition

      Weeks 2-4: Active Recovery Phase
      ✓ Transition to reduced garment wear as directed
      ✓ Gradual return to most daily activities and work
      ✓ Introduction of light stretching and very light exercise
      ✓ Continued attention to incision care and massage
      ✓ Monitoring of swelling and contour changes
      ✓ Follow-up appointments with surgeon

      Weeks 4-8: Intermediate Recovery Phase
      ✓ Discontinuation of garments or transition to part-time wear
      ✓ Gradual return to most forms of exercise
      ✓ Attention to any areas of firmness or irregularity
      ✓ Beginning of scar treatment if incisions fully closed
      ✓ Continued healthy nutrition and hydration
      ✓ Monitoring of progressive results

      Board-certified-aesthetic-specialist-at-doseway.com-ready-to-discuss-your-skin-goals

      How Much Does Laser Liposuction Typically Cost in Different Regions?

      The cost of laser liposuction varies significantly based on geographic region, reflecting differences in overhead expenses, market demand, and surgeon availability. Understanding these regional variations helps patients contextualize cost estimates and make informed decisions about where to pursue treatment. Generally, major metropolitan areas and coastal regions command premium pricing compared to smaller cities and inland locations, though quality and safety should remain the primary considerations regardless of geographic factors.

      In the United States, laser liposuction costs range from $3,500 to $10,000 depending on the number and size of areas treated, with average national costs between $5,000 and $7,000 for typical treatment of 2-3 areas. European pricing typically ranges from €2,500 to €7,000, with the United Kingdom at the higher end of this spectrum. Asian markets show considerable variation, with prices in countries like South Korea and Thailand often 30-50% lower than comparable US treatments, though quality standards and regulations may differ.

      Regional Cost Comparison Table:

      Geographic RegionAverage Cost RangeCost Influencing Factors
      United States$4,000 – $10,000Surgeon expertise, facility type, geographic location within US
      Western Europe€3,000 – €8,000Country-specific regulations, private vs public facilities
      United Kingdom£3,500 – £9,000London premium, surgeon credentials, facility accreditation
      AustraliaAU$5,000 – AU$12,000Major city vs regional pricing, surgeon experience
      Middle East$4,500 – $11,000Luxury facility offerings, international surgeon premiums
      Southeast Asia$2,500 – $5,500Medical tourism model, lower overhead costs

      What Financing Options and Insurance Considerations Apply to Laser Liposuction?

      Understanding the financial aspects of laser liposuction extends beyond the procedure’s base cost to include financing options, payment structures, and insurance considerations. As a predominantly cosmetic procedure, laser liposuction is typically not covered by health insurance plans, requiring patients to explore alternative payment methods. Various financing options exist to make the procedure more accessible, though careful consideration of terms and conditions ensures responsible financial decision-making.

      Most plastic surgery practices offer payment plans through specialized medical financing companies that provide loans specifically for elective procedures. These plans often feature competitive interest rates and flexible repayment terms ranging from 6 months to several years. Some practices also offer in-house payment plans that allow patients to pay for their procedure over time directly through the practice. Understanding all available options, comparing terms, and selecting a plan that aligns with individual financial circumstances represents an important aspect of the planning process.

      Financing and Payment Options:

      Practice Payment Options
      ✓ Full payment discounts for upfront cash or credit card payments
      ✓ In-house payment plans with structured installment agreements
      ✓ Third-party medical financing through specialized lenders
      ✓ Credit card payments with potential introductory rate periods
      ✓ Combination approaches using multiple payment methods

      Insurance Considerations
      ✓ Cosmetic procedures typically excluded from insurance coverage
      ✓ Possible partial coverage if medically justified (e.g., lipedema)
      ✓ Documentation requirements for medically necessary components
      ✓ Pre-authorization processes when applicable
      ✓ Out-of-network benefits for associated medical services

      Financial Planning Strategies
      ✓ Early consultation to determine accurate cost estimates
      ✓ Comparison of multiple financing options and terms
      ✓ Consideration of health savings accounts (HSAs) or flexible spending accounts (FSAs)
      ✓ Timing considerations related to deductibles and insurance years
      ✓ Budgeting for potential ancillary costs and unexpected expenses

      How Can You Maintain and Enhance Laser Liposuction Results Long-Term?

      The long-term success of laser liposuction depends significantly on post-procedure maintenance strategies that preserve the improved contour and prevent enlargement of remaining fat cells. While the removed fat cells are permanently eliminated, the remaining fat cells in treated and untreated areas can still expand with weight gain, potentially compromising results. Implementing sustainable lifestyle habits ensures that the investment in body contouring yields lasting benefits rather than temporary improvements.

      A comprehensive maintenance approach incorporates balanced nutrition, regular physical activity, adequate hydration, and consistent healthy habits that collectively support weight stability and overall wellness. Specific strategies should address the individual’s unique metabolism, lifestyle constraints, and personal preferences to ensure long-term adherence. Regular monitoring of body measurements and clothing fit provides objective feedback about maintenance success and early warning signs of changes that might require adjustment of strategies.

      Long-Term Results Maintenance Protocol:

      Nutritional Strategies
      ✓ Balanced macronutrient distribution supporting metabolic health
      ✓ Appropriate calorie intake for weight maintenance
      ✓ Emphasis on whole foods with minimal processing
      ✓ Adequate protein to support muscle maintenance
      ✓ Strategic meal timing and portion control approaches
      ✓ Limited consumption of processed carbohydrates and sugars

      Physical Activity Plan
      ✓ Combination of cardiovascular exercise and strength training
      ✓ Minimum of 150 minutes moderate activity weekly
      ✓ Incorporation of resistance training 2-3 times weekly
      ✓ Regular non-exercise activity thermogenesis (NEAT)
      ✓ Variety in activity selection to prevent adaptation
      ✓ Progressive challenge to maintain effectiveness

      Lifestyle Integration
      ✓ Consistent sleep schedule with 7-9 hours nightly
      ✓ Stress management techniques and practices
      ✓ Adequate hydration with minimum 64 ounces daily
      ✓ Regular self-monitoring through measurements or clothing fit
      ✓ Periodic evaluation of strategies and adjustment as needed
      ✓ Establishment of sustainable routines rather than short-term measures

      What Technological Advancements Are Shaping the Future of Laser Liposuction?

      The field of laser liposuction continues to evolve with technological innovations that enhance precision, safety, and outcomes while reducing downtime and discomfort. Recent advancements focus on improved laser wavelengths, enhanced delivery systems, combination approaches, and sophisticated treatment planning technologies that collectively push the boundaries of what’s possible in minimally invasive body contouring. Understanding these developments helps patients appreciate the sophistication of modern approaches and anticipate future innovations.

      New laser systems feature refined wavelengths that optimize fat cell targeting while minimizing effects on surrounding tissues, creating more efficient treatment with reduced recovery time. Advanced cannula designs with integrated cooling mechanisms protect the skin surface while delivering laser energy precisely to deeper fat layers. Combination devices that incorporate multiple technologies—such as laser with radiofrequency or ultrasound—create synergistic effects that address both fat reduction and skin tightening simultaneously.

      Emerging Technological Innovations:

      Laser System Advancements
      ✓ Dual-wavelength systems for customized tissue effects
      ✓ Pulsed delivery patterns optimizing energy deposition
      ✓ Integrated temperature monitoring and feedback systems
      ✓ Smaller diameter fibers enabling more precise treatment
      ✓ Flexible laser delivery systems for curved anatomical areas

      Treatment Planning Technologies
      ✓ 3D imaging systems for preoperative simulation
      ✓ Computer-assisted treatment planning software
      ✓ Real-time monitoring of tissue effects during treatment
      ✓ Predictive algorithms for outcome estimation
      ✓ Customized treatment protocols based on individual anatomy

      Combination Approaches
      ✓ Laser with radiofrequency for enhanced skin tightening
      ✓ Laser with ultrasound for improved fat liquefaction
      ✓ Laser with vibration-assisted cannulas for easier fat removal
      ✓ Integrated skin cooling with deep tissue heating
      ✓ Sequential energy delivery optimizing different tissue effects

      Womans-with-glowing-skin-after-successful-aesthetic-treatment-Book-a-free-consultation-at-doseway.com.

      Frequently Asked Questions About Laser Liposuction

      How long do laser liposuction results typically last?
      Laser liposuction permanently removes fat cells from treated areas, providing long-lasting contour improvements. However, remaining fat cells can still expand with significant weight gain, so maintaining stable weight through healthy lifestyle habits is essential for preserving results. The skin tightening effects also continue to develop over several months, with final results typically evident by 6-12 months after the procedure.

      What is the difference between laser liposuction and non-surgical fat reduction?
      The fundamental difference lies in the mechanism of action and degree of intervention. Laser liposuction physically removes fat cells through small incisions while simultaneously tightening skin through thermal stimulation. Non-surgical methods like CoolSculpting, Kybella, or radiofrequency treatments gradually reduce fat through cellular apoptosis or destruction without incisions, but typically provide more modest results without significant skin tightening.

      Can laser liposuction treat multiple areas in one session?
      Yes, laser liposuction can typically address multiple areas during a single surgical session, depending on the total treatment area, estimated fat removal volume, and the patient’s overall health. Combining areas is often more cost-effective and efficient, though there are practical limits based on surgical time, anesthesia considerations, and safe fat removal volumes that your surgeon will discuss during consultation.

      Is laser liposuction effective for weight loss?
      No, laser liposuction is a body contouring procedure rather than a weight loss solution. The procedure is designed to address localized fat deposits that are resistant to diet and exercise, not to achieve significant weight reduction. Ideal candidates are typically at or near their ideal body weight but struggle with specific areas of disproportionate fat distribution.

      What is the ideal age for laser liposuction?
      There is no specific ideal age for laser liposuction, as candidacy depends more on skin elasticity, overall health, and specific concerns rather than chronological age. Younger patients typically have better skin elasticity, which enhances contraction after fat removal, while older patients may have more skin laxity that requires additional attention. A thorough evaluation by a qualified surgeon determines appropriate candidacy regardless of age.

      How soon after laser liposuction can I exercise?
      Most patients can resume light walking immediately after the procedure, with gradual increase in activity over subsequent weeks. Light cardio exercise can typically be resumed after 1-2 weeks, while more strenuous activities and heavy lifting should wait until 4-6 weeks post-procedure. Your surgeon will provide specific guidelines based on your individual procedure and healing progression.

      Are the results of laser liposuction noticeable immediately?
      While some contour improvement is visible immediately after the procedure, significant swelling typically obscures the final results initially. As swelling gradually resolves over several weeks to months, the improved contour becomes increasingly apparent. The skin tightening effects continue to develop over 3-6 months as new collagen forms, with final results typically evident by 6-12 months.

      High-Commission Medical Products:

      1. SculptSure Contouring Garments – Premium post-procedure compression wear with medical-grade fabric technology
      2. LipoLux Recovery System – Advanced post-liposuction recovery kits featuring specialized supplements and topical treatments
      3. AestheticMD Skincare – Medical-grade skincare products specifically formulated for post-procedure healing and maintenance

      Surgical Equipment and Supplies:
      4. Cynosure SculpSure – At-home maintenance devices from the makers of professional laser liposuction systems
      5. CoolTech Compression – Specialized garments for optimal post-procedure contouring and comfort
      6. RejuvaSkin Solutions – Advanced topical treatments for scar management and skin optimization after procedures

      Wellness and Maintenance:
      7. Thrive Market Healthy Pantry – Curated selection of whole foods and supplements for maintaining results
      8. FitTrack Smart Scale – Advanced body composition monitoring to track maintenance progress
      9. MyFitnessPal Premium – Comprehensive nutrition tracking for long-term weight management
      10. GymPass Membership – Access to multiple fitness facilities to support active lifestyle maintenance

      Non-Surgical-Rhinoplasty

      Non-Surgical Rhinoplasty: Filler Types & Risks

      Non-surgical rhinoplasty has revolutionized cosmetic procedures by offering nose reshaping without surgery. This comprehensive guide covers everything from hyaluronic acid fillers to potential complications, helping you make an informed decision about this popular cosmetic treatment. Our free Nose Filler Simulator & Outcome Visualizer helps assess your suitability and visualize potential results before committing to the procedure.

      ✓ Understand different filler types and their longevity
      ✓ Learn about potential risks and complications
      ✓ Discover if you’re an ideal candidate for non-surgical nose jobs
      ✓ Compare costs versus traditional rhinoplasty
      ✓ Learn about recovery time and aftercare requirements
      ✓ Visualize potential outcomes with our interactive simulator

      Nose Filler Simulator & Outcome Visualizer

      Nose Filler Simulator & Outcome Visualizer

      Assess your suitability for non-surgical rhinoplasty and visualize potential outcomes

      1
      2
      3
      4

      Demographics

      Medical History

      Hold Ctrl/Cmd to select multiple options
      Hold Ctrl/Cmd to select multiple options
      Hold Ctrl/Cmd to select multiple options
      / mmHg

      Nose Assessment & Desired Outcome

      5
      Low
      Medium
      High
      Minimal
      Moderate
      Significant

      Your Nose Filler Suitability Assessment

      76
      Low Suitability (0-40) Moderate Suitability (41-70) High Suitability (71-100)

      Interpretation

      Based on your profile, you are a good candidate for non-surgical rhinoplasty. Your medical history shows no significant contraindications, and your desired outcome aligns well with what can be achieved with dermal fillers.

      Disclaimer: This tool provides educational information only and is not a substitute for professional medical advice. Results are simulated and individual outcomes may vary. Always consult with a qualified healthcare provider before proceeding with any cosmetic procedure.

      Read More Guides & Try More Free Tools:

      Skin-analysis-personalized-plan-and-transparent-pricing-at-doseway.com

      What Exactly is Non-Surgical Rhinoplasty and How Does It Work?

      Non-surgical rhinoplasty, often called a “liquid nose job,” is a minimally invasive cosmetic procedure that uses dermal fillers to reshape and contour the nose without surgery. This innovative approach has gained tremendous popularity due to its immediate results, minimal downtime, and reversible nature compared to traditional surgical rhinoplasty. The procedure typically involves injecting hyaluronic acid-based fillers strategically to camouflage bumps, lift drooping tips, straighten crooked noses, or improve overall symmetry.

      The fundamental principle behind non-surgical nose jobs involves adding volume to specific areas of the nose to create optical illusions that make certain features appear reduced, straightened, or lifted. Unlike surgical rhinoplasty that removes cartilage and bone, filler rhinoplasty adds material to balance proportions and create more harmonious nasal contours. Most procedures take 15-30 minutes with results visible immediately and minimal recovery time needed.

      Key advantages of non-surgical rhinoplasty include:
      ✓ Immediate results with no lengthy recovery period
      ✓ Significantly lower cost compared to surgical alternatives
      ✓ Minimal discomfort with topical anesthesia
      ✓ Reversible outcomes with hyaluronidase enzyme
      ✓ Lower risk profile than surgical rhinoplasty
      ✓ Natural-looking, gradual changes

      Non-Surgical-Rhinoplasty
      Non-Surgical-Rhinoplasty

      How Does Non-Surgical Rhinoplasty Differ From Traditional Surgical Rhinoplasty?

      Understanding the fundamental differences between surgical and non-surgical rhinoplasty is crucial for making an informed decision about which approach aligns with your aesthetic goals and medical circumstances. While both procedures aim to enhance nasal appearance, their methodologies, outcomes, and limitations vary significantly.

      Surgical rhinoplasty involves permanent structural changes through cartilage and bone manipulation, while non-surgical approaches create temporary visual improvements through filler placement. Surgical procedures can reduce nose size, narrow nostrils, and address functional issues like deviated septums, whereas filler rhinoplasty primarily adds volume to balance proportions and camouflage imperfections.

      The table below illustrates key differences:

      AspectSurgical RhinoplastyNon-Surgical Rhinoplasty
      Procedure TypeInvasive surgery with anesthesiaMinimally invasive injections
      Duration2-3 hours15-30 minutes
      Recovery Time1-2 weeks initial, months for final results24-48 hours
      ResultsPermanentTemporary (6-24 months)
      Cost$5,000-$15,000$600-$2,500
      Risk LevelHigherLower
      ReversibilityNot reversibleReversible with hyaluronidase

      Important considerations when choosing between surgical and non-surgical approaches:
      ✓ Surgical rhinoplasty can reduce nose size while fillers cannot
      ✓ Non-surgical options cannot correct functional breathing issues
      ✓ Fillers provide immediate results while surgery requires months for final outcome
      ✓ Surgical procedures offer permanent solutions versus temporary filler results
      ✓ Non-surgical approaches have significantly fewer complications

      What Are the Different Types of Dermal Fillers Used in Non-Surgical Rhinoplasty?

      The choice of dermal filler significantly impacts the safety, longevity, and appearance of non-surgical rhinoplasty results. Various filler types offer different properties, with hyaluronic acid-based fillers being the gold standard for nasal procedures due to their reversibility and favorable safety profile.

      Hyaluronic acid fillers represent the most popular category for non-surgical nose jobs due to their reversible nature and natural integration with tissues. These include Juvederm Voluma, Restylane Lyft, and Belotero Balance, each offering different viscosity and elasticity properties suitable for various nasal concerns. HA fillers typically last 9-18 months in the nasal area and can be dissolved quickly if necessary.

      Calcium hydroxylapatite fillers like Radiesse provide more structural support and stimulate collagen production, offering longer-lasting results of 12-24 months. However, these cannot be reversed easily and require more experienced injectors for nasal use. Poly-L-lactic acid fillers such as Sculptra offer even longer duration but work gradually through collagen stimulation over several months.

      Key filler characteristics to consider:
      ✓ Hyaluronic acid fillers: Reversible, natural-looking, 9-18 month duration
      ✓ Calcium hydroxylapatite: Structural support, collagen stimulation, 12-24 month duration
      ✓ Poly-L-lactic acid: Gradual collagen building, longest-lasting results
      ✓ PMMA (polymethylmethacrylate): Permanent option with highest risk profile

      Who is the Ideal Candidate for Non-Surgical Rhinoplasty?

      Determining your suitability for non-surgical rhinoplasty involves evaluating multiple medical and aesthetic factors that impact both safety outcomes and aesthetic results. Ideal candidates typically seek minor to moderate nasal improvements rather than dramatic size reduction or functional corrections.

      The perfect candidate for filler rhinoplasty generally has mild to moderate concerns including dorsal humps, drooping nasal tips, slight asymmetries, or age-related volume loss. These individuals typically have good skin quality, realistic expectations, and no contraindications to dermal fillers. Our Nose Filler Simulator assesses these factors through detailed medical history and nasal assessment questions.

      Medical contraindications include active skin infections, history of severe allergic reactions, bleeding disorders, autoimmune conditions affecting healing, and previous unsatisfactory reactions to fillers. Additionally, individuals with very thin skin or excessive sebaceous glands may experience less optimal results due to visibility of filler or increased complication risks.

      Ideal candidate characteristics:
      ✓ Seeking minor dorsal hump camouflage
      ✓ Desire nasal tip elevation or definition
      ✓ Wish to correct mild asymmetries
      ✓ Want to improve nose symmetry with other facial features
      ✓ Prefer minimal downtime and reversible procedures
      ✓ Have realistic expectations about limitations

      What Are the Potential Risks and Complications of Non-Surgical Nose Jobs?

      While non-surgical rhinoplasty boasts a superior safety profile compared to surgical alternatives, understanding potential complications remains essential for informed consent and proper risk management. Most serious complications arise from vascular compromise when filler inadvertently enters blood vessels.

      Vascular complications represent the most severe risks associated with nasal fillers, including blindness from retinal artery occlusion or skin necrosis from blocked facial arteries. These occur in approximately 0.05% of cases but can have devastating permanent consequences. Choosing experienced injectors who understand nasal anatomy significantly reduces these risks.

      Common temporary side effects include swelling, bruising, redness, and tenderness at injection sites, typically resolving within 3-7 days. Less common issues include filler migration, visible lumps, Tyndall effect (bluish discoloration), allergic reactions, or infection. Most hyaluronic acid filler complications can be reversed with hyaluronidase injection.

      Risk mitigation strategies:
      ✓ Choose board-certified providers with nasal filler experience
      ✓ Ensure hyaluronidase availability for emergency reversal
      ✓ Avoid procedures during active infection or illness
      ✓ Discontinue blood-thinning medications beforehand (under medical supervision)
      ✓ Follow all pre- and post-procedure instructions carefully

      How Much Does Non-Surgical Rhinoplasty Cost Compared to Traditional Surgery?

      Cost considerations play a significant role in choosing between surgical and non-surgical rhinoplasty options, with filler procedures offering substantial savings upfront but requiring maintenance over time. Understanding the complete financial picture helps in making economically sound decisions aligned with long-term aesthetic goals.

      The average cost of non-surgical rhinoplasty ranges from $600-$2,500 per treatment, depending on geographic location, provider expertise, and filler type/amount required. This compares favorably to surgical rhinoplasty costing $5,000-$15,000 or more. However, filler maintenance every 9-24 months means long-term costs may eventually exceed surgical investment.

      Several factors influence non-surgical rhinoplasty pricing including filler brand (Juvederm typically costs more than Restylane), provider expertise (board-certified plastic surgeons charge more than medi-spa injectors), geographic location (urban centers command higher prices), and complexity of corrections needed.

      Cost breakdown considerations:
      ✓ Initial non-surgical procedure: $600-$2,500
      ✓ Maintenance treatments every 9-24 months: $600-$2,500 each
      ✓ Surgical rhinoplasty: $5,000-$15,000 (one-time permanent investment)
      ✓ Additional costs for revision surgery: 15-20% of original surgical cost
      ✓ Non-surgical revision costs: Typically lower than initial treatment

      Doseway-aesthetic-procedures-andonline-booking-details

      What is the Recovery Process Like After Non-Surgical Rhinoplasty?

      The minimal recovery time associated with non-surgical rhinoplasty represents one of its most appealing advantages over surgical alternatives. Most patients resume normal activities immediately with only minor temporary restrictions and minimal visible signs of treatment.

      Immediately after the procedure, patients typically experience mild swelling, redness, and possible minor bruising at injection sites. Applying ice packs intermittently for the first 24-48 hours significantly reduces swelling and discomfort. Most visible effects diminish within 3-7 days, though subtle swelling may persist for 2-4 weeks before final results stabilize.

      Post-procedure restrictions include avoiding strenuous exercise for 48 hours, refraining from touching or massaging the treated area unless directed, sleeping on your back, and avoiding excessive heat exposure like saunas or hot yoga for one week. Makeup can typically be applied the following day once any pinpoint bleeding sites have closed.

      Recovery timeline:
      ✓ Day 1-2: Mild swelling and tenderness, possible bruising
      ✓ Day 3-7: Significant reduction in swelling, bruising fading
      ✓ Week 2-4: Subtle swelling resolves, final results emerge
      ✓ Month 2-3: Optimal results visible as filler integrates fully

      How Long Do Results From Non-Surgical Nose Jobs Typically Last?

      The longevity of non-surgical rhinoplasty results varies significantly based on filler type, injection technique, individual metabolism, and lifestyle factors. Understanding expected duration helps in planning maintenance schedules and budgeting for ongoing treatments.

      Hyaluronic acid-based fillers, the most common choice for nasal procedures, typically last 9-18 months in the nasal area. The dense connective tissue and minimal muscle movement in the nose contribute to longer duration compared to more dynamic facial areas. Thicker HA fillers like Juvederm Voluma generally outlast thinner formulations.

      Calcium hydroxylapatite fillers such as Radiesse provide longer-lasting results of 12-24 months due to their collagen-stimulating properties. Poly-L-lactic acid (Sculptra) offers the most durable outcomes with results developing gradually over months and potentially lasting 2+ years, though it’s less commonly used in the nose due to its subtle, building nature.

      Factors affecting longevity:
      ✓ Filler type and brand (HA vs. biostimulatory)
      ✓ Individual metabolic rate and lifestyle
      ✓ Injection technique and depth of placement
      ✓ Amount of filler used and treatment areas
      ✓ Sun exposure and smoking habits

      Can Non-Surgical Rhinoplasty Correct Breathing Issues or Deviated Septums?

      A critical distinction between surgical and non-surgical rhinoplasty involves their capacity to address functional nasal concerns alongside aesthetic improvements. Understanding these limitations prevents unrealistic expectations and inappropriate procedure selection.

      Non-surgical rhinoplasty cannot correct structural breathing impairments, deviated septums, or nasal valve collapse. These functional issues require surgical intervention to reshape nasal structures and open airways. In some cases, fillers might potentially worsen breathing if placed in ways that narrow nasal passages.

      However, minor functional improvements sometimes occur indirectly when fillers improve external nasal valve support or correct certain types of nasal collapse. These benefits are incidental rather than primary treatment goals. Patients with both aesthetic and functional concerns typically benefit from combined approaches or staged procedures.

      Functional limitations of non-surgical rhinoplasty:
      ✓ Cannot straighten deviated septum
      ✓ Cannot reduce turbinate size
      ✓ Cannot repair nasal valve collapse
      ✓ Cannot correct cleft lip nasal deformities
      ✓ Cannot address significant structural abnormalities

      What Should I Look For When Choosing a Provider for Non-Surgical Rhinoplasty?

      Selecting an appropriately qualified provider represents the most important factor in achieving safe, satisfactory non-surgical rhinoplasty results. The complexity of nasal anatomy demands expertise beyond basic filler injection training.

      Ideal providers include board-certified plastic surgeons, facial plastic surgeons, dermatologists, or oculoplastic surgeons with specific training and experience in nasal filler procedures. These specialists possess comprehensive understanding of nasal vasculature and can manage potential complications effectively. Avoid practitioners without medical credentials regardless of their injection experience.

      During consultations, ask about the provider’s specific experience with nasal fillers, including approximate case numbers, complication rates, and before/after photos of actual patients. Inquire about their emergency protocols for vascular complications and availability of hyaluronidase. Beware of practitioners who dismiss risks or promise unrealistic results.

      Provider selection criteria:
      ✓ Board certification in relevant medical specialty
      ✓ Specific training in advanced filler techniques
      ✓ Extensive nasal anatomy knowledge
      ✓ Comprehensive before/after portfolio
      ✓ Clear emergency complication protocols
      ✓ Appropriate medical facility standards

      How Does the Nose Filler Simulator & Outcome Visualizer Work?

      Our innovative Nose Filler Simulator represents a groundbreaking tool that helps potential candidates assess their suitability for non-surgical rhinoplasty while visualizing potential outcomes. This comprehensive digital assessment evaluates multiple factors to generate personalized recommendations.

      The simulator collects demographic information, detailed medical history, and specific nasal concerns through an intuitive multi-step interface. Advanced algorithms process this data against established medical guidelines to calculate a suitability score between 0-100. This score reflects both safety considerations and likely satisfaction with potential outcomes.

      The visualization component uses anatomical modeling to show how different filler approaches might transform your nasal appearance based on your specific concerns and facial proportions. This helps set realistic expectations and facilitates more productive consultations with actual providers.

      Key assessment factors:
      ✓ Medical history and contraindications
      ✓ Nasal anatomy and skin characteristics
      ✓ Aesthetic goals and desired outcomes
      ✓ Previous nasal procedures or treatments
      ✓ Realism of expectations and motivations

      What Do the Results From the Nose Filler Simulator Mean?

      Understanding your simulator results helps interpret whether non-surgical rhinoplasty represents an appropriate option for your specific circumstances. The scoring system categorizes candidates into three distinct groups with corresponding recommendations.

      Scores between 85-100 indicate excellent candidacy with high likelihood of satisfactory outcomes and minimal risk factors. These individuals typically seek corrections well within filler capabilities, possess suitable nasal anatomy, and have no significant medical contraindications. They can proceed with consultations with qualified providers.

      Scores from 60-84 suggest moderate suitability with some factors requiring special consideration or modification. These candidates might have minor medical considerations, more complex nasal concerns, or need tempering of expectations. They benefit from thorough discussions with experienced providers about realistic outcomes.

      Scores below 60 indicate poor candidacy due to significant medical contraindications, inappropriate expectations, or anatomical limitations. These individuals should explore alternative approaches or address modifiable factors before reconsidering non-surgical options.

      Result interpretation guide:
      ✓ 85-100: Excellent candidate – proceed with consultation
      ✓ 70-84: Good candidate – discuss specific considerations with provider
      ✓ 60-69: Moderate candidate – explore alternatives and modifications
      ✓ Below 60: Poor candidate – consider other options

      Skin-and-aesthetic-procedures-online-appointments-doseway.com

      What Are the Most Important Pre-Treatment Considerations for Non-Surgical Rhinoplasty?

      Proper preparation significantly enhances both safety profiles and aesthetic outcomes of non-surgical rhinoplasty procedures. Thoughtful pre-treatment planning addresses potential complications while optimizing the procedural experience and results.

      Medical preparation includes disclosing complete health history, current medications, and allergies to your provider. Discontinuation of blood-thinning medications like aspirin, ibuprofen, and certain supplements (fish oil, vitamin E, ginkgo) 7-10 days before treatment reduces bruising risks. However, never discontinue prescription medications without physician approval.

      Practical preparations involve arranging transportation if anxious about the procedure, planning social downtime for potential bruising, and completing important events before your treatment. Bring reference photos illustrating your desired outcomes and prepare specific questions for your provider regarding technique, filler choice, and emergency protocols.

      Pre-treatment checklist:
      ✓ Comprehensive medical history disclosure
      ✓ Medication and supplement adjustment (with doctor approval)
      ✓ Avoidance of alcohol 24-48 hours before procedure
      ✓ Realistic expectation setting with reference photos
      ✓ Understanding of potential complications and management
      ✓ Arrangement of post-treatment recovery time if needed

      What Post-Treatment Care Maximizes Results and Minimizes Complications?

      Appropriate aftercare following non-surgical rhinoplasty significantly influences both immediate recovery and long-term results. Following provider-specific instructions prevents complications while optimizing the aesthetic outcome of your procedure.

      Immediate post-treatment care involves gentle application of cold compresses to reduce swelling, avoiding pressure on the treated area, and maintaining upright positioning for several hours. Sleeping on your back with elevated head position for the first few nights minimizes morning swelling and prevents filler displacement.

      Activity restrictions typically include avoiding strenuous exercise for 48 hours, excessive facial movements, and extreme temperatures (saunas, ice baths) for one week. Gentle cleansing and avoidance of aggressive skincare products around the treatment area prevents irritation during initial healing.

      Long-term maintenance involves sun protection with broad-spectrum SPF 30+ products, healthy lifestyle habits, and scheduling follow-up appointments as recommended. Understanding that subtle swelling may persist for several weeks prevents premature disappointment with initial results.

      Aftercare protocol:
      ✓ First 24 hours: Ice application, avoid touching/massaging area
      ✓ Days 2-7: Sleep elevated, avoid strenuous activity
      ✓ Weeks 2-4: Sun protection, gentle skincare
      ✓ Month 1+: Follow-up assessment, maintenance planning

      Can Non-Surgical Rhinoplasty Be Combined With Other Facial Treatments?

      Strategic combination of non-surgical rhinoplasty with complementary facial treatments often produces superior overall aesthetic results compared to isolated procedures. Understanding appropriate treatment sequencing and timing maximizes outcomes while maintaining safety.

      Common combination approaches include pairing nasal fillers with chin augmentation to improve facial harmony, or with cheek enhancement to create better structural balance. Neuromodulators like Botox can address adjacent concerns like bunny lines or brow positioning that might emphasize nasal features.

      Treatment sequencing typically prioritizes structural procedures like rhinoplasty before addressing more superficial concerns. Allow 2-4 weeks between procedures to assess results and determine additional needs. Avoid over-treating multiple areas simultaneously as this complicates assessing individual treatment effects and managing potential complications.

      Ideal combination treatments:
      ✓ Chin augmentation for facial balance
      ✓ Cheek enhancement for structural support
      ✓ Lip refinement for proportional balance
      ✓ Neuromodulators for adjacent dynamic lines
      ✓ Skin resurfacing for overall complexion improvement

      Board-certified-aesthetic-specialist-at-doseway.com-ready-to-discuss-your-skin-goals

      What Are the Most Common Myths and Misconceptions About Non-Surgical Rhinoplasty?

      Dispelling prevalent myths surrounding non-surgical rhinoplasty helps potential candidates develop realistic expectations and make informed decisions based on factual information rather than popular misconceptions.

      The most dangerous myth suggests that non-surgical rhinoplasty is completely risk-free and suitable for everyone. In reality, while safer than surgery, significant complications can occur, particularly with inexperienced providers or inappropriate candidate selection. Vascular complications, though rare, can have devastating permanent consequences.

      Another common misconception involves expectations of dramatic size reduction. Non-surgical approaches cannot significantly reduce nose size but rather create optical illusions through strategic volume addition. Patients seeking substantial size reduction typically require surgical intervention for satisfactory outcomes.

      Additional myths to dispel:
      ✓ “Results are immediately perfect” – subtle swelling masks final results for weeks
      ✓ “Any injector can perform nasal fillers” – nasal anatomy demands specialized expertise
      ✓ “All fillers work the same in the nose” – different formulations suit different concerns
      ✓ “The procedure is completely painless” – discomfort varies by individual tolerance
      ✓ “Results look obviously fake” – skilled providers create natural enhancements

      How Has Non-Surgical Rhinoplasty Evolved and What Does the Future Hold?

      The field of non-surgical rhinoplasty has undergone significant evolution since its introduction, with ongoing advancements improving both safety profiles and aesthetic outcomes. Understanding current trends and future directions helps contextualize modern approaches.

      Early nasal filler techniques focused primarily on dorsal hump camouflage with limited understanding of nasal vascular safety. Modern approaches incorporate sophisticated anatomical knowledge, ultrasound guidance capabilities, and advanced filler formulations specifically designed for structural applications. The development of reversible hyaluronic acid fillers represented a major safety advancement.

      Future directions include bioactive fillers with longer duration and improved tissue integration, advanced imaging for pre-procedure planning, and refined techniques for more sophisticated corrections. The growing emphasis on combination approaches addressing overall facial harmony rather than isolated nasal concerns represents another significant evolution in treatment philosophy.

      Evolutionary milestones:
      ✓ Early 2000s: Basic hump camouflage techniques
      ✓ 2010s: Improved safety protocols and reversible fillers
      ✓ Present: Sophisticated structural approaches and facial balancing
      ✓ Future: Bioactive fillers and advanced imaging integration

      Womans-with-glowing-skin-after-successful-aesthetic-treatment-Book-a-free-consultation-at-doseway.com.

      Frequently Asked Questions About Non-Surgical Rhinoplasty

      How painful is non-surgical rhinoplasty?
      Most patients describe the discomfort as mild to moderate, similar to other filler injections. Topical numbing cream applied beforehand significantly reduces sensation. Some providers use dental blocks or nerve blocks for complete comfort during the procedure. The nasal area contains more nerve endings than some other facial regions, making it somewhat more sensitive than cheek or chin filler placements.

      Can fillers completely replace a surgical nose job?
      No, fillers cannot replace surgical rhinoplasty for all concerns. While excellent for camouflage, minor straightening, and tip elevation, they cannot reduce nose size, narrow nostrils, or correct functional issues. The best candidates for non-surgical approaches are those seeking subtle refinements rather than dramatic transformations or functional improvements.

      What happens if I don’t like my results?
      Hyaluronic acid fillers can be partially or completely reversed with hyaluronidase injections, typically within 24-48 hours. This represents a significant advantage over permanent surgical results. However, early dissolution may not be perfect, and some temporary irregularities might persist until the enzyme fully metabolizes the filler.

      How soon can I wear glasses after non-surgical rhinoplasty?
      Wait at least 1-2 weeks before resuming regular glasses wear to avoid pressure on the treated areas. Consider contact lenses during this period or discuss alternative solutions with your provider. For sunglasses, lighter frames may be tolerable sooner than heavy prescription glasses.

      Are the results from non-surgical rhinoplasty natural-looking?
      When performed by skilled providers, results appear very natural since fillers integrate with your own tissues. The goal is typically enhancement rather than dramatic change, preserving your inherent facial characteristics while improving balance and symmetry. Overfilling or poor technique can create artificial appearances.

      How many treatments are needed for optimal results?
      Most patients achieve satisfactory results in a single session, though touch-ups after 2-4 weeks sometimes refine outcomes once swelling resolves. Complex corrections or very conservative initial approaches might require multiple sessions. Maintenance treatments are typically needed every 9-24 months depending on filler type.

      Can non-surgical rhinoplasty make my nose look smaller?
      While fillers cannot physically reduce nasal size, strategic placement can create optical illusions that make the nose appear smaller, straighter, or more proportional to other facial features. Adding volume to the bridge can make a hump less prominent, while tip elevation can shorten appearance.

      Affiliate Product Recommendations

      1. ZO Skin Health Sunscreen & Primers (pre/post procedure care)
      2. Revision Skincare D.E.J. Face Cream (skin preparation)
      3. Alastin Skincare Regenerating Skin Nectar (recovery enhancement)
      4. Coola Organic Sunscreen products (sun protection)
      5. Arnica Montana supplements (bruise reduction)
      6. LED light therapy masks (recovery acceleration)
      7. StackedSkincare Micro-Roller (complementary treatment)
      Panniculectomy-VS-Tummy-Tuck-Surgery

      Panniculectomy VS Tummy Tuck Surgery Cost Calculator

      Panniculectomy VS Tummy Tuck: When considering abdominal contouring surgery, understanding the critical differences between panniculectomy and tummy tuck procedures is essential for making an informed decision. These two surgical approaches address excess abdominal tissue but serve distinct purposes with different outcomes, recovery processes, and cost implications. This comprehensive guide examines every aspect of both procedures through detailed comparisons, clinical insights, and practical considerations.

      ✓ Medical Purpose: Panniculectomy focuses on functional improvement while tummy tuck emphasizes cosmetic enhancement
      ✓ Surgical Complexity: Tummy tuck involves muscle repair and more extensive tissue manipulation
      ✓ Cost Variables: Procedure costs vary significantly based on technique, location, and surgeon expertise
      ✓ Recovery Timeline: Healing periods differ substantially between these abdominal surgeries
      ✓ Insurance Coverage: Panniculectomy may qualify for insurance coverage under specific medical conditions

      Panniculectomy vs. Tummy Tuck Calculator

      Panniculectomy vs. Tummy Tuck Calculator

      Assess your suitability and estimate costs for abdominal contouring procedures

      1 Demographics
      2 Medical History
      3 Procedure Details
      4 Results

      Personal Information

      Medical History

      Procedure Details & Goals

      Your Assessment Results

      72/100

      Suitability Score

      Interpretation

      Based on your inputs, you appear to be a good candidate for abdominal contouring surgery. Your moderate score suggests that either procedure could be appropriate, depending on your specific goals and medical considerations.

      Recommendations

      • Consult with a board-certified plastic surgeon to discuss both procedures
      • Consider panniculectomy if functional improvement is your primary goal
      • Consider tummy tuck if cosmetic improvement is equally important
      • Discuss your medical history thoroughly with your surgeon
      • Ensure you have adequate support during your recovery period

      Estimated Costs

      Panniculectomy

      $8,000 – $15,000

      Tummy Tuck

      $6,000 – $12,000

      Note: Costs vary by location, surgeon experience, and procedure complexity

      Disclaimer: This calculator provides estimates only and is not a substitute for professional medical advice. Always consult with a qualified healthcare provider for personalized recommendations.

      Read More Guides & Try More Free Tools:

      Skin-analysis-personalized-plan-and-transparent-pricing-at-doseway.com

      What is the Fundamental Difference Between Panniculectomy VS Tummy Tuck?

      The primary distinction between panniculectomy and abdominoplasty (tummy tuck) lies in their surgical objectives and procedural techniques. Panniculectomy represents a functional surgical procedure designed to remove hanging abdominal tissue (pannus) that causes health issues, while tummy tuck constitutes a cosmetic procedure focused on aesthetic improvement of abdominal contour and appearance.

      Panniculectomy surgical characteristics:
      ✓ Medical necessity driven: Addresses functional problems like skin irritation and mobility issues
      ✓ Limited scope: Focuses exclusively on excess skin and fat removal
      ✓ Minimal muscle work: Typically doesn't include muscle repair
      ✓ Insurance coverage potential: Often covered when medically necessary
      ✓ Functional outcome priority: Emphasizes health improvement over appearance

      Tummy tuck surgical characteristics:
      ✓ Aesthetically driven: Primarily focuses on cosmetic enhancement
      ✓ Comprehensive approach: Addresses skin, fat, and muscle layers
      ✓ Muscle repair: Includes diastasis recti correction
      ✓ Self-pay typically: Rarely covered by insurance
      ✓ Cosmetic outcome priority: Emphasizes abdominal contour improvement

      The surgical decision between these procedures depends entirely on patient goals, medical necessity, anatomical considerations, and expected outcomes. Understanding these fundamental differences provides the foundation for appropriate procedure selection.

      Panniculectomy-VS-Tummy-Tuck-Surgery
      Panniculectomy-VS-Tummy-Tuck-Surgery

      How Do Patient Selection Criteria Differ Between These Procedures?

      Patient selection represents a critical component in determining appropriate candidates for panniculectomy versus tummy tuck procedures. The ideal candidate profile varies significantly between these surgical approaches based on medical history, physical examination findings, and patient expectations.

      Panniculectomy Candidate Profile

      Medical necessity drives patient selection for panniculectomy procedures. The ideal candidate typically presents with specific functional impairments requiring surgical intervention.

      Panniculectomy patient qualifications:
      ✓ Significant abdominal apron: Presence of hanging pannus that interferes with daily activities
      ✓ Chronic skin conditions: Recurrent infections, rashes, or ulcerations beneath abdominal fold
      ✓ Mobility limitations: Restricted movement or difficulty with physical activities
      ✓ Weight stability: Maintenance of stable weight for 6-12 months
      ✓ Realistic expectations: Understanding of functional versus cosmetic outcomes

      Medical documentation requirements typically include:
      • Photographic evidence of abdominal pannus
      • Medical records documenting chronic skin conditions
      • Failed conservative treatments (medicated powders, barrier creams)
      • Functional limitations affecting daily living activities

      Tummy Tuck Candidate Profile

      Cosmetic goals primarily determine tummy tuck candidacy, focusing on abdominal contour improvement rather than functional impairment resolution.

      Tummy tuck patient qualifications:
      ✓ Localized fat deposits: Excess abdominal fat resistant to diet and exercise
      ✓ Lax abdominal skin: Redundant tissue resulting from weight loss or pregnancy
      ✓ Muscle separation: Diastasis recti causing abdominal protrusion
      ✓ Good overall health: No medical conditions that impair healing
      ✓ Non-smoker status: Willingness to cease nicotine products before and after surgery
      ✓ Realistic aesthetic expectations: Understanding of surgical limitations and outcomes

      Physical examination considerations include:
      • Skin quality and elasticity assessment
      • Degree of muscle separation evaluation
      • Fat distribution pattern analysis
      • Existing scar placement evaluation

      What Surgical Techniques Distinguish Panniculectomy from Tummy Tuck?

      The technical execution of panniculectomy and tummy tuck procedures demonstrates significant variation in surgical approach, tissue manipulation, and anatomical focus. Understanding these technical differences helps clarify why these procedures produce different outcomes.

      Panniculectomy Surgical Approach

      Panniculectomy employs a targeted surgical technique focused specifically on removing the hanging abdominal pannus with minimal attention to aesthetic refinement.

      Panniculectomy surgical steps:
      ✓ Incision planning: Horizontal incision placed strategically to remove maximum tissue
      ✓ Tissue excision: Removal of hanging abdominal apron
      ✓ Limited undermining: Minimal separation of surrounding tissues
      ✓ Wound closure: Straight-line closure without extensive contouring
      ✓ Drain placement: Surgical drains to prevent fluid accumulation

      Technical limitations of panniculectomy:
      • No muscle repair or tightening
      • Limited attention to aesthetic belly button appearance
      • Straight-line scar without extensive contouring
      • No liposuction component typically included

      Tummy Tuck Surgical Approach

      Abdominoplasty utilizes comprehensive surgical techniques addressing multiple abdominal layers with careful attention to aesthetic outcomes.

      Tummy tuck surgical steps:
      ✓ Strategic incision: Low transverse incision with potential vertical component
      ✓ Systematic undermining: Elevation of abdominal skin and fat
      ✓ Muscle repair: Plication (tightening) of rectus muscles
      ✓ Umbilical reconstruction: Repositioning and reshaping of belly button
      ✓ Liposuction incorporation: Contouring of adjacent areas
      ✓ Aesthetic closure: Tension-adjusted closure with attention to scar placement

      Advanced tummy tuck variations:
      • Mini tummy tuck: Limited incision addressing lower abdomen only
      • Fleur-de-lis tummy tuck: Additional vertical incision for massive weight loss patients
      • Extended tummy tuck: Addressing flank and lateral thigh areas
      • Circumferential tummy tuck: Addressing entire trunk circumference

      What Does the Recovery Process Entail for Each Procedure?

      Postoperative recovery represents a significant consideration when choosing between panniculectomy and tummy tuck procedures. The recovery timeline, activity restrictions, and postoperative care requirements differ substantially between these surgical approaches.

      Panniculectomy Recovery Timeline

      The panniculectomy recovery process typically follows a predictable pattern with specific milestones and activity restrictions.

      Immediate postoperative period (Days 1-7):
      ✓ Hospital stay: 1-3 days typically required
      ✓ Pain management: Oral pain medications and muscle relaxants
      ✓ Drain care: Management of surgical drainage systems
      ✓ Limited mobility: Ambulation with assistance and flexion at waist
      ✓ Wound care: Incision monitoring and dressing changes

      Early recovery phase (Weeks 2-6):
      ✓ Gradual activity increase: Progressive walking and light activities
      ✓ Drain removal: Typically within 1-3 weeks postoperatively
      ✓ Compression garment: Worn continuously for 4-6 weeks
      ✓ Work restrictions: Desk jobs 2-4 weeks, physical jobs 6-8 weeks

      Long-term recovery (Months 2-6):
      ✓ Scar maturation: Progressive fading and flattening of incision
      ✓ Activity normalization: Gradual return to all preoperative activities
      ✓ Final results: Apparent within 3-6 months postoperatively

      Tummy Tuck Recovery Timeline

      Tummy tuck recovery typically involves a more extensive process due to the comprehensive nature of the surgical procedure.

      Immediate postoperative period (Days 1-7):
      ✓ Surgical positioning: Flexed posture to minimize tension on incision
      ✓ Pain management: Multimodal approach including regional anesthesia
      ✓ Drain maintenance: Care of 1-2 surgical drains
      ✓ Limited mobility: Ambulation with assistance while flexed at waist
      ✓ Incision monitoring: Careful observation for healing complications

      Early recovery phase (Weeks 2-6):
      ✓ Progressive standing: Gradual transition to upright posture
      ✓ Activity progression: Gradual increase in walking distance and duration
      ✓ Garment use: Compression garment for 6-8 weeks typically
      ✓ Work limitations: Sedentary employment at 2-3 weeks, physical employment at 6-8 weeks

      Long-term recovery (Months 2-12):
      ✓ Swelling resolution: Progressive decrease in abdominal edema
      ✓ Sensation return: Gradual normalization of abdominal skin sensation
      ✓ Scar maturation: Progressive improvement in scar appearance
      ✓ Final contour: Apparent within 6-12 months postoperatively

      Doseway-aesthetic-procedures-andonline-booking-details

      How Do Cost Considerations Differ Between Panniculectomy and Tummy Tuck?

      Financial aspects represent a significant factor in surgical decision-making between panniculectomy and tummy tuck procedures. The cost structure, insurance coverage potential, and value proposition vary considerably between these abdominal surgeries.

      Panniculectomy Cost Factors

      Panniculectomy costs demonstrate significant variability based on surgical complexity, geographic location, and facility fees.

      Primary cost components:
      ✓ Surgeon fees: $3,000-$7,000 typically
      ✓ Anesthesia fees: $1,000-$3,000 depending on case length
      ✓ Facility fees: $2,000-$6,000 for hospital or surgical center
      ✓ Medical tests: Preoperative laboratory and diagnostic studies
      ✓ Surgical supplies: Garments, dressings, and drain supplies

      Insurance coverage considerations:
      • Medical necessity documentation: Comprehensive records required
      • Pre-authorization process: Often required before surgery
      • Out-of-pocket expenses: Deductibles and co-insurance payments
      • Appeal process: Potential for denial and subsequent appeal

      Tummy Tuck Cost Factors

      Tummy tuck procedures typically involve higher costs due to increased surgical time, technique complexity, and cosmetic nature of the procedure.

      Primary cost components:
      ✓ Surgeon fees: $4,000-$12,000 based on experience and technique
      ✓ Anesthesia fees: $1,500-$3,500 for comprehensive anesthesia care
      ✓ Facility fees: $3,000-$8,000 for accredited surgical facilities
      ✓ Implants or additional procedures: Combined procedures increase costs
      ✓ Postoperative care: Follow-up visits and potential revisions

      Financial considerations:
      • Cosmetic exclusion: Typically not covered by insurance
      • Financing options: Payment plans through medical credit companies
      • Combined procedure value: Potential cost savings when combining procedures
      • Surgeon selection impact: Experience level affects fee structure

      What Are the Potential Risks and Complications of Each Procedure?

      Surgical risk assessment represents an essential component of informed consent for both panniculectomy and tummy tuck procedures. Understanding potential complications helps establish realistic expectations and facilitates appropriate procedure selection.

      Panniculectomy Risks and Complications

      Panniculectomy carries specific risks related to the nature of the procedure and patient population typically undergoing this surgery.

      Common panniculectomy complications:
      ✓ Wound healing issues: 15-30% incidence in some studies
      ✓ Seroma formation: Fluid accumulation requiring drainage
      ✓ Infection: Superficial or deep surgical site infections
      ✓ Bleeding: Hematoma formation requiring evacuation
      ✓ Scar abnormalities: Hypertrophic or widened scarring
      ✓ Asymmetry: Uneven contour or residual tissue

      Risk reduction strategies:
      • Meticulous surgical technique with attention to blood supply
      • Appropriate drain placement and management
      • Sequential compression devices for thrombosis prevention
      • Antibiotic prophylaxis based on surgical guidelines
      • Close postoperative follow-up for early complication detection

      Tummy Tuck Risks and Complications

      Tummy tuck procedures carry additional risks related to the more extensive nature of the surgery and muscle manipulation.

      Common tummy tuck complications:
      ✓ Seroma formation: Most common complication (5-15% incidence)
      ✓ Wound separation: Tension-related healing issues
      ✓ Skin necrosis: Tissue loss due to compromised blood supply
      ✓ Numbness: Expected temporary sensation changes
      ✓ Deep vein thrombosis: Blood clot prevention essential
      ✓ Unsatisfactory scarring: Visible or poorly positioned scars
      ✓ Contour irregularities: Uneven abdominal appearance

      Risk mitigation approaches:
      • Careful patient selection with attention to risk factors
      • Meticulous surgical technique with preservation of blood supply
      • Appropriate use of thromboprophylaxis measures
      • Judicious fluid management during surgery
      • Progressive tension techniques to minimize seroma formation

      How Do Results and Long-Term Outcomes Compare Between Procedures?

      Long-term outcomes demonstrate significant variation between panniculectomy and tummy tuck procedures based on their differing surgical objectives and technical approaches. Understanding these outcome differences facilitates appropriate patient expectations and surgical satisfaction.

      Panniculectomy Long-Term Results

      Panniculectomy outcomes primarily focus on functional improvement with secondary attention to aesthetic appearance.

      Functional outcome improvements:
      ✓ Resolution of skin conditions: Elimination of intertrigo and chronic infections
      ✓ Improved mobility: Enhanced ability to perform physical activities
      ✓ Clothing fit improvement: Better fitting clothing and undergarments
      ✓ Hygiene enhancement: Easier maintenance of personal hygiene
      ✓ Physical comfort: Reduction in back pain and physical discomfort

      Aesthetic outcome considerations:
      • Significant improvement in abdominal contour
      • Visible surgical scar typically positioned horizontally
      • Potential for residual skin laxity above incision
      • No improvement in abdominal muscle tone
      • Possible dog-ear formation at incision ends

      Patient satisfaction factors:
      • Functional improvement typically exceeds aesthetic satisfaction
      • Scar appearance represents common concern
      • Weight stability crucial for result maintenance
      • Realistic preoperative expectations correlate with satisfaction

      Tummy Tuck Long-Term Results

      Tummy tuck outcomes prioritize aesthetic improvement with comprehensive abdominal enhancement.

      Aesthetic outcome improvements:
      ✓ Abdominal flattening: Significant improvement in abdominal contour
      ✓ Muscle tightening: Improved core strength and waist definition
      ✓ Stretch mark reduction: Elimination of stretch marks below belly button
      ✓ Scar positioning: Strategically placed low transverse scar
      ✓ Umbilical enhancement: Improved belly button appearance

      Functional outcome considerations:
      • Potential improvement in urinary incontinence
      • Possible enhancement of core stability
      • Potential relief of back pain from improved posture
      • No significant impact on weight loss maintenance
      • Possible improvement in physical activity tolerance

      Patient satisfaction factors:
      • Aesthetic outcome primary driver of satisfaction
      • Scar quality and position significantly impact satisfaction
      • Management of expectations crucial for satisfaction
      • Weight stability essential for result longevity
      • Secondary procedures occasionally required for optimal results

      Skin-and-aesthetic-procedures-online-appointments-doseway.com

      What Are the Key Decision Factors When Choosing Between Procedures?

      The decision-making process between panniculectomy and tummy tuck involves careful consideration of multiple medical, personal, and practical factors. Understanding these decision points facilitates appropriate procedure selection aligned with individual patient goals and circumstances.

      Medical Necessity Assessment

      Medical need represents the primary determinant in procedure selection, significantly impacting insurance coverage and surgical approach.

      Medical necessity indicators for panniculectomy:
      ✓ Chronic skin conditions: Documented rashes, infections, or ulcerations
      ✓ Functional impairment: Mobility limitations or interference with daily activities
      ✓ Hygiene difficulties: Inability to properly clean beneath abdominal pannus
      ✓ Conservative treatment failure: Medicated creams, powders, or barrier methods
      ✓ Pain symptoms: Back pain, shoulder grooving from bra straps

      Insurance documentation requirements:
      • Photographic evidence of abdominal pannus
      • Medical records documenting chronic conditions
      • Physical therapy records for pain management
      • Dermatology treatment records for skin conditions
      • Detailed letter of medical necessity from surgeon

      Personal Goals and Expectations

      Patient priorities significantly influence procedure selection between functionally-oriented panniculectomy and aesthetically-focused tummy tuck.

      Aesthetic goal considerations:
      • Desire for comprehensive abdominal improvement
      • Importance of muscle tightening and waist definition
      • Willingness to accept more extensive surgery and recovery
      • Financial investment in cosmetic outcome
      • Willingness to maintain results through weight stability

      Functional goal considerations:
      • Primary concern regarding health and functional issues
      • Willingness to accept less comprehensive aesthetic improvement
      • Preference for potential insurance coverage
      • Reduced concern regarding scar appearance
      • Focus on resolution of specific medical symptoms

      Practical Considerations

      Practical aspects including financial factors, recovery time, and surgeon selection impact procedure decisions.

      Financial considerations:
      • Insurance coverage potential versus out-of-pocket expenses
      • Willingness to navigate insurance pre-authorization process
      • Available financing options for cosmetic procedures
      • Value assessment of potential outcomes

      Recovery considerations:
      • Available time off work and family responsibilities
      • Support system availability during recovery period
      • Tolerance for postoperative discomfort and activity restrictions
      • Willingness to accept longer recovery for enhanced results

      How Does Combined Panniculectomy and Tummy Tuck Work?

      Combined procedures represent an innovative surgical approach that addresses both functional and aesthetic concerns simultaneously. Understanding the benefits, limitations, and considerations of combination surgery facilitates appropriate patient selection and expectation management.

      Combined Procedure Technique

      The combined panniculectomy-tummy tuck approach integrates elements of both procedures to maximize functional and aesthetic outcomes.

      Surgical sequence:
      ✓ Standard tummy tuck incision: Low transverse incision with potential vertical extension
      ✓ Panniculectomy tissue removal: Excision of hanging abdominal pannus
      ✓ Muscle repair: Rectus diastasis correction through plication
      ✓ Aesthetic contouring: Careful tissue redraping and umbilical repositioning
      ✓ Progressive tension closure: Layered closure to minimize complications

      Technical modifications:
      • Adjustment of tissue resection patterns to maximize blood supply
      • Strategic preservation of perforating blood vessels
      • Modified undermining techniques to balance tension and vascularity
      • Staged approach in high-risk patients occasionally considered

      Benefits of Combined Approach

      The simultaneous execution of panniculectomy and tummy tuck offers several advantages over staged or isolated procedures.

      Primary benefits:
      ✓ Comprehensive outcome: Addresses both functional and aesthetic concerns
      ✓ Single recovery period: One surgical episode with combined recovery
      ✓ Cost efficiency: Reduced overall costs compared to staged procedures
      ✓ Insurance contribution: Potential partial coverage for panniculectomy component
      ✓ Optimal tissue utilization: Strategic use of excised tissue for maximal improvement

      Patient selection criteria:
      • Significant abdominal pannus with functional impairment
      • Concurrent desire for aesthetic improvement
      • Good overall health with acceptable surgical risk
      • Realistic expectations regarding outcomes and scar burden
      • Understanding of potential compromise in both procedures

      Insurance Considerations for Combined Procedures

      Combined cases present unique insurance considerations requiring careful documentation and coding practices.

      Documentation requirements:
      • Clear separation of medically necessary versus cosmetic components
      • Detailed operative report specifying distinct procedure elements
      • Preoperative photographs demonstrating medical necessity
      • Itemized billing with distinct codes for covered and non-covered services

      Coding approach:
      • Panniculectomy coded with medical diagnosis supporting necessity
      • Tummy tuck component coded as cosmetic with appropriate modifiers
      • Separate fee structure for covered versus self-pay components
      • Advance insurance verification and pre-authorization when possible

      Board-certified-aesthetic-specialist-at-doseway.com-ready-to-discuss-your-skin-goals

      The field of abdominal contouring continues to evolve with technical innovations, changing patient demographics, and advancing understanding of aesthetic principles. Awareness of these trends provides context for current surgical decision-making.

      Technological Advancements

      Recent technological developments have enhanced both surgical techniques and perioperative management in abdominal contouring.

      Surgical technique innovations:
      ✓ Progressive tension sutures: Reduced seroma rates and enhanced recovery
      ✓ Lymphatic sparing techniques: Decreased postoperative swelling and improved healing
      ✓ Enhanced recovery protocols: Multimodal approaches to minimize discomfort
      ✓ Lipoabdominoplasty variations: Combined liposuction and tissue excision techniques
      ✓ Scar minimization strategies: Improved incision placement and closure methods

      Perioperative advancements:
      • Improved anesthetic techniques with longer-acting local anesthetics
      • Advanced thromboprophylaxis protocols for high-risk patients
      • Nutritional optimization approaches for enhanced healing
      • Prehabilitation programs to improve surgical outcomes
      • Non-invasive assessment tools for surgical planning

      Changing Patient Demographics

      Evolution in patient populations seeking abdominal contouring has influenced surgical approaches and technique selection.

      Demographic shifts:
      • Increased massive weight loss patients seeking body contouring
      • Growing male population pursuing abdominal procedures
      • Older patients maintaining fitness and seeking contour improvement
      • Ethnic diversity with specific contouring goals and scar considerations
      • Rising demand for minimal scar and limited incision approaches

      Surgical implications:
      • Technique modification for massive weight loss patients
      • Gender-specific approach to abdominal contouring
      • Combined procedures addressing multiple aesthetic concerns
      • Scar positioning considerations across different skin types
      • Individualized approach based on anatomical and demographic factors

      How to Prepare for Abdominal Contouring Surgery?

      Comprehensive preoperative preparation significantly impacts surgical safety, recovery experience, and final outcomes. Understanding the preparation process facilitates optimal surgical readiness.

      Medical Optimization

      Medical preparation focuses on optimizing health status to enhance surgical safety and recovery.

      Preoperative medical requirements:
      ✓ Comprehensive medical evaluation: Assessment of overall health status
      ✓ Laboratory testing: Complete blood count, metabolic panel, coagulation studies
      ✓ Cardiac evaluation: ECG for patients with cardiac risk factors
      ✓ Anesthesia clearance: Assessment by anesthesia provider when indicated
      ✓ Specialist consultations: Medical specialists for optimized chronic conditions

      Health optimization strategies:
      • Smoking cessation at least 4-6 weeks before surgery
      • Weight stabilization within 10% of goal weight
      • Nutritional optimization with emphasis on protein intake
      • Medication adjustment including blood thinners and supplements
      • Physical conditioning with focus on core strength and cardiovascular health

      Practical Preparation

      Logistical preparation ensures smooth surgical experience and recovery period.

      Home preparation:
      ✓ Recovery area setup: Comfortable space with essential items within reach
      ✓ Meal preparation: Pre-made meals and snacks for initial recovery period
      ✓ Comfort items: Pillows for positioning, entertainment options, comfort foods
      ✓ Medical supplies: Dressings, medications, thermometer, compression garments
      ✓ Clothing options: Loose-fitting garments with easy access

      Support system coordination:
      • Caregiver arrangement for immediate postoperative period
      • Transportation coordination for surgical appointment and follow-up visits
      • Childcare or pet care arrangements during recovery
      • Emergency contact information readily available
      • Communication plan for updates to family and friends

      What Postoperative Care Maximizes Surgical Results?

      Comprehensive postoperative care significantly influences healing quality, comfort during recovery, and final aesthetic outcomes. Understanding proper postoperative management facilitates optimal recovery.

      Immediate Postoperative Management

      The initial postoperative period requires specific care protocols to ensure safety and comfort.

      Early recovery priorities:
      ✓ Pain management: Multimodal approach including medications and positioning
      ✓ Nausea control: Aggressive management of postoperative nausea and vomiting
      ✓ Early ambulation: Gradual increase in walking with assistance
      ✓ Incision monitoring: Regular assessment for signs of complications
      ✓ Drain care: Measurement and recording of drainage output

      Comfort enhancement strategies:
      • Strategic pillow placement for optimal positioning
      • Temperature control for comfort and circulation
      • Hydration maintenance with easy access to fluids
      • Entertainment options to minimize boredom during limited activity
      • Relaxation techniques to manage discomfort and anxiety

      Long-Term Recovery Optimization

      Extended recovery phase focuses on scar management, result optimization, and lifestyle maintenance.

      Scar management approaches:
      ✓ Silicone products: Sheets or gels for improved scar appearance
      ✓ Sun protection: Strict avoidance of sun exposure on healing scars
      ✓ Massage techniques: Gentle scar mobilization after complete healing
      ✓ Topical treatments: Vitamin E, onion extract, or other scar improvement products
      ✓ Time and patience: Understanding scar maturation requires 12-18 months

      Lifestyle factors for result maintenance:
      • Weight stability through balanced nutrition and regular activity
      • Core strengthening after appropriate healing period
      • Skin hydration and nutrition for optimal appearance
      • Healthy lifestyle habits including smoking avoidance
      • Realistic expectations regarding aging and weight fluctuations

      How to Choose the Right Surgeon for Your Procedure?

      Surgeon selection represents one of the most critical decisions in the abdominal contouring process. Understanding qualification standards, consultation approaches, and red flags facilitates appropriate surgeon selection.

      Surgeon Qualifications

      Specific credentials and experience indicators help identify qualified abdominal contouring surgeons.

      Essential qualifications:
      ✓ Board certification: American Board of Plastic Surgery certification
      ✓ Procedure-specific experience: Significant volume in abdominal contouring
      ✓ Hospital privileges: Operating privileges at accredited facilities
      ✓ Before-and-after portfolio: Comprehensive photographic documentation
      ✓ Patient testimonials: Feedback from previous surgical patients

      Experience assessment:
      • Number of similar procedures performed annually
      • Experience with complex cases and revisions
      • Comfort with combined procedures and varied techniques
      • Willingness to provide references from previous patients
      • Demonstration of consistent, high-quality results

      Consultation Process

      The consultation experience provides valuable insight into surgeon approach, communication style, and practice philosophy.

      Comprehensive consultation components:
      ✓ Medical history review: Detailed assessment of health status and goals
      ✓ Physical examination: Careful evaluation of abdominal anatomy
      ✓ Procedure discussion: Thorough explanation of options and recommendations
      ✓ Outcome expectations: Realistic discussion of potential results and limitations
      ✓ Financial transparency: Clear explanation of costs and payment options

      Communication assessment:
      • Willingness to answer all questions thoroughly
      • Ability to explain complex concepts in understandable terms
      • Demonstration of genuine interest in patient goals
      • Respect for patient concerns and preferences
      • Clear communication of potential risks and complications

      Womans-with-glowing-skin-after-successful-aesthetic-treatment-Book-a-free-consultation-at-doseway.com.

      Frequently Asked Questions

      What is the main difference between panniculectomy and tummy tuck?

      The fundamental difference lies in their primary purpose and surgical approach. Panniculectomy is a functional procedure that removes hanging abdominal tissue causing health problems like skin irritation, infections, or mobility issues. It focuses exclusively on removing excess skin and fat without muscle repair. Tummy tuck (abdominoplasty) is primarily a cosmetic procedure that enhances abdominal appearance by removing excess skin and fat while also tightening abdominal muscles. Tummy tuck provides comprehensive contour improvement but typically isn't covered by insurance since it's considered elective cosmetic surgery.

      How painful is recovery after panniculectomy versus tummy tuck?

      Recovery pain levels differ between these procedures. Panniculectomy generally involves moderate pain focused around the incision site, typically well-controlled with oral medications for 3-7 days. Tummy tuck recovery typically involves more significant discomfort due to muscle repair, often described as similar to intense abdominal exercises. Tummy tuck patients usually require stronger pain management for 1-2 weeks and maintain a flexed posture initially to reduce tension on the repair. Both procedures benefit from multimodal pain management approaches including long-acting local anesthetics during surgery.

      Can panniculectomy be covered by insurance?

      Yes, panniculectomy may be covered by insurance when deemed medically necessary. Coverage typically requires documentation of specific health problems caused by hanging abdominal tissue, including chronic skin infections, rashes, ulcers, mobility limitations, or back pain. Most insurers require proof that conservative treatments have failed and that the pannus hangs below the pubic hairline. The process usually involves pre-authorization with detailed medical records, photographs, and a letter of medical necessity from your surgeon. Coverage varies significantly between insurance providers.

      How long do results last from these procedures?

      Both procedures provide permanent removal of excess skin and fat, but long-term results depend on weight stability and lifestyle factors. Panniculectomy results can last indefinitely if weight remains stable, though natural aging will cause some skin laxity over time. Tummy tuck results are also permanent but can be compromised by significant weight fluctuations, pregnancies, or aging. The muscle repair in tummy tuck is permanent, though some stretching may occur over years. Maintaining stable weight through proper diet and exercise is crucial for preserving results from both procedures.

      What are the scar differences between these surgeries?

      Scar characteristics differ significantly between these procedures. Panniculectomy typically results in a horizontal scar across the lower abdomen, often longer and higher than a tummy tuck scar since the focus is maximal tissue removal rather than scar concealment. Tummy tuck scars are strategically placed low on the abdomen to be concealable under underwear or swimsuits, typically shorter and more carefully positioned. Tummy tuck may also include a circular scar around the belly button. Both scars mature over 12-18 months, fading from red to white, with final appearance influenced by genetics and scar care.

      Can I get pregnant after having a tummy tuck?

      Yes, you can get pregnant after a tummy tuck, but it's generally recommended to complete childbearing before undergoing the procedure. Pregnancy after tummy tuck will stretch the repaired muscles and skin, potentially compromising surgical results. The abdominal wall can safely accommodate pregnancy, but you may lose some of the aesthetic improvements from surgery. Some women require revision surgery after pregnancy to restore their abdominal contour. If planning future pregnancies, consider delaying tummy tuck or discussing modified approaches with your surgeon that may better accommodate future abdominal expansion.

      Which procedure has a higher risk of complications?

      Both procedures carry similar general risks, like bleeding, infection, and scarring, but specific complication profiles differ. Panniculectomy has higher rates of wound healing issues (15-30% in some studies) due to the nature of the tissue being treated andthe patient population. Tummy tuck has an increased risk of seroma formation (5-15%) due to more extensive tissue undermining, and potential for blood clots due to longer surgery time. The muscle repair in a tummy tuck adds another potential complication source. Overall, tummy tuck generally carries slightly higher overall complication rates due to its more complex nature, though individual risk varies based on health status and surgical factors.

      Affiliate Product Recommendations

      1. Medical-Grade Compression Garments: Brands like Marena, Leonisa, and Shaperx offer high-quality postoperative garments with affiliate commissions ranging 8-12%
      2. Scar Treatment Products: Bio-Oil, Mederma, and silicone scar sheets from brands like ScarAway with typical commissions of 10-15%
      3. Premium Protein Supplements: Medical-grade protein powders from brands like Vital Proteins and Ancient Nutrition with 15-20% commission potential
      4. Recovery Essentials: Specialty pillows from Pregnancy Pillow brands used for post-surgical positioning with 5-8% commissions
      5. Skincare Lines: Medical-grade skincare from brands like SkinMedica and Obagi with commission rates of 10-15%
      6. Home Recovery Equipment: Portable drain holders, shower chairs, and grabber tools with 5-10% affiliate commissions
      7. Healthy Meal Delivery: Services like Factor and Trifecta Nutrition catering to postoperative dietary needs with 5-8% recurring commissions
      Neck-Lift-Cost

      Neck Lift Cost: Surgical vs. Non-Surgical Options Cost Estimator

      Are you considering neck rejuvenation but confused about the costs and options available? Our comprehensive neck lift cost calculator helps you compare surgical versus non-surgical treatments with accurate price estimates tailored to your specific needs. This complete guide covers everything from basic neck anatomy to advanced procedural techniques, recovery timelines, and hidden expenses you need to know before making your decision.

      ✓ Accurate cost comparisons between surgical and non-surgical neck treatments
      ✓ Factors that determine your final procedure price
      ✓ Recovery timelines and what to expect during healing
      ✓ How to choose the right procedure for your specific concerns
      ✓ Insurance considerations and financing options
      ✓ Before and after results with realistic expectations
      ✓ Maintaining your results long-term with proper aftercare

      Neck Lift Cost Comparison Calculator

      Neck Lift Cost Comparison Calculator

      Compare procedure costs and assess your candidacy for neck lift surgery

      1
      Demographics
      2
      Medical History
      3
      Procedure Details
      4
      Results

      Personal Information

      Body Measurements

      cm
      ft/in
      kg
      lbs

      Medical Conditions

      Lifestyle Factors

      /

      Procedure Preferences

      Geographic Region

      5/10
      5/10

      Your Neck Lift Assessment

      72%

      Your estimated candidacy score for neck lift surgery

      Low Candidacy Moderate Candidacy High Candidacy
      MEDIUM RISK PROFILE

      Based on your medical history and lifestyle factors, you have a moderate risk profile for neck lift surgery. Consultation with a board-certified plastic surgeon is recommended to discuss your specific case.

      Cost Comparison by Region

      RegionEstimated Cost RangeNotes
      United States$4,500 – $8,000Varies by state and surgeon experience
      European Union€3,500 – €6,500UK prices may be higher post-Brexit
      United Kingdom£4,000 – £7,000Private clinics only
      CanadaCAD $5,000 – $9,000Not covered by provincial health plans
      AustraliaAUD $6,000 – $10,000Major city prices are higher

      Personalized Recommendations

      • Schedule consultations with at least 2-3 board-certified plastic surgeons
      • Discuss non-surgical alternatives like Kybella or Ultherapy
      • Consider a combination procedure if addressing multiple concerns
      • Review financing options and payment plans
      • Ask about revision policies and follow-up care

      Disclaimer: This calculator provides estimates only and is not a substitute for professional medical advice. Actual costs and surgical candidacy may vary based on individual factors. Always consult with a qualified healthcare provider before making decisions about medical procedures.

      Read More Guides & Try More Free Tools:

      Skin-analysis-personalized-plan-and-transparent-pricing-at-doseway.com

      What Exactly is a Neck Lift and Who Needs One?

      A neck lift, medically known as platysmaplasty, is a cosmetic procedure designed to address signs of aging in the neck and jawline area. This treatment targets common concerns like loose skin, excess fat deposits, muscle banding, and the dreaded “turkey neck” appearance that develops as collagen production decreases and skin elasticity diminishes over time. Understanding whether you’re a candidate for surgical versus non-surgical approaches depends on multiple factors including your skin quality, age, aesthetic goals, and budget constraints.

      The ideal candidate for neck lift procedures typically exhibits one or more of these conditions:
      • Significant skin laxity that doesn’t respond to non-invasive treatments
      • Visible vertical bands in the neck caused by platysma muscle separation
      • Excess fatty deposits under the chin, creating a double chin appearance
      • Jowling that extends from the jawline into the neck area
      • Genetic predisposition to neck aging despite maintaininga healthy weight

      Neck-Lift-Cost
      Neck-Lift-Cost

      How Much Does a Neck Lift Actually Cost in the United States?

      The cost of neck lift procedures varies dramatically based on geographical location, surgeon expertise, facility fees, anesthesia costs, and the complexity of your specific case. Surgical neck lifts represent a significant investment in your appearance, while non-surgical options provide more affordable entry points with less dramatic but still noticeable results. Understanding the complete breakdown of expenses helps you budget appropriately and avoid unexpected financial surprises during your cosmetic journey.

      According to the American Society of Plastic Surgeons and the American Society for Aesthetic Plastic Surgery, current average costs for neck procedures include:
      • Traditional surgical neck lift: $4,500-$8,200
      • Mini neck lift (limited incision): $3,500-$6,000
      • Neck liposuction alone: $2,500-$5,000
      • Non-surgical skin tightening: $1,200-$3,000 per session
      • Injectable treatments for neck bands: $600-$1,200 per session
      • Kybella for double chin reduction: $1,200-$2,500 per session

      What Factors Determine Your Final Neck Lift Procedure Cost?

      Multiple variables influence the final price you’ll pay for neck rejuvenation, making personalized consultations essential for accurate pricing. Surgical fees typically comprise the largest portion of your expenses, but ancillary costs like anesthesia, facility fees, medical tests, and post-operative garments can add thousands to your final bill. Geographic location plays a significant role, with major metropolitan areas commanding premium prices compared to smaller cities and towns.

      Key factors affecting your neck lift cost include:
      • Surgeon’s experience and reputation – board-certified plastic surgeons charge more
      • Procedure complexity – combining neck lift with facelift increases costs
      • Anesthesia type – general anesthesia costs more than local with sedation
      • Facility accreditation – hospital operating rooms cost more than in-office surgical suites
      • Geographic location – prices vary significantly between regions and cities
      • Revision cases – corrective surgery typically costs more than primary procedures

      Surgical Neck Lift Options: What Are the Different Techniques Available?

      Surgical neck lifts offer the most dramatic and long-lasting results for significant neck aging concerns. The specific technique your surgeon recommends depends on your anatomical needs, skin quality, and desired outcome. Traditional neck lifts address both skin and muscle, while limited incision techniques target specific concerns with less downtime. Understanding the differences between these approaches helps you make an informed decision about which procedure aligns with your goals and recovery timeline.

      What is a Traditional Cervicofacial Rhytidectomy?

      A traditional cervicofacial rhytidectomy, commonly known as a full neck and facelift, addresses moderate to severe aging in both the face and neck simultaneously. This comprehensive procedure involves incisions that typically begin in the hairline at temple level, extend down in front of the ear, curve behind the earlobe into the hairline, and sometimes include a small incision under the chin. Through these incisions, the surgeon can access the platysma muscle, remove excess fat, redistribute remaining fat for better contouring, and redrape the skin for a smoother, more youthful neck and jawline.

      The traditional neck lift procedure includes these key components:
      • Platysma muscle manipulation – either tightening, repositioning, or suturing
      • SMAS (Superficial Musculoaponeurotic System) manipulation for structural support
      • Liposuction for removal of excess submental fat
      • Skin excision and redraping for optimal contour
      • Sometimes includes submandibular gland reduction for enhanced definition

      When is a Mini Neck Lift the Right Choice?

      A mini neck lift, also called a limited incision neck lift, targets mild to moderate neck aging in younger patients or those with specific isolated concerns. This less invasive approach uses shorter incisions, typically limited to around the ears and sometimes a small submental incision under the chin. The mini lift focuses primarily on the central neck area, addressing fat accumulation and mild skin laxity without the extensive dissection of a traditional procedure. While results are less dramatic than a full neck lift, the trade-off includes reduced cost, shorter surgery time, and faster recovery.

      Ideal candidates for mini neck lifts typically present with:
      • Isolated neck aging without significant jowling
      • Good skin elasticity with minimal laxity
      • Localized fat accumulation under the chin
      • Minimal platysma banding
      • Age typically between 30-50 years
      • Desire for subtle improvement with minimal downtime

      How Does Neck Liposuction Differ from a Full Neck Lift?

      Neck liposuction specifically targets excess fat deposits in the submental area and jawline without addressing significant skin laxity or muscle banding. This procedure is ideal for younger patients with good skin elasticity who struggle with hereditary double chin that doesn’t respond to diet and exercise. Using small cannulas inserted through tiny incisions, the surgeon removes stubborn fat cells to create better definition between the jawline and neck. When skin retraction is good, liposuction alone can produce significant improvement, but when skin is loose, it may accentuate the problem rather than solving it.

      The advantages of neck liposuction over full neck lift include:
      • Less invasive with smaller incisions
      • Reduced cost compared to comprehensive procedures
      • Shorter recovery time – typically 3-5 days
      • Local anesthesia option in many cases
      • Can be combined with skin tightening technologies
      • Minimal scarring with discreet incision placement

      Non-Surgical Neck Rejuvenation: What Are Your Options Without Surgery?

      Non-surgical neck treatments have revolutionized cosmetic medicine, offering noticeable improvement with minimal downtime and reduced risk. While these procedures cannot duplicate the dramatic results of surgical intervention, they provide excellent alternatives for early aging concerns or for patients who wish to avoid surgery. The non-surgical approach typically involves a combination of modalities to address multiple concerns including skin laxity, fine lines, volume loss, and muscle banding.

      How Effective Are Injectable Treatments for Neck Rejuvenation?

      Injectable treatments offer targeted solutions for specific neck concerns without surgery or downtime. Neuromodulators like Botox, Dysport, and Xeomin can soften platysma bands – the vertical cords that form in the neck – by relaxing the underlying muscle. Meanwhile, deoxycholic acid injections like Kybella permanently destroy fat cells under the chin, reducing fullness and improving contour. While injectables cannot address significant skin laxity, they provide meaningful improvement for patients with specific, isolated concerns.

      Common injectable treatments for neck concerns include:
      • Neuromodulators for platysma band reduction – typically $300-$800 per treatment
      • Kybella for submental fat reduction – $1,200-$2,500 per session, usually 2-4 sessions needed
      • Hyaluronic acid fillers for jawline definition – $600-$1,500 per syringe, typically 2-4 syringes
      • Collagen-stimulating injections for skin quality improvement – $600-$900 per session

      Doseway-aesthetic-procedures-andonline-booking-details

      What Non-Surgical Skin Tightening Technologies Deliver Results?

      Non-surgical skin tightening technologies use various energy-based modalities to stimulate collagen production and contract existing collagen fibers, resulting in gradual improvement in skin laxity over several months. These treatments include radiofrequency, ultrasound, and laser technologies that deliver controlled thermal energy to the deeper layers of skin without damaging the surface. While results are more subtle than surgical options, these procedures offer meaningful improvement for early to moderate laxity with no downtime and minimal risk.

      The most effective non-surgical skin tightening technologies include:
      • Ultherapy – ultrasound technology FDA-approved for neck lifting
      • Thermage – radiofrequency treatment for skin tightening
      • Morpheus8 – microneedling with radiofrequency for skin remodeling
      • Profound – radiofrequency microneedling for collagen stimulation
      • CO2 laser resurfacing – improves texture and mild tightening

      How Do Combination Non-Surgical Approaches Enhance Results?

      Combination non-surgical approaches typically yield better results than single-modality treatments by addressing multiple aspects of neck aging simultaneously. A comprehensive non-surgical neck rejuvenation plan might include skin tightening to improve laxity, injectables to address muscle bands and fat, and skin resurfacing to improve texture and tone. While the cumulative cost of multiple treatments can approach that of a surgical procedure, the advantage lies in minimal downtime and gradual, natural-looking improvement that doesn’t dramatically change your appearance all at once.

      An effective non-surgical neck rejuvenation combination might include:
      • Ultherapy or Thermage for skin tightening
      • Botox for platysma band reduction
      • Kybella for submental fat reduction
      • Fractional laser for skin texture improvement
      • Professional-grade skincare for maintenance

      Skin-and-aesthetic-procedures-online-appointments-doseway.com

      What is the Typical Recovery Timeline After Neck Lift Procedures?

      Understanding the recovery process helps you plan appropriately and set realistic expectations for your post-procedure experience. Surgical neck lifts require significant downtime with gradual improvement over several months, while non-surgical treatments offer minimal to no disruption to your normal activities. Proper healing requires following your surgeon’s instructions meticulously, attending all follow-up appointments, and having patience as swelling resolves and final results emerge.

      What Can You Expect During the First Week After Surgical Neck Lift?

      The immediate postoperative period after surgical neck lift involves significant swelling, bruising, and discomfort that gradually improves each day. Most patients experience tightness, difficulty with neck movement, and possible temporary numbness in the treatment area. Drains may be placed to prevent fluid accumulation and are typically removed within 1-2 days. Pain medication helps manage discomfort, while keeping your head elevated reduces swelling. Most patients take 1-2 weeks off work depending on their job demands and healing progression.

      First week recovery milestones include:
      • Days 1-3: Significant swelling and bruising, garment wear, limited movement
      • Days 4-7: Gradual reduction in swelling, suture removal begins, increased mobility
      • End of week 1: Possible return to sedentary work, decreased pain medication needs
      • Throughout: Head elevation, gentle walking encouraged, strict avoidance of bending or lifting

      How Long Until You See Final Results From Your Neck Lift?

      Patience is essential when evaluating your neck lift results, as final outcomes emerge gradually over several months as swelling resolves and tissues settle into their new position. While dramatic improvement is visible once initial swelling subsides at 2-3 weeks, subtle refinement continues for 6-12 months as collagen remodeling occurs and incision lines mature. The longevity of your results depends on numerous factors including your age, skin quality, lifestyle habits, and genetic predisposition to aging.

      Realistic timeline for neck lift results:
      • 2 weeks: 50-60% of swelling resolved, presentable in public
      • 6 weeks: 80% of final result visible, resume most normal activities
      • 3 months: 90% improvement, exercise restrictions lifted
      • 6-12 months: Final results fully apparent, scar maturation continues
      • 5-10 years: Longevity of results with proper maintenance

      How Does Our Neck Lift Cost Comparison Calculator Work?

      Our proprietary neck lift cost comparison calculator uses advanced algorithms to provide personalized cost estimates based on your specific needs, geographical location, and procedure preferences. By inputting basic information about your concerns, desired outcomes, and budget parameters, the calculator generates accurate pricing ranges for both surgical and non-surgical options in your area. This powerful tool helps you make informed financial decisions about your neck rejuvenation journey.

      The calculator considers these key variables:
      • Procedure type (surgical vs. non-surgical)
      • Geographic location and local market prices
      • Surgeon experience level and credentials
      • Facility type (hospital vs. surgical center)
      • Anesthesia requirements
      • Combination procedures
      • Medical complexity factors

      What Information Do You Need to Input for Accurate Calculations?

      Providing detailed information ensures the most accurate cost estimates from our calculator. Essential inputs include your geographical location, since prices vary significantly between regions, and your specific concerns like skin laxity, fat accumulation, or muscle banding. The calculator also considers your age, as this influences recommended procedures, and whether you’ve had previous neck treatments. Additional factors like smoking status, medical conditions, and desired recovery time further refine the recommendations.

      Required inputs for accurate cost estimation:
      • Zip code for geographical pricing adjustments
      • Primary concerns (skin, fat, muscles, or combination)
      • Age range and skin quality assessment
      • Previous neck treatments history
      • Desired level of improvement (subtle to dramatic)
      • Budget parameters and financing preferences
      • Timeline for procedure and recovery constraints

      How to Interpret Your Personalized Cost Estimate Results?

      Understanding your personalized cost estimate helps you budget appropriately and compare different treatment options. The calculator provides a range rather than a fixed price because final costs depend on surgical findings and individual variations. The estimate typically includes surgeon’s fees, anesthesia costs, facility fees, and basic follow-up care, but may not include preoperative tests, medications, or potential revision procedures. Comparing surgical versus non-surgical options side-by-side allows you to evaluate cost-benefit ratios for different approaches.

      Key components of your cost estimate report:
      • Surgeon’s fee range based on experience level
      • Anesthesia costs (local vs. general)
      • Facility fees (hospital vs. accredited surgical center)
      • Implant or material costs if applicable
      • Non-surgical treatment series pricing
      • Combination procedure discounts if applicable
      • Geographical pricing adjustments

      What Are the Hidden Costs of Neck Lift Procedures?

      Beyond the quoted surgical fee, numerous additional expenses contribute to the total cost of neck rejuvenation. Understanding these hidden costs prevents financial surprises and helps you budget appropriately. Common overlooked expenses include preoperative medical clearance, laboratory tests, prescription medications, post-operative garments, and potential time off work. Non-surgical treatments often require multiple sessions for optimal results, making the total investment higher than the per-session price suggests.

      Often overlooked neck procedure expenses:
      • Preoperative medical clearance and lab work: $200-$500
      • Prescription medications: $50-$150
      • Post-operative compression garments: $75-$200
      • Follow-up visit costs beyond the standard period
      • Scar treatment products: $50-$150
      • Revision procedure potential (5-15% of cases)
      • Time off work (1-2 weeks for surgical procedures)

      How Can You Finance Your Neck Lift Procedure?

      Multiple financing options make neck lift procedures accessible to patients across different budget ranges. Most plastic surgery practices offer payment plans through specialized medical financing companies, while some accept credit cards or offer in-house payment arrangements. Understanding the pros and cons of each option helps you select the most appropriate financing method for your financial situation. Additionally, some procedures may have tax benefits if performed for medically necessary reasons, though cosmetic neck lifts typically don’t qualify.

      Common financing options for neck procedures:
      • Medical credit cards like CareCredit with promotional periods
      • Personal loans from banks or credit unions
      • In-house payment plans through your surgeon’s practice
      • Health savings accounts (HSA) or flexible spending accounts (FSA)
      • Credit card payments (often with higher interest rates)
      • Medical tourism financing for international options

      How to Choose the Right Surgeon for Your Neck Lift?

      Selecting a qualified, experienced surgeon is the most important decision in your neck lift journey, significantly impacting both your results and safety. Board certification in plastic surgery ensures extensive training specifically in cosmetic procedures of the face and neck. Beyond credentials, reviewing before-and-after photos of actual patients with similar concerns helps evaluate a surgeon’s aesthetic style and technical skill. Personal rapport and comfort level with your surgeon contribute to a positive overall experience and satisfactory outcome.

      Essential criteria for selecting a neck lift surgeon:
      • Board certification by the American Board of Plastic Surgery
      • Extensive experience specifically with neck procedures
      • Hospital privileges at accredited facilities
      • Consistent, natural-looking before and after photos
      • Transparent pricing with detailed cost breakdowns
      • Comfortable communication style and good patient rapport
      • Clear explanation of risks, benefits, and alternatives

      What Questions Should You Ask During Your Neck Lift Consultation?

      A thorough consultation provides the information needed to make an informed decision about your neck procedure. Preparing questions in advance ensures you cover all relevant topics and can compare different surgeons effectively. Beyond cost and technique discussions, understanding the surgeon’s revision policy, complication management, and emergency protocols provides insight into their practice standards. Bringing photos of your desired outcome helps communicate your aesthetic goals clearly.

      Essential consultation questions for neck lift candidates:
      • How many neck lift procedures do you perform annually?
      • What is your complication rate and how do you manage complications?
      • Can I see before and after photos of patients with similar concerns?
      • What technique do you recommend for my specific anatomy and why?
      • What is included in the quoted price and what costs are additional?
      • What is your policy on revision procedures if needed?
      • Where will my procedure be performed and is the facility accredited?

      What Are the Potential Risks and Complications of Neck Lift Surgery?

      Like any surgical procedure, neck lifts carry potential risks and complications that patients must understand before consenting to treatment. While serious complications are rare in experienced hands, minor issues occur more frequently. Choosing a board-certified plastic surgeon operating in an accredited facility significantly reduces your risk profile. Understanding potential complications, their likelihood, and how they’re managed helps you make an informed decision and recognize early warning signs during recovery.

      Possible neck lift complications include:
      • Hematoma (blood collection) requiring drainage
      • Infection requiring antibiotic treatment
      • Nerve injury causing temporary or permanent numbness
      • Unsatisfactory scarring requiring revision
      • Asymmetry needing corrective procedure
      • Skin necrosis (tissue death) in rare cases
      • Anesthesia-related complications
      • Prolonged swelling or contour irregularities

      How Can You Minimize Risks and Ensure Optimal Healing?

      Proactive measures significantly reduce your risk of complications and promote optimal healing after neck procedures. Following your surgeon’s preoperative instructions regarding medication avoidance, smoking cessation, and nutritional optimization prepares your body for surgery and recovery. Postoperative compliance with activity restrictions, wound care, and follow-up appointments further enhances your safety profile and results. Recognizing early warning signs of potential complications allows prompt intervention before issues escalate.

      Essential risk reduction strategies:
      • Complete disclosure of all medications and supplements
      • Smoking cessation at least 4 weeks before and after surgery
      • Proper management of existing medical conditions
      • Arranging adequate help during initial recovery period
      • Strict adherence to activity restrictions and wound care
      • Maintenance of stable weight before and after procedure
      • Attendance at all scheduled follow-up appointments

      Board-certified-aesthetic-specialist-at-doseway.com-ready-to-discuss-your-skin-goals

      How Do Non-Surgical Neck Treatments Compare to Surgical Results?

      Understanding the limitations and advantages of non-surgical versus surgical neck treatments helps set realistic expectations about potential outcomes. Surgical neck lifts provide dramatic, long-lasting improvement for significant aging concerns, while non-surgical options offer subtle enhancement with minimal downtime. The best approach depends on your specific concerns, skin quality, age, and tolerance for recovery. Many patients benefit from starting with non-surgical treatments earlier in the aging process and progressing to surgical options when non-surgical methods no longer provide sufficient improvement.

      Comparative analysis of surgical vs. non-surgical neck treatments:

      FactorSurgical Neck LiftNon-Surgical Treatments
      ResultsDramatic, structural improvementSubtle to moderate enhancement
      Longevity7-10 years or longer6 months to 2 years
      Downtime10-14 days minimum0-3 days typically
      Cost$4,500-$8,200 once$1,200-$3,000 per session, repeated
      AnesthesiaUsually general or IV sedationTopical or local anesthesia
      RisksSurgical risks presentMinimal risks
      Ideal CandidateSignificant laxity and agingEarly to moderate concerns

      Can Non-Surgical Treatments Delay the Need for Surgical Neck Lift?

      Strategic use of non-surgical treatments can potentially delay the need for surgical intervention by addressing early signs of aging before they become significant. Regular non-surgical maintenance starting in your late 30s or early 40s can preserve skin quality and slow the progression of laxity. However, once significant skin excess and muscle banding develop, non-surgical options provide limited improvement. A comprehensive approach combining appropriate non-surgical treatments at the right time extends your youthful appearance and may push back surgical timelines.

      Effective non-surgical prevention strategies include:
      • Regular skin tightening treatments starting in late 30s
      • Neuromodulator injections for early platysma band prevention
      • Consistent sun protection to preserve skin elasticity
      • Professional skincare with retinoids and growth factors
      • Maintenance of stable weight to prevent skin stretching
      • Healthy lifestyle with proper nutrition and hydration
      • Minimizing repetitive neck movements that contribute to banding

      What Are the Latest Advancements in Neck Lift Techniques?

      Neck lift technology and techniques continue to evolve, offering improved results with enhanced safety profiles and reduced recovery times. Recent advancements focus on more natural-looking outcomes, minimal scarring approaches, and combined technologies that address multiple aging concerns simultaneously. Staying informed about the latest developments helps you discuss current options with your surgeon and select the most appropriate technique for your specific needs and goals.

      Recent innovations in neck rejuvenation include:
      • High-definition liposuction using power-assisted technology
      • J-plasma Renuvion for subdermal skin contraction
      • Scarless thread lift techniques with absorbable sutures
      • Stem cell-enriched fat transfer for enhanced volume and skin quality
      • Endoscopic approaches for minimal incision neck lifting
      • Personalized treatment planning using 3D imaging technology
      • Advanced recovery protocols for reduced downtime

      How Have Non-Surgical Technologies Improved in Recent Years?

      Non-surgical neck treatments have seen remarkable technological advancements, with newer devices offering more significant results with improved comfort and reduced treatment time. Energy-based devices now deliver more precise energy deposition to targeted tissue layers while protecting the skin surface. Combination technologies that deliver multiple forms of energy simultaneously provide enhanced efficacy for challenging concerns like moderate skin laxity that previously required surgical intervention.

      Notable advancements in non-surgical neck technologies:
      • Microfocused ultrasound with visual guidance for precise energy delivery
      • Fractional radiofrequency needles that bypass epidermal melanin
      • Temperature-controlled radiofrequency for consistent tissue heating
      • Combination radiofrequency and microwave technologies
      • Targeted pressure wave devices for fat reduction without energy
      • Next-generation injectables with improved duration and spread characteristics

      How to Maintain Your Neck Lift Results Long-Term?

      Protecting your investment in neck rejuvenation requires diligent maintenance and healthy lifestyle habits that preserve your results and slow further aging. While neck lift procedures turn back the clock, they don’t stop it completely, making ongoing care essential for long-term satisfaction. A comprehensive maintenance plan includes both professional treatments and at-home care tailored to your specific procedure type and skin needs.

      Essential maintenance strategies for neck lift results:
      • Consistent sun protection with broad-spectrum sunscreen
      • Regular non-surgical skin tightening treatments every 6-12 months
      • Medical-grade skincare with retinoids, antioxidants, and peptides
      • Healthy nutrition rich in collagen-supporting nutrients
      • Adequate hydration and smoking avoidance
      • Maintenance of stable weight within 5-10 pounds
      • Sleep position training to avoid neck creasing
      • Minimal alcohol consumption to prevent dehydration and skin damage

      What Professional Maintenance Treatments Extend Surgical Results?

      Strategic non-surgical maintenance treatments can significantly extend the longevity of your surgical neck lift results by addressing new aging concerns as they develop. Regular skin tightening treatments preserve collagen density and skin elasticity, while injectables address early muscle band recurrence before it becomes significant. A personalized maintenance plan designed by your surgeon addresses your specific aging pattern and keeps you looking refreshed between potential future procedures.

      Recommended professional maintenance treatments:
      • Annual microfocused ultrasound for collagen maintenance
      • Quarterly neuromodulator treatments for early band prevention
      • Biannual professional chemical peels for skin quality
      • Periodic laser treatments for pigment and texture
      • Annual regenerative medicine treatments like PRP or PRF
      • Customized skincare regimen adjustments as aging progresses
      • Nutritional counseling for skin health optimization

      What Are the Psychological Benefits of Neck Rejuvenation?

      Beyond physical transformation, neck procedures often provide significant psychological benefits that impact overall quality of life and self-perception. Patients frequently report improved confidence, reduced self-consciousness about their appearance, and greater satisfaction with their reflection. The neck is a highly visible area that significantly influences overall facial harmony, making improvement in this region particularly impactful on overall appearance perception.

      Documented psychological benefits of neck rejuvenation:
      • Improved self-esteem and body image
      • Reduced social anxiety in personal and professional settings
      • Enhanced professional confidence and perceived competence
      • Greater satisfaction with personal appearance in photographs
      • Reduced focus on perceived flaws during daily activities
      • Increased motivation for overall self-care and healthy behaviors
      • Improved interpersonal relationships through confidence boost

      How Does Neck Rejuvenation Impact Professional and Social Interactions?

      The neck and jawline significantly influence perceptions of age, health, and vitality in both professional and social contexts. A well-defined jawline and smooth neck contour project an image of youth, energy, and competence that can positively impact career advancement and social opportunities. Many patients report changed interactions following neck procedures, with others perceiving them as more refreshed, approachable, and energetic regardless of their actual age or energy levels.

      Documented impacts of neck rejuvenation on interactions:
      • Perceived as 5-7 years younger than actual age
      • Increased positive attention in social and professional settings
      • Enhanced first impressions in interviews and meetings
      • Improved dating experiences for single patients
      • Greater willingness to participate in photos and social media
      • Increased assertiveness in professional negotiations
      • Expanded social activities and engagement

      Womans-with-glowing-skin-after-successful-aesthetic-treatment-Book-a-free-consultation-at-doseway.com.

      Frequently Asked Questions About Neck Lift Costs and Procedures

      What is the difference between a neck lift and a facelift?

      A neck lift specifically targets the neck area below the jawline, addressing concerns like loose neck skin, muscle banding, and excess fat under the chin. A facelift focuses on the mid and lower face, improving nasolabial folds, jowls, and cheek sagging. While many patients benefit from combining both procedures for comprehensive facial rejuvenation, they can be performed separately depending on your specific concerns.

      How painful is neck lift recovery?

      Most patients describe neck lift recovery as uncomfortable rather than severely painful, with sensations of tightness, pressure, and occasional sharp twinges rather than constant pain. Prescription medication effectively manages discomfort during the first 3-5 days, after which most patients transition to over-the-counter pain relievers. The majority of significant discomfort resolves within the first week, replaced by itching and numbness as nerves regenerate.

      Can a neck lift be covered by insurance?

      In extremely rare cases where neck skin causes functional problems like chronic skin infections or difficulty moving the head, insurance might provide coverage. However, purely cosmetic neck lifts are not covered by insurance. Some patients with significant weight loss may qualify for coverage if excess skin causes documented health issues, but approval requires extensive documentation and pre-authorization.

      What is the best age for a neck lift?

      The ideal age for neck lift varies based on individual aging patterns rather than chronological age. Most surgical neck lift patients range from 45-65, but younger patients with genetic predisposition to neck aging or significant weight loss may benefit earlier. The decision depends on your specific concerns, skin quality, and whether non-surgical options still provide satisfactory improvement.

      How long do non-surgical neck treatments last?

      Longevity of non-surgical neck treatments varies significantly by modality. Neuromodulators for platysma bands typically last 3-4 months, while Kybella produces permanent fat reduction. Skin tightening treatments like Ultherapy provide gradual improvement over 2-3 months with results lasting 1-2 years. Most non-surgical approaches require maintenance treatments to sustain optimal results.

      Can neck liposuction alone solve my neck concerns?

      Neck liposuction effectively addresses excess fat under the chin but does not improve skin laxity or muscle banding. Ideal candidates have good skin elasticity with isolated fat accumulation without significant loose skin. When skin laxity exists, liposuction alone may worsen the appearance by removing underlying support. Your surgeon can assess your skin recoil during consultation to determine if liposuction alone will provide satisfactory improvement.

      What happens to my neck lift results as I continue to age?

      A neck lift turns back the clock but doesn’t stop it completely. You will continue to age naturally after your procedure, but typically from a more youthful baseline. Most patients maintain significant improvement compared to how they would have aged without surgery, with many opting for minor non-surgical maintenance down the line. Proper skincare, sun protection, and healthy lifestyle habits help preserve your results longer.

      1. Skincare Products: Recommend medical-grade skincare lines like SkinMedica, Obagi, and Zo Skin Health – particularly their retinols, vitamin C serums, and peptide creams that support neck skin health.
      2. Recovery Products: Affiliate links for post-surgical compression garments, specialized neck pillows, and scar treatment products like silicone sheets and gels.
      3. Home Devices: Medical-grade home devices such as NuFACE Trinity for microcurrent toning, DNAEGF Renewal for collagen stimulation, and LightStim for LED therapy.
      4. Supplement Lines: Collagen supplements, arnica montana for bruising, and specialized nutritional support for surgical recovery from brands like Vital Proteins and Pure Encapsulations.
      5. Sun Protection: High-quality mineral sunscreens from EltaMD, Colorescience, and SkinCeuticals that provide essential UV protection for maintaining neck lift results.
      6. Non-Surgical Treatments: Affiliate partnerships with medical practices offering Ultherapy, Kybella, and other non-surgical neck treatments with exclusive offers for readers.
      7. Financing Services: Referral links to medical financing companies like CareCredit that help patients afford procedures, often with promotional interest-free periods.
      Chemical-Peel-Levels

      Chemical Peel Levels: Cost, Side Effects & Recovery Time

      Chemical peels represent one of the most effective and popular cosmetic treatments for skin rejuvenation, offering solutions for everything from mild acne scars to deep wrinkles. This comprehensive guide explores the intricate world of chemical peel treatments, providing detailed insights into peel depth classifications, associated costs, potential side effects, and recovery timelines. Whether you’re considering a light refresh or dramatic transformation, understanding the nuances of chemical peel procedures can help you make informed decisions about your skincare journey.

      • Depth Classification: Understanding superficial, medium, and deep peel differences
      • Cost Analysis: Breakdown of pricing factors and investment requirements
      • Safety Profile: Comprehensive side effect management and risk mitigation
      • Recovery Timeline: Detailed healing process expectations for each peel level
      • Skin Type Considerations: Customized approaches for different skin tones and conditions
      • Treatment Planning: Strategic selection criteria for optimal results

      Chemical Peel Depth & Recovery Estimator

      Chemical Peel Depth & Recovery Estimator

      Assess the appropriate chemical peel depth and estimate recovery time based on your profile

      1
      Demographics
      2
      Medical History
      3
      Skin Assessment
      4
      Results

      Personal Information

      cm
      kg

      Medical History

      Hold Ctrl/Cmd to select multiple options
      Hold Ctrl/Cmd to select multiple options
      / mmHg

      Skin Assessment

      Hold Ctrl/Cmd to select multiple options
      Hold Ctrl/Cmd to select multiple options

      Your Chemical Peel Assessment

      7.2

      Recommended Peel Depth: Medium

      Low Risk Medium Risk High Risk

      Interpretation

      Based on your profile, you are a suitable candidate for a medium-depth chemical peel. Your skin type and medical history indicate a moderate risk profile with expected recovery time of 7-10 days.

      Personalized Recommendations

      • Consider a series of superficial peels before attempting medium depth
      • Discontinue retinoid products 5-7 days before treatment
      • Use broad-spectrum sunscreen daily during recovery
      • Schedule treatment during periods of minimal sun exposure
      • Consult with a board-certified dermatologist before proceeding

      Disclaimer: This tool provides estimates only and is not a substitute for professional medical advice. Always consult with a qualified healthcare provider before undergoing any cosmetic procedure.

      Read More Guides & Try More Free Tools:

      Skin-analysis-personalized-plan-and-transparent-pricing-at-doseway.com

      What Are Chemical Peels and How Do They Actually Work?

      Chemical peels are dermatological procedures that apply chemical solutions to the skin, causing controlled exfoliation and eventual peeling of the outer layers. The fundamental mechanism involves chemical-induced destruction of specific skin depths, triggering the body's natural healing processes to generate newer, healthier skin tissues. This process stimulates collagen production, improves skin texture, reduces pigmentation irregularities, and addresses various cosmetic concerns through precisely calibrated chemical reactions.

      The science behind chemical peels revolves around three key biological processes:

      • Keratinocyte Disruption: Chemical agents break down the bonds between dead skin cells in the stratum corneum
      • Inflammatory Response: Controlled injury triggers cytokine release and immune cell activation
      • Fibroblast Stimulation: Dermal remodeling occurs through increased collagen and elastin production

      Different chemical formulations target specific skin concerns through distinct mechanisms of action:

      • Alpha Hydroxy Acids (AHAs): Glycolic, lactic, and mandelic acids work by reducing corneocyte cohesion in the upper epidermis
      • Beta Hydroxy Acids (BHAs): Salicylic acid penetrates oil-filled follicles and exfoliates within the pore lining
      • Trichloroacetic Acid (TCA): Causes protein denaturation and coagulation throughout the epidermal and dermal layers
      • Phenol Solutions: Produce profound protein precipitation and complete epidermal necrosis with deep penetration

      Chemical-Peel-Levels
      Chemical-Peel-Levels

      What Different Types of Chemical Peels Are Available Based on Depth Penetration?

      The classification of chemical peels primarily depends on their depth of penetration into the skin layers, which directly correlates with their intensity, results, and downtime requirements. Understanding these categories helps patients and practitioners select the appropriate treatment for specific skin concerns and tolerance levels.

      Superficial Chemical Peels: What Skin Concerns Do They Address?

      Superficial peels, also known as lunchtime peels, penetrate only the outermost layer of the epidermis (stratum corneum) and typically involve mild acid solutions with concentrations below 30%. These treatments require little to no downtime and are ideal for maintaining skin health and addressing minor imperfections.

      Common indications for superficial peels include:

      • Mild textural irregularities and rough skin
      • Early photoaging signs including fine lines
      • Faint hyperpigmentation and sun spots
      • Dull complexion and minor surface discoloration
      • Mild acne and comedonal breakouts
      • Preparation for more intensive procedures

      Popular superficial peel formulations include:

      • Glycolic Acid Peels (20-30%): Derived from sugar cane, excellent for brightness and fine lines
      • Salicylic Acid Peels (20-30%): Oil-soluble, ideal for acne-prone and oily skin types
      • Lactic Acid Peels (20-30%): Larger molecule size provides gentle exfoliation with hydrating benefits
      • Mandelic Acid Peels (20-40%): Larger molecular structure with antibacterial properties, suitable for sensitive skin
      • Jessner's Solution: Combination of resorcinol, salicylic acid, and lactic acid in ethanol

      Medium-Depth Chemical Peels: When Are They Recommended?

      Medium-depth chemical peels penetrate through the entire epidermis and into the papillary dermis, creating more significant wounding and corresponding results. These procedures typically utilize TCA concentrations between 35-50% or combination approaches like Jessner's solution followed by TCA 35%.

      Clinical applications for medium peels include:

      • Moderate photodamage and wrinkles
      • Visible sun spots and age spots
      • Mild to moderate acne scarring
      • Pigmentation disorders including melasma
      • Rough texture and enlarged pores
      • Precancerous lesions like actinic keratoses

      The procedural protocol for medium peels involves:

      • Pre-treatment preparation with retinoids and bleaching agents for 2-6 weeks
      • Conscious sedation or oral analgesics for patient comfort
      • Frosting indication during application signaling protein denaturation
      • Significant peeling occurring between days 3-7 post-treatment
      • Complete re-epithelialization within 7-10 days
      • Erythema resolution over 2-4 weeks

      Deep Chemical Peels: What Results Can You Realistically Expect?

      Deep chemical peels penetrate to the reticular dermis, creating the most dramatic results and requiring the most extensive recovery. The classic Baker-Gordon phenol formula remains the gold standard, though modern modifications have improved safety profiles while maintaining efficacy.

      Conditions warranting deep chemical peels include:

      • Severe photodamage with coarse wrinkles
      • Prominent acne scarring and pitted lesions
      • Significant dyschromias and mottled pigmentation
      • Precancerous growths and early non-melanoma skin cancers
      • Substantial textural abnormalities and leathery skin

      Critical considerations for deep peels involve:

      • Requirement for cardiac monitoring during phenol application
      • Extended healing timeline with 10-14 days of social downtime
      • Permanent removal of freckles and certain pigmentation
      • Long-term hypopigmentation requiring strict sun protection
      • Significant discomfort during initial recovery phase
      • Potential for scarring if improperly performed or aftercare neglected

      Doseway-aesthetic-procedures-andonline-booking-details

      How Much Do Chemical Peels Actually Cost? Complete Price Breakdown

      The financial investment in chemical peel treatments varies dramatically based on multiple factors including peel depth, geographic location, practitioner expertise, and practice overhead. Understanding the complete cost structure helps patients budget appropriately and avoid unexpected expenses.

      Superficial Chemical Peel Cost Factors and Price Ranges

      Superficial peels represent the most affordable entry point into professional chemical exfoliation, with prices typically ranging from $150 to $300 per treatment. Multiple sessions are usually required for optimal results, typically packaged as series of 3-6 treatments at 2-4 week intervals.

      Cost influencers for superficial peels include:

      • Acid Type: Glycolic acid peels generally cost less than specialized formulations like mandelic or phytic acid
      • Practice Location: Urban centers and premium zip codes command higher fees
      • Practitioner Credentials: Board-certified dermatologists charge more than estheticians
      • Additional Services: Combining peels with complementary treatments increases overall cost
      • Product Quality: Pharmaceutical-grade solutions cost more than cosmetic-grade alternatives

      Medium Chemical Peel Investment Requirements

      Medium-depth peels require greater clinical expertise and carry more significant risks, reflected in their price range of $1,000 to $2,500 per treatment. Most patients achieve satisfactory results with a single session, though some concerns may benefit from combination approaches or repeat procedures.

      Medium peel cost components include:

      • Pre-treatment Consultations: Essential medical evaluation and skin assessment
      • Procedure Fees: Practitioner time, clinical space, and monitoring equipment
      • Anesthesia/Sedation: Oral or intravenous medications for comfort management
      • Post-procedure Kits: Specialized wound care products and protective formulations
      • Follow-up Visits: Monitoring healing progress and managing complications

      Deep Chemical Peel Financial Considerations

      Deep peels represent the pinnacle of chemical exfoliation with corresponding costs ranging from $3,000 to $6,000. This investment reflects the significant clinical expertise required, extended procedure time, necessary monitoring equipment, and comprehensive aftercare support.

      Justification for deep peel pricing includes:

      • Provider Expertise: Limited number of practitioners qualified to perform phenol peels
      • Facility Requirements: Accredited surgical suite with cardiac monitoring capabilities
      • Procedure Duration: Multiple hours of active treatment and monitoring
      • Anesthesia Services: Often involves anesthesiologist or nurse anesthetist
      • Comprehensive Aftercare: Extended follow-up period and complication management

      What Are the Real Side Effects and Risks of Chemical Peels?

      While chemical peels are generally safe when performed by qualified professionals, understanding potential adverse effects ensures informed consent and appropriate preparation. Risk profiles correlate directly with peel depth, with more aggressive treatments carrying greater potential for complications.

      Common Temporary Side Effects Across All Peel Depths

      Certain reactions represent expected physiological responses to chemical injury rather than true complications. These temporary effects typically resolve spontaneously during the healing process without intervention.

      Expected side effects include:

      • Erythema: Skin redness proportional to peel depth, lasting days to months
      • Edema: Temporary swelling, particularly around eyes and mouth
      • Desquamation: Peeling and flaking as damaged skin sheds
      • Tightness and Dryness: Temporary barrier compromise requiring intensive moisturization
      • Increased Sensitivity: Heightened reactivity to environmental factors and products

      Potential Complications and Risk Management Strategies

      More significant adverse events, while uncommon with proper patient selection and technique, require recognition and prompt management to prevent long-term consequences.

      Serious complications may include:

      • Infection: Bacterial, viral, or fungal colonization of compromised skin
      • Scarring: Abnormal wound healing with hypertrophic or atrophic results
      • Pigmentary Changes: Both hyperpigmentation and hypopigmentation
      • Prolonged Erythema: Persistent redness beyond expected timeline
      • Milia Formation: Multiple small epidermal inclusion cysts
      • Herpes Reactivation: Viral outbreaks in susceptible individuals
      • Toxic Shock Syndrome: Rare but serious systemic complication

      Risk mitigation approaches encompass:

      • Appropriate Patient Selection: Screening for contraindications and risk factors
      • Pre-treatment Priming: Preparing skin with retinoids and hydroquinone when indicated
      • Strict Sun Avoidance: Complete photoprotection before and after procedures
      • Antiviral Prophylaxis: Preventing herpes outbreaks in susceptible patients
      • Proper Wound Care: Meticulous cleansing and moisturization protocols
      • Graudated Treatment Approach: Starting with lighter peels before progressing deeper

      What Does Chemical Peel Recovery Really Entail? Timeline Expectations

      The postoperative period following chemical peel procedures involves predictable stages of healing with specific care requirements at each phase. Realistic expectations about the recovery process improve patient satisfaction and compliance with aftercare instructions.

      Superficial Peel Recovery: What to Expect Day by Day

      Superficial peels involve minimal social disruption, with most patients resuming normal activities immediately or within 24 hours. The recovery focus centers on proper skincare and sun protection rather than wound management.

      Typical superficial peel timeline:

      • Days 1-2: Mild redness resembling sunburn, possible tightness or itching
      • Days 2-4: Subtle flaking or "pilling" of dead skin, often barely noticeable
      • Days 5-7: Complete resolution of visible effects with improved skin texture and glow
      • Week 2: Optimal results visible as skin maturation completes

      Post-procedure care instructions include:

      • Gentle cleansing with non-foaming, pH-balanced cleansers
      • Frequent application of fragrance-free moisturizers and barrier repair creams
      • Strict daily sunscreen use with SPF 30-50, reapplied every 2 hours
      • Avoidance of active ingredients like retinoids and vitamin C for 5-7 days
      • Minimal makeup application with clean brushes and sponges

      Medium Peel Healing Process: Week-by-Week Progression

      Medium-depth peels involve more substantial tissue injury with correspondingly longer recovery periods and specific wound care requirements. Patients should plan for 7-10 days of social downtime.

      Comprehensive medium peel recovery timeline:

      • Days 1-2: Significant redness, swelling, and tightness with mild discomfort
      • Days 2-4: Development of bronze or brown discoloration as proteins coagulate
      • Days 4-7: Dramatic peeling and shedding in sheets or patches
      • Days 7-10: Complete re-epithelialization with pink, sensitive new skin
      • Weeks 2-4: Gradual resolution of erythema and return to normal activities
      • Months 1-3: Continued collagen remodeling with improving results

      Critical wound care components include:

      • Soaking with cool compresses or vinegar soaks to reduce crusting
      • Frequent application of thick occlusive ointments to prevent desiccation
      • Strict avoidance of picking, peeling, or manipulating shedding skin
      • Sleeping with head elevated to minimize morning edema
      • Use of humidifiers to counteract indoor drying environments

      Deep Peel Recovery: The Complete Rehabilitation Journey

      Deep chemical peels represent a significant medical procedure with extensive recovery requirements spanning several months. Patients must commit to strict postoperative protocols to ensure optimal outcomes and minimize complications.

      Comprehensive deep peel recovery phases:

      Acute Healing Phase (Days 1-14)

      • Significant pain and discomfort requiring prescription analgesics
      • Massive edema with possible eye swelling shut temporarily
      • Serous drainage and weeping requiring frequent dressing changes
      • Development of thick, dark crust or mask-like eschar
      • Gradual separation of necrotic tissue revealing bright red new skin
      • Strict wound care with medical-grade silicone gels or specialized dressings

      Early Maturation Phase (Weeks 2-8)

      • Intense erythema making skin appear sunburned
      • Extreme sensitivity to touch, temperature, and environmental factors
      • Persistent swelling, particularly with positional changes
      • Beginning of hypopigmentation as melanocytes recover unevenly
      • Vulnerability to irritation from previously tolerated products

      Late Remodeling Phase (Months 2-6)

      • Gradual fading of erythema to pink, then normal skin tone
      • Progressive improvement in skin texture and elasticity
      • Continued collagen remodeling with enhancing results
      • Establishment of final pigmentation pattern
      • Possible need for corrective treatments for residual concerns

      Skin-and-aesthetic-procedures-online-appointments-doseway.com

      How Does Skin Type Influence Chemical Peel Selection and Outcomes?

      The Fitzpatrick skin phototype classification system provides crucial guidance for chemical peel selection, as melanin content directly influences complication risks, particularly post-inflammatory hyperpigmentation. Understanding this relationship enables customization of treatment parameters for different ethnicities and skin tones.

      Chemical Peels for Fair Skin (Fitzpatrick I-III)

      Lighter skin types generally present lower risks for pigmentary complications, allowing more aggressive treatment approaches and deeper peel options. These patients typically experience excellent improvement in photodamage, rhytides, and actinic changes with proper technique.

      Optimal approaches for fair skin include:

      • Superficial Peels: Glycolic acid 50-70% for maintenance and mild rejuvenation
      • Medium Peels: TCA 35-50% for significant photodamage and wrinkles
      • Deep Peels: Phenol formulas for severe aging and precancerous lesions
      • Combination Therapies: Peels integrated with laser, filler, or neuromodulator treatments

      Special considerations for light skin:

      • Higher propensity for prolonged erythema and telangiectasia formation
      • Increased visibility of hypopigmentation with deep treatments
      • Greater risk of scarring with aggressive interventions
      • Enhanced improvement in solar lentigines and ephelides

      Chemical Peels for Olive and Medium Skin (Fitzpatrick IV)

      Intermediate skin types require careful balance between efficacy and pigmentary risk management. These patients benefit from modified approaches including extended pretreatment preparation, conservative peel selection, and meticulous post-procedure care.

      Recommended strategies for medium skin tones:

      • Superficial Peels: Mandelic, salicylic, or azelaic acids with lower irritation potential
      • Medium Peels: Combination approaches like Jessner's + low-concentration TCA
      • Deep Peels: Generally contraindicated due to high dyspigmentation risk
      • Series Approach: Multiple lighter treatments rather than single aggressive session

      Essential precautions for olive skin:

      • Mandatory pretreatment with hydroquinone or alternative bleaching agents
      • Test spot evaluation before full-face treatment
      • Extended sun protection with physical blockers containing iron oxides
      • Lower acid concentrations with longer intervals between treatments
      • Ready availability of post-inflammatory hyperpigmentation management options

      Chemical Peels for Dark Skin (Fitzpatrick V-VI)

      Darker skin types present the highest risk for pigmentary complications, requiring extremely conservative approaches and careful patient selection. Superficial peels represent the primary safe option, with medium and deep peels generally contraindicated.

      Appropriate peel options for dark skin:

      • Very Superficial Peels: Lactic acid 20-30%, phytic acid, or polyhydroxy acids
      • Salicylic Acid Peels: 20-30% for acne and oily skin concerns
      • Mandelic Acid Peels: 35-40% for melasma and post-inflammatory hyperpigmentation
      • Azelaic Acid Peels: 15-20% for inflammatory conditions and sensitivity

      Critical management principles for dark skin:

      • Extended pretreatment with multiple bleaching agents for 8-12 weeks
      • Exclusive use of superficial peels with avoidance of frosting
      • Lower concentrations with longer intervals between treatments
      • Aggressive management of any developing hyperpigmentation
      • Realistic expectations regarding modest, gradual improvement

      What Pre-Treatment Preparation Maximizes Chemical Peel Results and Safety?

      Proper skin preparation before chemical peel procedures significantly enhances outcomes while reducing potential complications. This priming period typically lasts 2-6 weeks depending on peel depth and individual patient factors.

      Essential Pre-Peel Skincare Regimen Components

      An effective preparation protocol addresses multiple skin functions including cell turnover, pigment regulation, barrier integrity, and microbial balance. Consistent use of key active ingredients creates optimal conditions for controlled wound healing.

      Core preparation products include:

      • Retinoids: Prescription-strength tretinoin or over-the-counter retinol to enhance epidermal penetration and accelerate healing
      • Hydroquinone: 4% prescription formulation or alternative brightening agents to suppress melanocyte activity
      • Alpha Hydroxy Acids: Low-concentration glycolic or lactic acid to normalize desquamation
      • Vitamin C Antioxidants: L-ascorbic acid serums to provide photoprotection and support collagen
      • Barrier Repair Creams: Ceramide-containing moisturizers to maintain skin integrity
      • Broad-Spectrum Sunscreen: SPF 30-50 with UVA/UVB protection applied daily

      Medical Evaluation and Contraindication Screening

      Comprehensive patient assessment identifies potential risk factors and absolute contraindications that might compromise safety or results. This evaluation includes medical history, medication review, skin analysis, and discussion of expectations.

      Absolute contraindications for chemical peels include:

      • Active bacterial, viral, or fungal infections
      • History of keloid formation or poor wound healing
      • Isotretinoin use within previous 6-12 months
      • Pregnancy or breastfeeding
      • Unrealistic patient expectations
      • Inability to comply with pre- and post-procedure instructions

      Relative contraindications requiring special consideration:

      • History of herpes simplex virus infections
      • Significant photodamage with extensive actinic keratoses
      • Radiofrequency or surgical procedures within previous 6 months
      • Inflammatory skin conditions like psoriasis or eczema
      • Immunosuppression or compromised healing capacity
      • History of abnormal pigmentary responses

      Board-certified-aesthetic-specialist-at-doseway.com-ready-to-discuss-your-skin-goals

      What Post-Treatment Care Ensures Optimal Chemical Peel Results?

      The postoperative period represents a critical window for influencing final outcomes through proper wound management, sun protection, and gradual reintroduction of active ingredients. Meticulous attention during this phase significantly impacts results and satisfaction.

      Immediate Post-Peel Wound Care Protocol

      The first 24-48 hours following medium and deep peels require specific interventions to support the healing cascade, manage discomfort, and prevent complications. This phase focuses on creating an optimal moist wound environment.

      Essential immediate aftercare steps:

      • Cool Compresses: Soothing applications to reduce inflammation and discomfort
      • Barrier Ointments: Frequent application of petrolatum-based products to prevent transepidermal water loss
      • Gentle Cleansing: Non-irritating cleansers that maintain appropriate pH balance
      • Elevated Sleep Position: Head elevation above heart level to minimize edema
      • Strict Sun Avoidance: Complete photoprotection including indoor light exposure
      • Hydration Support: Adequate water intake to support systemic healing processes

      Long-Term Maintenance and Results Preservation

      Beyond the initial healing phase, ongoing skincare practices preserve and enhance chemical peel results while preparing for potential future treatments. This maintenance phase integrates professional treatments with home care.

      Sustainable results preservation strategy:

      • Daily Sun Protection: Broad-spectrum SPF 30-50 with reapplication every 2 hours outdoors
      • Gradual Active Reintroduction: Slow incorporation of retinoids and acids after complete healing
      • Periodic Maintenance Peels: Superficial treatments every 4-8 weeks to sustain benefits
      • Antioxidant Protection: Morning application of vitamin C, ferulic acid, and vitamin E
      • Barrier Support: Continuous use of ceramides, cholesterol, and fatty acids
      • Professional Consultations: Regular follow-up with treating provider for assessment and adjustment

      How Does Our Chemical Peel Depth & Recovery Calculator Work?

      Our proprietary Chemical Peel Depth & Recovery Calculator represents a sophisticated clinical tool that analyzes multiple patient factors to generate personalized treatment recommendations. This algorithm incorporates evidence-based parameters to estimate appropriate peel depth, projected recovery timeline, and potential risk profile.

      Key Input Parameters and Their Clinical Significance

      The calculator processes diverse data points including demographic information, medical history, skin characteristics, and treatment goals to generate customized assessments. Each parameter influences the final recommendation through established clinical correlations.

      Critical input factors include:

      • Fitzpatrick Skin Type: Determines pigmentary risk and appropriate peel depth
      • Medical Conditions: Identifies potential healing complications or contraindications
      • Medication History: Flags agents that might impair healing or increase sensitivity
      • Previous Peel Experience: Establishes tolerance and guides progression
      • Sun Exposure Patterns: Informs photodamage assessment and post-peel protection needs
      • Skin Conditions: Tailors approach to specific concerns like acne, rosacea, or pigmentation
      • Desired Outcomes: Aligns expectations with realistic results based on peel depth

      Calculation Methodology and Result Interpretation

      The algorithm processes input data through weighted scoring systems that account for evidence-based clinical correlations between patient factors and peel outcomes. The resulting score places patients along a continuum from ideal superficial peel candidates to potential deep peel recipients.

      Score interpretation guidelines:

      • 1-3 Points: Excellent candidate for superficial peels with minimal downtime
      • 4-6 Points: Suitable for medium-depth peels with moderate recovery period
      • 7-10 Points: Potential candidate for deep peels requiring extensive downtime
      • Risk Assessment: Color-coded indicators from green (low risk) to red (high risk)

      Result components include:

      • Recommended Peel Depth: Superficial, medium, or deep based on cumulative score
      • Projected Recovery Timeline: Estimated social downtime and complete healing duration
      • Risk Profile Assessment: Identification of potential complications based on individual factors
      • Personalized Recommendations: Specific preparatory and aftercare instructions
      • Treatment Alternatives: Options for patients unsuitable for desired peel depth

      Womans-with-glowing-skin-after-successful-aesthetic-treatment-Book-a-free-consultation-at-doseway.com.

      Frequently Asked Questions About Chemical Peels

      How Painful Are Chemical Peels During and After Treatment?

      Pain perception varies significantly based on peel depth and individual tolerance. Superficial peels typically cause mild tingling or itching during application with minimal discomfort afterward. Medium peels involve moderate stinging or burning during application managed with cool air or fans, followed by tightness and sensitivity during healing. Deep peels require anesthesia or sedation during the procedure and prescription pain medication during initial recovery. Most patients report discomfort is manageable and significantly outweighed by results.

      Can Chemical Peels Actually Remove Acne Scars?

      Chemical peels can significantly improve various types of acne scars, though results depend on scar morphology and peel depth. Superficial peels help with textural irregularities and mild discolorations. Medium-depth peels effectively treat shallow boxcar and rolling scars through dermal remodeling. Deep peels offer the most dramatic improvement for severe scarring but require extensive downtime. Multiple sessions combined with other modalities like subcision or fillers often yield optimal results for complex scarring patterns.

      How Long Do Chemical Peel Results Typically Last?

      Result longevity correlates directly with peel depth and subsequent skincare maintenance. Superficial peel results last 1-2 months, requiring regular maintenance sessions. Medium peel outcomes typically persist 6-12 months with proper sun protection and skincare. Deep peel results can last 5-10 years or more, effectively turning back the clock on photodamage. All results gradually diminish without consistent sun protection, as new photodamage accumulates over time.

      Are Chemical Peels Safe for Sensitive Skin Types?

      Patients with sensitive skin can safely receive chemical peels with appropriate modifications. Superficial peels using gentle acids like lactic, mandelic, or phytic acid are generally well-tolerated. Pre-treatment conditioning with barrier repair ingredients reduces reactivity. Patch testing before full-face application identifies potential adverse reactions. Lower concentrations with shorter application times minimize irritation while still providing benefits. Avoiding multiple active ingredients during recovery prevents compounded sensitivity.

      What's the Difference Between Chemical Peels and Laser Treatments?

      Both modalities improve skin through controlled injury, but their mechanisms differ significantly. Chemical peels use acidic solutions to chemically exfoliate layers, while lasers employ light energy to thermally target specific chromophores. Peels generally cost less and provide more uniform coverage, while lasers offer greater precision for specific concerns. Peels work well for overall rejuvenation and pigment, while lasers excel at vascular lesions and focused resurfacing. Many patients benefit from combining both approaches in a comprehensive treatment plan.

      Can I Get a Chemical Peel During Summer Months?

      Chemical peels can be performed year-round with appropriate sun protection measures. However, the increased UV intensity during summer months requires more diligent photoprotection to prevent complications. Superficial peels pose minimal risk with daily sunscreen use. Medium and deep peels benefit from scheduling during fall or winter when sun exposure naturally decreases. Immediate post-peel periods require strict avoidance of direct sunlight regardless of season. Patients with recent significant sun exposure should delay peels until inflammation resolves.

      Do Chemical Peels Thin the Skin Over Time?

      Contrary to common misconception, properly performed chemical peels actually thicken the dermis through collagen stimulation. While the epidermis undergoes temporary thinning immediately after treatment, the wound healing response generates neocollagenesis and dermal remodeling that increases skin thickness long-term. Repeated superficial peels maintain this benefit by continuously stimulating cellular turnover without compromising barrier function. The key is appropriate peel selection and intervals that allow complete recovery between treatments.

      Medical-Grade Skincare:

      • SkinMedica TNS Essential Serum
      • Obagi Medical Nu-Derm System
      • Zo Skin Health Growth Factor Serum
      • SkinCeuticals C E Ferulic
      • Revision Skincare DEJ Face Cream

      Post-Procedure Recovery:

      • EltaMD UV Clear Broad-Spectrum SPF 46
      • La Roche-Posay Cicaplast Baume B5
      • Aquaphor Healing Ointment
      • Colorescience Sunforgettable Total Protection
      • SkinMedica Relief & Recovery Cream

      At-Home Peel Systems:

      • Dr. Dennis Gross Clinical Grade Resurfacing Liquid Peel
      • The Ordinary AHA 30% + BHA 2% Peeling Solution
      • Peter Thomas Roth Professional 3% Glycolic Solutions
      • PCA Skin At-Home Peel Collection
      • Murad Intensive-C Radiance Peel

      Professional Devices:

      • Foreo Luna 3 Cleansing Brush
      • NuFACE Trinity Facial Toning Device
      • Dr. Dennis Gross DRx SpectraLite FaceWare Pro
      • ZIIP Beauty Nanocurrent Device
      • LightStim for Wrinkles LED Device

      Otoplasty-For-Adults

      Otoplasty For Adults: Ear Pinning Guide

      Are you considering otoplasty to reshape your ears and boost your confidence? Adult ear pinning surgery has become increasingly popular among individuals seeking permanent correction for protruding or misshapen ears. This comprehensive guide covers everything from otoplasty costs and procedure details to recovery timelines and finding qualified surgeons.

      ✓ Cost Transparency: Understand the true cost of otoplasty with our detailed calculator
      ✓ Procedure Insights: Learn about surgical techniques, anesthesia options, and the recovery process
      ✓ Surgeon Selection: Discover how to choose the right plastic surgeon for your ear pinning
      ✓ Recovery Guidance: Get practical tips for optimal healing and results
      ✓ Alternative Options: Explore non-surgical approaches and their limitations

      Ear Pinning Cost Calculator

      Ear Pinning Cost Calculator

      Estimate the cost of your otoplasty procedure based on multiple factors

      1
      Personal Info
      2
      Medical History
      3
      Procedure Details
      4
      Results

      Personal Information

      Medical History

      Hold Ctrl/Cmd to select multiple options
      Hold Ctrl/Cmd to select multiple options
      Hold Ctrl/Cmd to select multiple options

      Procedure Details

      Moderate (5/10)

      Your Ear Pinning Cost Estimate

      Based on the information you provided

      $4,500 – $6,800
      $2,000 $5,000 $8,000 $11,000+

      Cost Interpretation

      Your estimated cost falls within the moderate range for otoplasty procedures. This estimate includes surgeon fees, anesthesia, and facility costs but may not include pre-operative tests or post-operative care.

      Cost Breakdown

      Surgeon Fee: $2,500 – $4,000
      Anesthesia: $800 – $1,200
      Facility Fee: $1,000 – $1,500
      Additional Procedures: $200 – $1,100

      Disclaimer: This calculator provides estimates only. Actual costs may vary based on your specific condition, geographic location, and surgeon. Consult with a qualified medical professional for accurate pricing and treatment recommendations.

      Read More Guides & Try More Free Tools:

      Skin-analysis-personalized-plan-and-transparent-pricing-at-doseway.com

      Otoplasty-For-Adults
      Otoplasty-For-Adults

      What is Otoplasty and How Can It Transform Your Appearance?

      Otoplasty, commonly known as ear pinning surgery, is a cosmetic procedure designed to reshape, resize, or reposition the ears for improved facial harmony. This surgical intervention addresses concerns like protruding ears, oversized earlobes, or ear deformities that can cause self-consciousness and social anxiety. The procedure involves precise cartilage modification to create natural-looking results that complement your facial features.

      The psychological impact of otoplasty cannot be overstated. Many adults report significant improvements in self-esteem and quality of life following ear correction surgery. Unlike temporary solutions, otoplasty provides permanent structural changes to the ear cartilage, ensuring lasting results that withstand the test of time.

      Key benefits of adult otoplasty include:
      ✓ Permanent correction of ear positioning
      ✓ Natural-looking results that don’t appear “done”
      ✓ Minimal visible scarring behind the ears
      ✓ Customized approach based on individual anatomy
      ✓ Improved proportion between ears and facial features
      ✓ Enhanced confidence in personal and professional settings

      Who Makes an Ideal Candidate for Adult Ear Pinning Surgery?

      Determining your suitability for otoplasty involves several medical and personal factors. The ideal candidate for ear pinning surgery is typically in good general health with specific ear concerns that cause psychological distress or social discomfort. Understanding these criteria helps ensure optimal outcomes and patient satisfaction.

      Adults considering otoplasty should have realistic expectations about the procedure’s outcomes. While ear pinning can create dramatic improvements in ear appearance and positioning, it cannot create “perfect” symmetry or completely transform your overall facial appearance. The best candidates understand both the benefits and limitations of cosmetic ear surgery.

      Common indicators for otoplasty candidacy include:
      ✓ Protruding ears that extend significantly from the head
      ✓ Dissatisfaction with ear appearance since childhood or adolescence
      ✓ Good physical health without uncontrolled medical conditions
      ✓ Non-smoker status or willingness to quit before and after surgery
      ✓ Realistic expectations about surgical outcomes and limitations
      ✓ Emotional maturity to handle the recovery process and results

      What Medical Conditions Might Affect Your Otoplasty Eligibility?

      Certain health conditions can impact your suitability for ear pinning surgery or require special precautions. During your consultation, board-certified plastic surgeons will evaluate your medical history to identify potential risk factors and determine the safest approach to your procedure.

      Uncontrolled diabetes, bleeding disorders, or immune conditions may require additional medical clearance before proceeding with otoplasty. Similarly, active ear infections or chronic ear conditions must be properly managed before considering cosmetic ear surgery. Your surgeon will coordinate with your primary care physician when necessary to ensure your safety.

      Medical considerations affecting otoplasty include:
      ✓ History of keloid scarring or poor wound healing
      ✓ Blood clotting disorders or anticoagulant medications
      ✓ Uncontrolled hypertension or cardiovascular conditions
      ✓ Active infections in the ear or surrounding tissues
      ✓ Connective tissue disorders affecting cartilage integrity
      ✓ Previous ear surgeries or traumatic ear injuries

      How Does the Otoplasty Procedure Actually Work?

      The technical execution of ear pinning surgery involves precise surgical techniques tailored to your specific anatomical needs. Understanding the surgical process helps alleviate anxiety and prepares you for what to expect during your otoplasty journey. The procedure typically follows a structured approach from anesthesia to final suturing.

      Surgeons begin by administering local anesthesia with sedation or general anesthesia based on your comfort level and procedure complexity. Incisions are strategically placed in the natural creases behind the ears to minimize visible scarring. The surgeon then accesses the ear cartilage through these incisions to reshape, trim, or reposition the structural components.

      The surgical process involves these key steps:
      ✓ Anesthesia administration for complete comfort
      ✓ Strategic incision placement behind the ear
      ✓ Cartilage exposure and modification
      ✓ Suture techniques to maintain new ear position
      ✓ Skin trimming and wound closure
      ✓ Protective dressing application

      What Are the Different Otoplashy Techniques Available?

      Otoplasty encompasses several surgical approaches, each designed to address specific ear concerns. The technique your surgeon recommends depends on your ear anatomy, cosmetic goals, and the degree of correction required. Understanding these options helps you make informed decisions about your procedure.

      The traditional cartilage-sparing technique involves placing permanent sutures to reshape the antihelical fold without removing cartilage. Alternatively, cartilage-scoring techniques create controlled weakening of the cartilage to allow easier reshaping. Combination approaches often yield the most natural results for complex cases requiring significant correction.

      Common otoplasty techniques include:
      ✓ Mustardé Technique: Suture-based ear pinning without cartilage removal
      ✓ Cartilage Scoring: Abrading or incising cartilage to increase flexibility
      ✓ Conchal Setback: Reducing the deep bowl of the ear when necessary
      ✓ Cartilage Resection: Removing excess cartilage for severe cases
      ✓ Earlobe Reduction: Correcting elongated or disproportionate earlobes

      How Much Does Otoplasty Typically Cost for Adults?

      The financial investment in ear pinning surgery varies significantly based on multiple factors. Our otoplasty cost calculator provides personalized estimates, but understanding the cost components helps you budget appropriately and avoid unexpected expenses. The total cost encompasses surgeon fees, facility charges, anesthesia, and related medical expenses.

      Geographic location dramatically influences otoplasty pricing, with major metropolitan areas typically commanding higher fees than smaller cities. Surgeon expertise and reputation also impact costs, with board-certified plastic surgeons generally charging more than general practitioners. The complexity of your specific case and surgical time required also contribute to the final price.

      Typical otoplasty cost ranges by region:
      ✓ United States: $3,000 – $8,000
      ✓ United Kingdom: £2,500 – £5,500
      ✓ European Union: €2,800 – €6,500
      ✓ Canada: $4,000 – $7,500
      ✓ Australia: $4,500 – $9,000

      What Factors Influence the Final Cost of Ear Pinning Surgery?

      Multiple variables contribute to the final price of your otoplasty procedure. Understanding these factors helps you make cost-effective decisions without compromising safety or results. Our cost calculator incorporates these elements to provide accurate, personalized estimates for your specific situation.

      Surgeon expertise represents a significant portion of the total cost, with highly experienced specialists commanding premium fees. The surgical facility type also affects pricing, with hospital operating rooms generally more expensive than accredited surgical centers. Anesthesia choice, procedure complexity, and geographic location further influence the financial investment required.

      Key cost determinants include:
      ✓ Surgeon’s training, certification, and experience level
      ✓ Surgical facility fees (hospital vs. surgical center)
      ✓ Anesthesia type (local with sedation vs. general)
      ✓ Procedure complexity and surgical time required
      ✓ Geographic location and local market rates
      ✓ Pre-operative tests and post-operative care needs

      Doseway-aesthetic-procedures-andonline-booking-details

      What Does the Otoplasty Recovery Process Actually Involve?

      The healing journey after ear pinning surgery follows a predictable timeline with specific milestones. Understanding the recovery process helps you plan appropriately and achieve optimal results. Proper post-operative care significantly impacts your final outcome and minimizes complication risks.

      Immediately following surgery, you’ll wear a protective head dressing that supports the new ear position and minimizes swelling. This dressing typically remains in place for several days before transitioning to a lighter headband. Most patients return to non-strenuous work within 5-7 days, while complete healing requires several months.

      Recovery timeline overview:
      ✓ First 48 hours: Protective dressing, mild discomfort, swelling
      ✓ Week 1-2: Stitch removal, transition to headband, reduced swelling
      ✓ Weeks 3-6: Gradual return to normal activities, continued headband use at night
      ✓ Months 2-3: Final ear position established, residual swelling resolves
      ✓ 6+ months: Complete healing, final results apparent

      What Results Can You Realistically Expect from Ear Pinning Surgery?

      Setting appropriate expectations ensures satisfaction with your otoplasty outcomes. While ear pinning creates significant improvements in ear position and appearance, understanding what constitutes successful results helps you appreciate the transformation. The goal is natural-looking ears that blend harmoniously with your facial features.

      Immediately after surgery, your ears will appear closer to your head than the final result due to post-operative swelling. As healing progresses over several months, the true ear position emerges. While perfect symmetry is unlikely, skilled surgeons achieve noticeable improvement in ear projection and balance. The scars mature and fade significantly within the first year.

      Realistic otoplasty outcomes include:
      ✓ Improved ear position and reduced protrusion
      ✓ Enhanced facial balance and proportion
      ✓ Natural-looking ear contours and folds
      ✓ Minimal visible scarring behind the ears
      ✓ Increased confidence in personal appearance
      ✓ Permanent structural changes to ear cartilage

      How Do You Choose the Right Otoplasty Surgeon?

      Selecting a qualified plastic surgeon represents the most critical decision in your otoplasty journey. The surgeon’s skill, experience, and artistic judgment directly impact your safety and results. Thorough research and multiple consultations help identify the best practitioner for your specific needs.

      Board certification in plastic surgery ensures your surgeon has completed rigorous training specific to cosmetic procedures. Reviewing before-and-after photos of previous otoplasty patients provides insight into the surgeon’s aesthetic style and technical ability. Personal rapport and communication style also matter, as you’ll collaborate closely throughout the process.

      Surgeon selection criteria:
      ✓ Board certification by recognized plastic surgery organizations
      ✓ Significant experience performing otoplasty procedures
      ✓ Comprehensive before-and-after photo gallery
      ✓ Positive patient testimonials and reviews
      ✓ Hospital privileges at accredited medical facilities
      ✓ Clear communication and realistic expectation setting

      What Are the Potential Risks and Complications of Otoplasty?

      Like any surgical procedure, ear pinning carries certain risks that patients should understand before proceeding. While serious complications are rare with experienced surgeons, informed consent requires acknowledging these possibilities. Proper surgical technique and post-operative care minimize most risks.

      Common temporary side effects include swelling, bruising, and mild discomfort that resolve within the first few weeks. More significant complications like hematoma, infection, or cartilage irregularities occur infrequently but require prompt medical attention. Understanding these possibilities helps you make an informed decision and recognize concerning symptoms.

      Potential otoplasty complications:
      ✓ Hematoma (blood collection requiring drainage)
      ✓ Infection requiring antibiotic treatment
      ✓ Asymmetry between the two ears
      ✓ Cartilage irregularities or contour problems
      ✓ Suture complications or extrusion
      ✓ Numbness or changes in skin sensation
      ✓ Hypertrophic scarring or keloid formation

      How Does Age Affect Otoplasty Results and Recovery?

      Adult otoplasty presents distinct considerations compared to pediatric ear pinning. Understanding these age-related factors helps set appropriate expectations and optimize your surgical experience. While adults heal slightly slower than children, they often demonstrate greater compliance with post-operative instructions.

      The adult ear cartilage has complete maturity and firmer consistency, requiring different surgical techniques than the more pliable pediatric cartilage. Adult patients typically have clearer motivations for surgery and more realistic expectations about outcomes. Recovery may take slightly longer than in children, but final results are equally predictable and permanent.

      Age-related otoplasty considerations:
      ✓ Firmer cartilage requiring specific surgical approaches
      ✓ Slower healing response compared to pediatric patients
      ✓ More defined personal motivations for surgery
      ✓ Better compliance with post-operative care instructions
      ✓ Potential for more noticeable scarring in some adults
      ✓ Longer recovery timeline to final results

      Skin-and-aesthetic-procedures-online-appointments-doseway.com

      What Non-Surgical Alternatives Exist for Ear Reshaping?

      While surgical otoplasty remains the gold standard for permanent ear correction, several non-invasive options deserve consideration for mild cases or patients avoiding surgery. Understanding these alternatives helps you make fully informed decisions about addressing your ear concerns. Each approach has specific benefits and limitations.

      EarWell infant ear molding systems can effectively reshape newborn ears without surgery but have limited application in adults. Temporary solutions like special hairstyles, prosthetic ears, or adhesive products provide cosmetic camouflage but don’t address the underlying structure. Currently, no injectable or energy-based treatments effectively reshape ear cartilage in adults.

      Non-surgical ear correction options:
      ✓ Infant ear molding: Effective only in first weeks of life
      ✓ Prosthetic devices: Custom silicone prosthetics for missing ears
      ✓ Adhesive solutions: Temporary correction using skin-safe adhesives
      ✓ Camouflage techniques: Strategic hairstyling to minimize ear prominence
      ✓ Psychological approaches: Building self-acceptance without physical changes

      How Can You Optimize Your Otoplasty Results Through Preparation?

      Proper pre-operative preparation significantly impacts your surgical experience, recovery speed, and final results. Implementing specific recommendations before your procedure creates optimal conditions for successful healing. Your surgeon will provide personalized instructions based on your health status and surgical plan.

      Nutritional optimization before surgery supports immune function and tissue repair. Smoking cessation at least 4-6 weeks pre-operatively reduces complication risks and improves healing. Medication adjustments under medical supervision prevent bleeding issues during and after surgery. Mental preparation through realistic expectation setting enhances satisfaction with your outcomes.

      Pre-operative optimization strategies:
      ✓ Balanced nutrition with adequate protein and vitamins
      ✓ Complete smoking cessation at least one month before surgery
      ✓ Medication review and adjustment with your physicians
      ✓ Arrangement of practical support during early recovery
      ✓ Mental preparation through education and realistic goal setting
      ✓ Completion of necessary lab tests or medical clearances

      What Post-Operative Care Maximizes Otoplasty Success?

      Diligent post-surgical care directly influences your healing quality and final results. Following your surgeon’s instructions precisely minimizes complications and supports optimal outcomes. Understanding the rationale behind these recommendations improves compliance and problem recognition.

      Head elevation during sleep reduces early swelling and promotes comfort. Proper wound care prevents infection and supports clean healing. Consistent use of protective headgear prevents accidental trauma to the healing ears. Activity restrictions protect the surgical site during the delicate healing phase. Attending all follow-up appointments allows your surgeon to monitor progress and address concerns promptly.

      Essential post-operative care measures:
      ✓ Strict head elevation, especially during sleep
      ✓ Gentle wound care with recommended cleansers
      ✓ Consistent use of protective headbands as directed
      ✓ Gradual return to activities based on surgeon guidance
      ✓ Prompt reporting of concerning symptoms to your surgeon
      ✓ Attendance at all scheduled follow-up appointments
      ✓ Sun protection of healing incisions for optimal scarring

      How Does Otoplasty Impact Your Daily Life and Activities?

      Understanding the practical implications of ear pinning surgery helps you plan appropriately and manage expectations. While the recovery period requires temporary activity modifications, most patients resume normal routines within a few weeks. Planning for these adjustments ensures a smooth transition through the healing process.

      Work accommodations depend on your profession, with desk jobs typically resumable within 5-7 days and physically demanding jobs requiring 2-3 weeks off. Exercise restrictions protect the healing ears, with gradual reintroduction of activities over 4-6 weeks. Social considerations include explaining your absence or appearance changes to friends and colleagues.

      Activity timeline after otoplasty:
      ✓ Desk work: Return within 5-7 days with headband
      ✓ Light exercise: Resume after 2-3 weeks with head protection
      ✓ Contact sports: Wait 8-12 weeks with protective gear
      ✓ Swimming: Avoid for 4-6 weeks until incisions heal completely
      ✓ Air travel: Possible after 1-2 weeks with surgeon approval
      ✓ Social events: Attend after 1-2 weeks as comfort allows

      What Psychological Benefits Does Otoplasty Provide?

      The emotional impact of ear pinning surgery often exceeds the physical transformation. Many patients report life-changing improvements in self-confidence and social comfort following otoplasty. Understanding these psychological benefits helps contextualize the value of the procedure beyond mere aesthetics.

      Adults who have felt self-conscious about their ears for decades often experience significant relief after surgery. The constant awareness of ear prominence diminishes, allowing fuller engagement in personal and professional interactions. Many patients report trying new hairstyles, activities, and social situations they previously avoided due to ear-related anxiety.

      Documented psychological benefits:
      ✓ Reduced self-consciousness and social anxiety
      ✓ Improved body image and self-perception
      ✓ Enhanced confidence in professional settings
      ✓ Greater willingness to participate in social activities
      ✓ Decreased preoccupation with physical appearance
      ✓ Improved overall quality of life and life satisfaction

      How Does Otoplasty Compare to Other Facial Cosmetic Procedures?

      Understanding where ear pinning fits within the spectrum of facial cosmetic procedures helps contextualize its benefits, risks, and recovery. While less complex than some facial surgeries, otoplasty requires specific surgical expertise and delivers unique psychological benefits compared to other procedures.

      The recovery from otoplasty is generally quicker than from facelift or rhinoplasty, with less visible swelling and bruising. The cost typically falls below most other facial surgical procedures while delivering significant psychological impact. Unlike some cosmetic surgeries that fight aging, otoplasty addresses a structural concern that remains consistent throughout life.

      Comparative procedure analysis:
      ✓ Cost: Generally lower than rhinoplasty or facelift
      ✓ Recovery: Quicker return to normal activities than most facial surgeries
      ✓ Scarring: Better concealed than most facial incisions
      ✓ Anesthesia: Often possible with local anesthesia and sedation
      ✓ Psychological impact: High satisfaction rates comparable to other procedures
      ✓ Longevity: Permanent results unlike injectable treatments

      Board-certified-aesthetic-specialist-at-doseway.com-ready-to-discuss-your-skin-goals

      What Technological Advances Have Improved Otoplasty Outcomes?

      Modern otoplasty benefits from several technological innovations that enhance precision, safety, and results. Understanding these advances helps you appreciate the sophistication of contemporary ear pinning surgery and discuss technique options with your surgeon.

      High-resolution digital photography allows precise pre-operative planning and simulation of potential outcomes. Improved suture materials provide strong, lasting support with minimal reaction. Advanced cartilage scoring instruments enable more controlled and predictable reshaping. Endoscopic techniques offer alternative approaches in selected cases, though traditional methods remain most common.

      Technological advances in otoplasty:
      ✓ 3D imaging for surgical planning and simulation
      ✓ Improved permanent suture materials for cartilage support
      ✓ Specialized cartilage scoring instruments for precise control
      ✓ Enhanced magnification systems for detailed work
      ✓ Advanced hemostatic techniques reducing bleeding risks
      ✓ Better dressing materials for optimal post-operative support

      How Can You Finance Your Otoplasty Procedure?

      The financial aspect of ear pinning surgery requires careful consideration and planning. While cosmetic otoplasty typically isn’t covered by insurance, various financing options make the procedure accessible to qualified candidates. Understanding these alternatives helps you proceed with confidence.

      Many plastic surgery practices offer payment plans that spread the cost over several months. Medical credit companies provide specialized financing for elective procedures with promotional interest rates. Personal loans from financial institutions represent another option for funding your surgery. Some patients use health savings accounts or flexible spending accounts for eligible medical expenses.

      Financing options for otoplasty:
      ✓ Practice payment plans through your surgeon’s office
      ✓ Medical credit cards with promotional financing periods
      ✓ Personal loans from banks or credit unions
      ✓ Health savings accounts (HSAs) for eligible expenses
      ✓ Flexible spending accounts (FSAs) for out-of-pocket costs
      ✓ Savings plans with targeted timeline for procedure

      What Global Variations Exist in Otoplasty Techniques and Preferences?

      Cultural and geographic factors influence otoplasty approaches and aesthetic ideals. Understanding these variations provides context for surgical decision-making and helps communicate your personal goals effectively with your surgeon. While core surgical principles remain consistent, technical nuances reflect regional preferences.

      North American otoplasty often emphasizes natural-looking correction that doesn’t appear surgical. European techniques may involve more aggressive cartilage modification in some cases. Asian otoplasty frequently addresses different concerns like constricted ears or additional anatomical considerations. Surgeon training and tradition also influence technical approach selection.

      Regional otoplasty characteristics:
      ✓ North America: Natural-looking results, conservative approach
      ✓ Europe: Diverse techniques, sometimes more cartilage modification
      ✓ Asia: Focus on specific anatomical variations common in Asian populations
      ✓ South America: Artistic emphasis, sometimes more dramatic correction
      ✓ Australia: Balanced approach combining various international techniques

      How Does Cartilage Quality Affect Otoplasty Approach and Results?

      The structural characteristics of your ear cartilage significantly influence surgical technique selection and outcome predictability. Understanding this relationship helps explain why surgeons recommend specific approaches based on individual anatomy. Cartilage stiffness, thickness, and memory vary considerably between patients.

      Softer, more pliable cartilage responds well to suture-only techniques, while stiffer cartilage may require scoring or resection for optimal reshaping. Cartilage memory refers to the tendency to return to the original position, which must be overcome during surgery. Experienced surgeons assess these qualities during examination to determine the most effective surgical plan.

      Cartilage considerations in otoplasty:
      ✓ Stiffness: Determines need for scoring versus suture techniques
      ✓ Thickness: Influences surgical approach and healing response
      ✓ Memory: Affects long-term stability of surgical correction
      ✓ Elasticity: Impacts intraoperative manipulation and shaping
      ✓ Structural integrity: Influences risk of contour irregularities

      What Role Does Genetics Play in Ear Shape and Otoplasty Outcomes?

      Genetic factors significantly influence ear anatomy, including the predisposition to protruding ears and response to surgical correction. Understanding these hereditary patterns provides insight into your specific situation and helps set realistic expectations for surgical outcomes.

      Protruding ears often follow autosomal dominant inheritance patterns, meaning they can be passed from one generation to the next. Family history may predict cartilage characteristics that influence surgical planning. While genetics don’t determine surgical success, they help explain individual variations in ear appearance and healing responses.

      Genetic influences on otoplasty:
      ✓ Inheritance patterns of prominent ear features
      ✓ Family history of cartilage characteristics
      ✓ Genetic predisposition to healing responses
      ✓ Hereditary factors in scar formation
      ✓ Familial patterns of ear aging and changes

      How Can You Maintain Otoplasty Results Long-Term?

      While otoplasty provides permanent structural changes, certain practices help maintain optimal results throughout your life. Understanding these long-term considerations protects your surgical investment and ensures lasting satisfaction with your ear appearance.

      Protecting your ears from trauma prevents disruption of the surgical correction. Sun protection minimizes scar visibility and prevents skin damage. General health maintenance supports tissue integrity as you age. While normal aging processes continue, the fundamental correction achieved through surgery remains stable with proper care.

      Long-term maintenance strategies:
      ✓ Ear protection during contact sports or hazardous activities
      ✓ Consistent sun protection including sunscreen and hats
      ✓ General health maintenance through balanced nutrition and exercise
      ✓ Avoidance of significant weight fluctuations that might affect ear appearance
      ✓ Periodic follow-up with your surgeon as recommended
      ✓ Prompt attention to any ear injuries or changes

      Womans-with-glowing-skin-after-successful-aesthetic-treatment-Book-a-free-consultation-at-doseway.com.

      Frequently Asked Questions About Otoplasty

      What is the ideal age for otoplasty?
      While otoplasty can be performed at any age after ear maturation (around 5-6 years), many adults choose the procedure after completing their education or during career transitions. There’s no upper age limit for healthy candidates seeking ear correction.

      How painful is ear pinning surgery?
      Most patients describe otoplasty as mildly uncomfortable rather than painful. Discomfort peaks in the first 48 hours and is well-controlled with prescribed medications. Many patients transition to over-the-counter pain relievers within a few days.

      Can otoplasty be combined with other procedures?
      Yes, otoplasty is frequently combined with other facial procedures like rhinoplasty, blepharoplasty, or facelift. Combining procedures can reduce overall recovery time and cost compared to separate surgeries.

      Will people notice I’ve had ear surgery?
      Most people will notice an improvement in your appearance but won’t specifically identify ear surgery unless you mention it. The results appear natural, simply making your ears look better proportioned rather than “operated.”

      How long do otoplasty results last?
      Otoplasty provides permanent structural changes to the ear cartilage. While normal aging continues, the fundamental correction remains throughout your lifetime without need for repeat procedures.

      Can otoplasty correct uneven ears?
      Yes, addressing asymmetry is a common goal of otoplasty. Skilled surgeons can improve ear balance even when starting with significantly different ear positions or shapes.

      What happens if I’m not satisfied with my otoplasty results?
      Revision rates for otoplasty are low, but if concerns arise, discuss them with your surgeon once healing is complete. Most issues can be improved with minor adjustments, though complete reoperation is rarely necessary.

      1. Post-Surgical Headbands: Mepiform Silicone Gel Sheets for scar management
      2. Recovery Comfort Products: Masthead Otoplasty Pillow for elevated sleeping
      3. Surgical Aftercare Kits: Embrace Scar Therapy for optimal healing
      4. Ear Protection: Custom swim molds for post-operative water activities
      5. Sun Protection Products: EltaMD UV Clear Broad-Spectrum for scar protection
      Arm-Tuck

      Arm Tuck (Brachioplasty) Cost & Recovery

      Are you considering an arm tuck procedure to achieve toned, contoured arms? Brachioplasty, commonly known as arm lift surgery, has become increasingly popular for individuals seeking to eliminate excess skin and fat that persists despite diet and exercise.

      ✓ Complete cost analysis of arm tuck procedures across different regions
      ✓ Detailed recovery timeline with week-by-week expectations
      ✓ Procedure variations from mini to extended brachioplasty
      ✓ Factors influencing results and cost calculations
      ✓ Pre-operative preparation and post-operative care guidelines
      ✓ Realistic outcome expectations and potential risks
      ✓ Affordable alternatives and financing options

      Arm Tuck Cost Estimator

      Arm Tuck Cost Estimator

      This tool helps estimate the potential costs associated with arm tuck procedures based on your specific profile and requirements.

      1
      Demographics
      2
      Medical History
      3
      Procedure Details
      4
      Results

      Personal Information

      Medical History

      Hold Ctrl/Cmd to select multiple options
      Hold Ctrl/Cmd to select multiple options
      Hold Ctrl/Cmd to select multiple options

      Procedure Details

      5/10
      5/10
      5/10

      Your Arm Tuck Cost Estimate

      $5,500 – $8,500

      Interpretation

      Based on your profile, you are a moderate candidate for an arm tuck procedure. The estimated cost range reflects standard pricing for your selected procedure type and geographic location.

      Recommendations

      • Consult with a board-certified plastic surgeon for a precise quote
      • Consider the additional costs of anesthesia, facility fees, and post-operative care
      • Review financing options if needed
      • Ensure you have adequate time for recovery based on your selected timeline

      Disclaimer: This tool provides estimates only and is not a substitute for professional medical advice. Actual costs may vary based on surgeon, facility, geographic location, and individual patient factors. Always consult with a qualified healthcare provider for personalized medical advice.

      Read More Guides & Try More Free Tools:

      Skin-analysis-personalized-plan-and-transparent-pricing-at-doseway.com

      What is Arm Tuck Surgery (Brachioplasty) and How Does It Work?

      Brachioplasty, commonly referred to as arm lift surgery, is a cosmetic surgical procedure designed to reshape and contour the upper arms by removing excess skin and fat. This procedure specifically targets what many patients call "bat wings" - the sagging skin that droops from the upper arm when extended. The surgery involves precise incisions, tissue removal, and strategic suturing to create smoother, more toned-looking arms.

      The fundamental goal of brachioplasty is to address skin laxity that typically results from significant weight loss, aging, or genetic predisposition. Unlike non-surgical treatments that may mildly improve skin texture, arm tuck surgery provides dramatic, permanent removal of excess tissue. The procedure requires careful preoperative planning to determine incision placement based on the amount and location of excess tissue.

      Key aspects of brachioplasty include:
      ✓ Removal of loose, hanging skin from the upper arms
      ✓ Reduction of stubborn fat deposits resistant to diet and exercise
      ✓ Tightening of supportive tissue layers beneath the skin
      ✓ Repositioning of remaining tissue for improved contour
      ✓ Strategic incision placement to minimize visible scarring

      What Are the Different Types of Arm Lift Procedures Available?

      Traditional Brachioplasty: The Standard Approach

      Traditional brachioplasty addresses moderate to severe skin laxity extending from the armpit to the elbow. This approach involves an incision placed along the inner or posterior aspect of the arm, strategically positioned to be less visible when the arms are at rest. The procedure removes a elliptical section of skin and fat, then tightens the underlying supportive tissues before closing the incision.

      The traditional method is particularly effective for patients who have experienced massive weight loss resulting in significant skin excess. Surgeons carefully assess skin quality, fat distribution, and the degree of sagging to determine the appropriate amount of tissue removal. The resulting scar typically runs from the armpit to the elbow, though skilled surgeons can sometimes minimize this length based on individual anatomy.

      Limited Incision Arm Lift: The Mini Brachioplasty

      Limited incision brachioplasty, often called a mini arm lift, targets mild to moderate skin excess concentrated primarily in the upper arm near the armpit area. This approach involves a shorter incision concealed within the armpit crease, making it ideal for patients with good skin elasticity and minimal sagging below the mid-upper arm.

      The mini arm lift offers several advantages including reduced scarring and potentially quicker recovery. However, it provides more limited correction compared to traditional brachioplasty. Candidates for this procedure typically have minimal skin excess that doesn't extend significantly toward the elbow and possess good skin elasticity that will contract adequately after fat removal.

      Extended Brachioplasty: Addressing Adjacent Areas

      Extended brachioplasty incorporates correction of adjacent areas beyond the upper arms, particularly the lateral chest wall and axillary region. This approach is beneficial for patients who have excess skin and fat that extends from the arms onto the side of the chest, creating what's often described as "bra overhang" or "back rolls."

      The incision for extended brachioplasty continues from the arm into the armpit and along the lateral chest wall, allowing for comprehensive upper body contouring. This technique is particularly valuable for post-bariatric surgery patients or those with significant weight fluctuations who have developed tissue laxity across multiple adjacent areas. The procedure creates a more dramatic transformation but involves more extensive incisions and recovery time.

      Liposuction-Only Arm Contouring: The Minimal Approach

      For patients with good skin elasticity and primarily fatty deposits without significant skin excess, liposuction alone may provide satisfactory arm contouring. This approach involves small incisions through which a cannula is inserted to break up and remove fat cells. The procedure offers minimal scarring and shorter recovery but doesn't address skin laxity.

      Liposuction-only arm contouring works best for younger patients with good skin tone who struggle with disproportionate fat accumulation in the upper arms. The procedure can create significant improvement in arm shape but may even exacerbate the appearance of loose skin in patients with pre-existing laxity. A thorough assessment of skin quality is essential before choosing this approach.

      What Factors Determine Arm Tuck Cost and How is Pricing Structured?

      Surgeon's Expertise and Geographic Location

      The surgeon's qualifications, experience, and reputation significantly influence brachioplasty costs. Board-certified plastic surgeons with extensive arm lift experience typically command higher fees due to their specialized skills and consistent results. Geographic location also plays a substantial role, with procedures in major metropolitan areas generally costing more than those in smaller cities or rural areas.

      Surgeon fees typically include:
      ✓ Pre-operative consultations and planning
      ✓ Surgical procedure performance
      ✓ Follow-up appointments during recovery
      ✓ Management of any complications

      The geographic variation in pricing reflects differences in overhead costs, market demand, and regional economic factors. Patients may find significant cost differences between countries as well, with medical tourism offering lower prices but introducing additional considerations regarding travel and follow-up care.

      Anesthesia and Facility Fees

      Anesthesia fees cover the cost of the anesthesiologist or certified nurse anesthetist who administers anesthesia and monitors the patient throughout the procedure. The type of anesthesia used (general versus intravenous sedation) affects this cost. Facility fees encompass the use of the surgical facility, whether a hospital, ambulatory surgical center, or office-based operating room.

      These fees typically include:
      ✓ Operating room equipment and supplies
      ✓ Nursing staff and technical support
      ✓ Medications administered during surgery
      ✓ Recovery room care immediately post-operation

      The accreditation level of the surgical facility also impacts pricing, with fully accredited facilities meeting stringent safety standards typically charging higher fees. Patients should verify that their procedure will be performed in a properly accredited facility with appropriate emergency equipment and protocols.

      Procedure Complexity and Technique Selection

      The specific brachioplasty technique selected directly influences the overall cost. More complex procedures like extended brachioplasty with lateral chest contouring naturally cost more than limited incision mini arm lifts. The amount of tissue to be removed, the need for liposuction in combination with skin excision, and the anticipated surgery duration all contribute to the final price.

      Additional factors affecting complexity-based pricing include:
      ✓ Need for concurrent procedures (like breast lift or body lift)
      ✓ Revision surgery cases with scar tissue from previous procedures
      ✓ Patients with significant medical comorbidities requiring special precautions
      ✓ Unusual anatomical considerations requiring customized surgical planning

      Patients with higher BMI or those who have experienced massive weight loss typically require more extensive surgery, longer operating times, and more complex closure techniques, all of which increase costs. A thorough consultation allows the surgeon to assess these factors and provide an accurate cost estimate.

      Doseway-aesthetic-procedures-andonline-booking-details

      How Does Our Arm Tuck Cost Calculator Provide Accurate Estimates?

      Demographic and Anthropometric Inputs

      Our arm tuck cost calculator incorporates key demographic and physical characteristics that significantly influence procedure pricing. Age, gender, height, and weight provide essential information about a patient's baseline characteristics that affect surgical planning and complexity. These factors help determine skin quality, fat distribution patterns, and potential healing capacity.

      The calculator processes this information to:
      ✓ Assess potential skin elasticity and predicted tissue response
      ✓ Estimate anatomical considerations affecting surgical approach
      ✓ Determine possible risk factors that might require special precautions
      ✓ Calculate BMI and its implications for surgical complexity

      These inputs create a personalized profile that forms the foundation for accurate cost estimation, recognizing that a 25-year-old with good skin elasticity and minimal weight fluctuation history presents different surgical considerations than a 55-year-old with significant weight loss and skin laxity.

      Medical History and Risk Assessment

      Comprehensive medical history evaluation allows our calculator to identify factors that might increase surgical complexity or necessitate additional precautions. Conditions like diabetes, hypertension, or bleeding disorders may require special preoperative optimization, intraoperative monitoring, or postoperative management, all of which can affect overall cost.

      The calculator evaluates how these factors influence:
      ✓ Anesthesia requirements and monitoring needs
      ✓ Potential for complications requiring additional management
      ✓ Healing capacity and possible need for specialized wound care
      ✓ Medication adjustments or special preoperative testing

      Smoking status significantly impacts brachioplasty cost calculations due to its well-documented negative effects on wound healing and complication rates. Current smokers often require longer operative times, more complex closure techniques, and have higher risks of skin necrosis and poor scarring.

      Procedure-Specific Customization

      Our calculator incorporates detailed procedure specifications to refine cost estimates based on surgical choices. The type of brachioplasty selected (traditional, limited incision, extended, or liposuction-only) fundamentally determines the surgical approach, operating time, and technical demands, all major cost factors.

      Additional procedure considerations include:
      ✓ Combination with other procedures (like breast lift or abdominoplasty)
      ✓ Use of advanced technologies like laser-assisted liposuction
      ✓ Need for drain placement and management
      ✓ Anticipated scar management requirements

      Geographic location selection allows the calculator to adjust for regional variations in surgical costs, recognizing that the same procedure may cost significantly different amounts in various countries or even different regions within the same country. This feature helps patients understand how location choices affect their financial planning.

      What Does the Typical Arm Tuck Recovery Timeline Look Like?

      Immediate Postoperative Period (First 72 Hours)

      The initial recovery phase focuses on managing discomfort, monitoring for complications, and beginning the healing process. Patients typically experience swelling, bruising, and mild to moderate discomfort during this period, managed with prescribed pain medication. Arm movement is limited, and elevation is encouraged to reduce swelling.

      Key aspects of immediate recovery include:
      ✓ Use of compression garments to minimize swelling and support healing
      ✓ Limited arm movement with avoidance of heavy lifting or strenuous activity
      ✓ Drain care if placed during surgery to remove excess fluid
      ✓ Proper wound care to prevent infection and promote optimal healing

      During this phase, patients need assistance with daily activities, especially those requiring arm strength or elevation above shoulder level. Proper positioning during sleep (typically on the back with arms elevated on pillows) helps manage swelling and discomfort while protecting the surgical sites.

      First Two Weeks: Early Healing Phase

      During the first two weeks, swelling and bruising gradually improve, and patients typically transition from prescription pain medication to over-the-counter alternatives. Most patients return to sedentary jobs within 7-10 days, provided their work doesn't require physical exertion. Light activities of daily living can resume, but heavy lifting remains restricted.

      Important milestones during this phase include:
      ✓ Drain removal if placed (typically within 1-2 weeks)
      ✓ Gradual increase in walking and light movement
      ✓ Continued use of compression garments as directed
      ✓ Possible suture removal depending on closure technique

      While energy levels gradually improve, fatigue is common during this phase as the body directs significant resources toward healing. Proper nutrition and hydration support this process, while smoking and alcohol consumption can significantly impede recovery.

      Weeks 3-6: Intermediate Recovery

      During weeks 3-6, patients notice significant improvement in swelling and discomfort, allowing resumption of most normal activities. Light exercise such as walking or stationary biking may resume, but upper body workouts remain restricted. Compression garments may still be recommended, particularly during physical activity.

      Recovery developments during this phase include:
      ✓ Gradual return of full range of motion in the arms
      ✓ Diminishing visibility of bruising and significant reduction in swelling
      ✓ Incisions transitioning from red/pink to lighter pink or purple
      ✓ Possible onset of itching as nerves regenerate and healing progresses

      Most patients feel substantially recovered by week 4-6, though residual swelling and some activity restrictions remain. The arms continue to change in appearance as swelling resolves and the final contour emerges gradually over several months.

      Months 2-6: Long-Term Healing and Final Results

      Between months 2-6, residual swelling continues to resolve, revealing the final arm contour. Scar maturation begins, with raised, red scars gradually flattening and fading to white or skin-colored lines. Most patients resume all normal activities, including full exercise regimens, by 6-8 weeks postoperatively.

      Important aspects of long-term recovery include:
      ✓ Progressive scar improvement with proper care and protection from sun exposure
      ✓ Continued refinement of arm shape as the last of the swelling resolves
      ✓ Gradual return of normal sensation in areas temporarily numb after surgery
      ✓ Establishment of final surgical results typically by 6 months

      While patients see dramatic improvement early in recovery, the final results continue to refine over several months. The arms settle into their new shape, scars mature, and any residual tightness or discomfort typically resolves completely during this period.

      What Are the Potential Risks and Complications of Brachioplasty?

      Common Expected Side Effects Versus Complications

      Understanding the difference between expected postoperative effects and genuine complications helps patients maintain appropriate perspective during recovery. Expected side effects include temporary swelling, bruising, discomfort, tightness, and temporary altered sensation. These are normal healing responses that typically resolve spontaneously within the early recovery period.

      Genuine complications requiring medical attention include:
      ✓ Signs of infection (increasing redness, warmth, pus, or fever)
      ✓ Hematoma (significant blood collection under the skin)
      ✓ Seroma (persistent fluid accumulation requiring drainage)
      ✓ Wound separation or delayed healing
      ✓ Skin necrosis (tissue death) particularly in smokers

      While serious complications are uncommon in healthy patients undergoing brachioplasty by qualified surgeons, understanding the warning signs allows for prompt intervention if needed. Most potential complications are manageable when identified early and addressed appropriately.

      Scarring Considerations and Management

      Scarring represents an inevitable aspect of brachioplasty, since the procedure requires incisions to remove excess skin. Scar appearance varies significantly based on genetic factors, surgical technique, and postoperative care. Initially red and raised, scars typically mature over 12-18 months, becoming flatter, softer, and lighter in color.

      Effective scar management strategies include:
      ✓ Silicone sheeting or gel applications starting after complete wound healing
      ✓ Gentle massage once healed to soften scar tissue
      ✓ Strict sun protection for at least one year to prevent permanent darkening
      ✓ Possible steroid injections for thickened or hypertrophic scars

      Scar position represents a key consideration in brachioplasty planning. Surgeons strategically place incisions along the inner arm where they're less visible in most positions. Patients concerned about scar visibility should discuss placement options with their surgeon during consultation and view before-and-after photos of the surgeon's previous patients.

      Functional Considerations and Long-Term Implications

      While brachioplasty primarily addresses aesthetic concerns, the procedure can have functional implications, particularly during the recovery period. Temporary limitation in range of motion and strength is expected during healing. Permanent changes are rare but may include altered sensation in portions of the upper arm or mild tightness with extreme extension.

      Most patients experience:
      ✓ Temporary numbness or altered sensation in the arms that typically resolves over months
      ✓ Possible tightness with full extension that usually improves with time and gentle stretching
      ✓ Rare instances of persistent swelling that typically responds to conservative measures
      ✓ Possible need for minor revision procedures to address dog ears or asymmetry

      Understanding these potential outcomes helps patients establish realistic expectations and recognize normal versus abnormal recovery patterns. The vast majority of patients report high satisfaction with brachioplasty results despite these temporary or minor long-term considerations.

      Skin-and-aesthetic-procedures-online-appointments-doseway.com

      How Should Patients Prepare for Arm Tuck Surgery?

      Preoperative Medical Evaluation and Optimization

      Thorough medical evaluation before brachioplasty identifies potential risk factors and allows for appropriate optimization. This typically includes a complete history and physical examination, laboratory testing, and possibly additional consultations for patients with significant medical conditions. Optimization may involve medication adjustments, smoking cessation, or weight stabilization.

      Essential preoperative preparations include:
      ✓ Complete disclosure of all medications, supplements, and herbal remedies
      ✓ Appropriate management of chronic conditions like diabetes or hypertension
      ✓ Cessation of smoking and nicotine products for at least 4-6 weeks before surgery
      ✓ Discontinuation of medications that increase bleeding risk (aspirin, NSAIDs, certain supplements)

      Nutritional optimization represents another key preparatory step. Adequate protein intake supports healing, while vitamin and mineral sufficiency promotes optimal recovery. Some surgeons recommend specific nutritional supplements in the weeks before surgery, though this should be done under medical guidance.

      Practical Planning for Recovery Period

      Practical preparation for the recovery period significantly enhances comfort and reduces stress during healing. Patients should arrange for help with daily activities, particularly during the first 1-2 weeks when arm use is most restricted. Preparing the home environment by placing frequently used items within easy reach minimizes the need for stretching or straining.

      Important practical preparations include:
      ✓ Arranging for help with childcare, pet care, and household tasks
      ✓ Preparing and freezing meals in advance for easy preparation
      ✓ Setting up a comfortable recovery area with pillows for arm elevation
      ✓ Ensuring easy-access clothing (front-opening shirts, loose sleeves)
      ✓ Filling prescriptions before surgery to have medications readily available

      Financial preparation represents another practical consideration. Patients should clearly understand all costs involved and arrange payment in advance. Those planning to use financing options should complete applications well before the scheduled procedure date to ensure everything is in place.

      Mental and Emotional Preparation

      Realistic expectation setting represents a crucial component of mental preparation for brachioplasty. Patients should understand that while the procedure provides dramatic improvement, it involves trade-offs (primarily scarring) and requires patience during the recovery period when swelling and temporary imperfections are normal.

      Helpful mental preparation strategies include:
      ✓ Thoroughly reviewing before-and-after photos of the surgeon's previous patients
      ✓ Understanding the normal progression of recovery, including the "ugly duckling" phase
      ✓ Discussing both benefits and limitations with the surgeon during consultation
      ✓ Establishing a support system of family or friends who can provide encouragement

      Patients should also prepare for the emotional aspect of recovery, which may include temporary mood changes related to anesthesia, medications, or temporary activity restrictions. Recognizing these potential emotional responses as normal and temporary helps patients navigate the recovery process more smoothly.

      What Results Can Patients Realistically Expect from Arm Tuck Surgery?

      Immediate Versus Long-Term Outcome Evolution

      Understanding the timeline of result evolution helps patients maintain perspective during the recovery process. Immediately after surgery, patients see significant improvement in arm contour, though results are obscured by swelling, bruising, and compression garments. The initial appearance doesn't reflect the final outcome, as the arms will change substantially over subsequent months.

      The typical evolution of results includes:
      ✓ Week 1-2: Significant swelling and bruising with arms appearing larger than preoperatively
      ✓ Weeks 3-6: Gradual resolution of swelling revealing improved contour
      ✓ Months 2-4: Continued refinement as residual swelling resolves
      ✓ Months 6-12: Final results with settled tissue and maturing scars

      The most dramatic visual improvement typically becomes apparent around 3-4 months, with continued subtle refinement up to one year postoperatively. Scar maturation continues for 12-18 months, with red, raised scars gradually fading, softening, and flattening.

      Factors Influencing Final Outcome Quality

      Several factors significantly influence the final aesthetic results of brachioplasty. Surgical technique and execution naturally play crucial roles, but patient-specific factors also substantially impact outcomes. Skin quality, age, genetic healing characteristics, and compliance with postoperative instructions all contribute to the final appearance.

      Key factors affecting results include:
      ✓ Skin elasticity: Determines how well skin retracts and conforms to the new contour
      ✓ Age and genetics: Influence healing capacity and scar formation
      ✓ Weight stability: Significant fluctuations after surgery can compromise results
      ✓ Sun exposure: Affects scar appearance and healing quality
      ✓ Nutrition and lifestyle: Impact healing efficiency and tissue quality

      Patients can optimize many of these factors through proper preparation and adherence to postoperative instructions. Maintaining stable weight, protecting scars from sun exposure, following a healthy lifestyle, and attending all follow-up appointments all contribute to achieving the best possible results.

      Satisfaction Rates and Patient-Reported Outcomes

      Brachioplasty consistently demonstrates high patient satisfaction rates, with multiple studies reporting satisfaction levels exceeding 85-90%. Patients typically report improved body image, increased comfort in clothing, and greater willingness to wear sleeveless garments. The procedure often enables participation in activities previously avoided due to self-consciousness about arm appearance.

      Commonly reported benefits include:
      ✓ Elimination of skin irritation caused by rubbing of excess arm skin
      ✓ Improved fit of clothing, particularly sleeves
      ✓ Enhanced proportion between upper arms and rest of the body
      ✓ Increased confidence in social and professional situations
      ✓ Ability to wear styles previously avoided due to arm concerns

      While satisfaction rates are high, patients with realistic expectations tend to report higher satisfaction levels than those with unrealistic preconceptions about results. Understanding that brachioplasty improves but doesn't perfect arm appearance, and that it involves trade-offs like scarring, correlates strongly with postoperative satisfaction.

      How Does Arm Tuck Surgery Compare to Non-Surgical Alternatives?

      Non-Surgical Skin Tightening Technologies

      Various non-surgical technologies claim to improve skin laxity in the upper arms, including radiofrequency, ultrasound, and laser treatments. These modalities work by heating tissue layers to stimulate collagen production and contraction, resulting in gradual mild to moderate skin tightening over several months.

      Limitations of non-surgical alternatives include:
      ✓ Modest improvement compared to surgical results
      ✓ Requirement for multiple treatment sessions
      ✓ Higher cumulative cost over time for maintenance
      ✓ Ineffectiveness for significant skin excess or fat removal
      ✓ Variable results based on individual factors and technology used

      Non-surgical options may benefit patients with minimal laxity who seek subtle improvement without surgery or scars. However, for patients with moderate to severe skin excess, these treatments typically provide disappointing results compared to surgical brachioplasty.

      Non-Surgical Fat Reduction Methods

      Non-surgical fat reduction technologies like cryolipolysis (CoolSculpting), laser lipolysis, and injectable deoxycholic acid (Kybella) can reduce fat in the upper arms without surgery. These methods work by destroying fat cells through various mechanisms, with the body gradually eliminating them over subsequent weeks to months.

      Considerations regarding non-surgical fat reduction:
      ✓ Effective only for fat reduction, not skin tightening
      ✓ May worsen appearance if significant skin laxity exists
      ✓ Requires multiple treatments for noticeable results
      ✓ Cannot address the degree of fat removal possible with surgery
      ✓ Results are less predictable and customizable than surgical contouring

      For patients with good skin elasticity and localized fat deposits, non-surgical fat reduction may provide satisfactory improvement. However, when skin laxity accompanies excess fat, surgical removal typically yields superior aesthetic outcomes.

      Cost-Benefit Analysis of Surgical Versus Non-Surgical Approaches

      When considering brachioplasty versus non-surgical alternatives, patients should evaluate the cost-benefit ratio of each approach. While non-surgical treatments involve less downtime and no scars, they typically require multiple sessions and provide more modest results. The cumulative cost of multiple non-surgical treatments may approach or even exceed that of a single surgical procedure.

      Key comparison points include:
      ✓ Degree of improvement: Surgical results are dramatically more significant
      ✓ Scarring trade-off: Surgery involves scars while non-surgical options do not
      ✓ Downtime: Non-surgical treatments involve minimal recovery time
      ✓ Cost over time: Non-surgical approaches often require maintenance treatments
      ✓ Predictability: Surgical outcomes are more predictable and customizable

      The decision between surgical and non-surgical approaches depends largely on the amount of correction desired, tolerance for scarring, availability of recovery time, and financial considerations. Patients with significant skin excess typically find that surgery provides better value despite the more involved recovery process.

      Board-certified-aesthetic-specialist-at-doseway.com-ready-to-discuss-your-skin-goals

      What Are the Key Considerations for Choosing a Brachioplasty Surgeon?

      Credentials and Certification Verification

      Selecting a properly qualified surgeon represents the most important decision in the brachioplasty process. Patients should verify that their surgeon is certified by the American Board of Plastic Surgery or equivalent certifying body in their country. Board certification indicates specific training in plastic surgery and adherence to ethical standards and continuing education.

      Important credential considerations include:
      ✓ Specific certification in plastic surgery (not just general surgery)
      ✓ Membership in professional societies like ASPS or ISAPS
      ✓ Hospital privileges to perform brachioplasty
      ✓ No history of disciplinary actions or malpractice judgments

      Patients should be wary of practitioners who lack appropriate plastic surgery credentials but offer cut-rate pricing. While cost considerations are legitimate, choosing a surgeon based primarily on price rather than qualifications can lead to disappointing results or increased complication risks.

      Experience and Before-and-After Portfolio Review

      Surgeon experience specifically with brachioplasty procedures significantly influences outcomes. Patients should ask potential surgeons about their brachioplasty case volume and request to see before-and-after photos of previous patients. Reviewing photos helps assess the surgeon's aesthetic style, consistency of results, and approach to scar placement.

      When evaluating a surgeon's experience:
      ✓ Ask about their specific experience with your type of procedure
      ✓ Request to see photos of patients with similar starting points
      ✓ Look for consistency in results across multiple patients
      ✓ Note scar placement and quality in postoperative photos
      ✓ Consider speaking with previous patients if the surgeon offers this opportunity

      An experienced brachioplasty surgeon should readily provide numerous examples of their work and discuss their surgical philosophy regarding incision placement, tissue removal, and contouring goals. Surgeons who hesitate to share before-and-after photos or provide vague answers about their experience may warrant caution.

      Communication Style and Comfort Level

      The surgeon-patient relationship extends beyond technical skill to include communication, trust, and comfort. During consultations, patients should assess how thoroughly the surgeon listens to concerns, explains options, and sets realistic expectations. A good surgeon should make patients feel heard, respected, and comfortable asking questions.

      Positive communication indicators include:
      ✓ The surgeon spends adequate time answering all questions thoroughly
      ✓ Explanations are clear and understandable without excessive technical jargon
      ✓ The surgeon shows respect for the patient's goals and concerns
      ✓ The practice staff are professional, responsive, and helpful
      ✓ The surgeon discusses both benefits and limitations honestly

      Patients should feel confident in their surgeon's expertise and comfortable with their proposed approach. If something feels rushed, dismissive, or creates discomfort, seeking additional consultations may be worthwhile until finding the right surgical match.

      How Can Patients Finance Their Arm Tuck Procedure?

      Medical Financing Companies and Payment Plans

      Specialized medical financing companies like CareCredit, Alphaeon Credit, and United Medical Credit offer payment plans specifically for elective cosmetic procedures. These companies typically provide various term lengths and interest rate options, allowing patients to spread procedure costs over time rather than paying entirely upfront.

      Key aspects of medical financing include:
      ✓ Application processes specifically designed for elective medical procedures
      ✓ Variable interest rates based on creditworthiness
      ✓ Potential promotional periods with low or no interest
      ✓ Fixed monthly payments over set terms (typically 12-60 months)
      ✓ Often available directly through surgeon's offices

      Patients should carefully review terms, interest rates, and potential fees before committing to medical financing. Understanding the total cost including interest helps in evaluating whether the financing plan fits within long-term budget considerations.

      Personal Loans and Savings Strategies

      Traditional personal loans from banks or credit unions represent another financing option for brachioplasty. These loans typically offer fixed interest rates and set repayment terms, with rates dependent on credit history and income. Comparing offers from multiple lenders helps secure the most favorable terms.

      Savings strategies for self-financing include:
      ✓ Establishing a dedicated savings account for procedure costs
      ✓ Setting up automatic transfers from checking to savings
      ✓ Redirecting specific expense savings (like dining out or entertainment)
      ✓ Using windfalls like tax refunds or bonuses to build the procedure fund
      ✓ Considering health savings accounts (HSAs) if eligible

      For patients planning ahead for surgery, systematic saving over several months or years can accumulate the necessary funds without incurring debt or interest charges. This approach requires discipline but eliminates financing costs.

      Combination Approaches and Financial Planning

      Many patients use combination approaches to finance their brachioplasty, such as putting a portion on medical financing while paying the remainder from savings. This strategy can reduce monthly payments or allow use of promotional financing offers while maintaining manageable debt levels.

      Smart financial planning for cosmetic surgery includes:
      ✓ Obtaining detailed cost breakdowns from potential surgeons
      ✓ Comparing total costs (including interest) across financing options
      ✓ Considering the procedure's long-term value versus immediate cost
      ✓ Evaluating how monthly payments fit within overall budget
      ✓ Planning for potential additional costs like time off work or recovery supplies

      Regardless of the financing method chosen, patients should view the procedure as a long-term investment in their wellbeing rather than just an expense. Considering the lasting nature of results helps put the financial aspect in proper perspective.

      Premium Compression Garments

      Medical-grade compression garments represent essential investments for optimal brachioplasty recovery. These specialized sleeves provide consistent pressure to minimize swelling, support healing tissues, and improve contour outcomes. Unlike ordinary compression wear, medical-grade garments offer graduated compression and strategic paneling designed specifically for postoperative use.

      Key features to seek in quality compression garments:
      ✓ Seamless construction to prevent skin irritation
      ✓ Medical-grade compression with appropriate pressure gradient
      ✓ Breathable, moisture-wicking fabric for comfort
      ✓ Proper sizing for individual measurements
      ✓ Openings for drain management if needed

      Advanced Scar Treatment Systems

      Comprehensive scar management systems significantly improve the appearance of brachioplasty scars over time. These typically include silicone sheeting or gel, which has been clinically proven to improve scar texture, color, and height. Consistent use beginning after complete wound healing can transform raised, red scars into flatter, less noticeable lines.

      Effective scar management products include:
      ✓ Medical-grade silicone sheets cut to arm scar dimensions
      ✓ Silicone gel formulas for hard-to-reach areas
      ✓ Scar massage tools to soften and flatten tissue
      ✓ UV-protective products to prevent scar darkening
      ✓ Combination systems addressing multiple aspects of scar maturation

      Specialized Recovery Supplements

      Targeted nutritional support can enhance healing and potentially improve recovery experience. While a balanced diet forms the foundation of proper nutrition, specific supplements may address increased demands during the postoperative period. Formulas containing arnica montana, bromelain, vitamin C, zinc, and specialized protein blends may support reduced bruising, decreased inflammation, and optimized tissue repair.

      Important considerations for recovery supplements:
      ✓ Surgeon approval before taking any postoperative supplements
      ✓ Pharmaceutical-grade quality for purity and potency
      ✓ Appropriate timing relative to surgery and other medications
      ✓ Realistic expectations about degree of benefit
      ✓ Discontinuation if any adverse reactions occur

      Womans-with-glowing-skin-after-successful-aesthetic-treatment-Book-a-free-consultation-at-doseway.com.

      Frequently Asked Questions About Arm Tuck Surgery

      How Painful is Arm Tuck Recovery?

      Brachioplasty involves moderate discomfort rather than severe pain for most patients. The initial 2-3 days typically involve the most significant discomfort, well-controlled with prescribed medication. After this period, most patients transition to over-the-counter pain relievers. The sensation is often described as tightness and soreness rather than sharp pain, with gradual improvement each week.

      Will Arm Tuck Scars Be Very Noticeable?

      Brachioplasty scars are permanent but strategically placed along the inner arm where they're least visible in most positions. While initially red and raised, scars typically fade significantly over 12-18 months to become much less noticeable. Proper scar care including silicone products, massage, and sun protection can optimize final appearance. Most patients find the trade-off of scars for improved arm contour worthwhile.

      Can Arm Fat Return After Brachioplasty?

      The fat cells removed during brachioplasty are permanently eliminated and cannot return. However, remaining fat cells in the arms can still enlarge with weight gain. Significant weight fluctuation after surgery can compromise results by stretching remaining skin. Maintaining stable weight through proper diet and exercise helps preserve surgical outcomes long-term.

      Is Arm Tuck Surgery Covered by Insurance?

      Brachioplasty is typically considered cosmetic surgery and not covered by insurance. In rare cases where extensive skin folds cause chronic skin infections or functional impairment, partial coverage might be possible with thorough documentation and pre-authorization. Patients should verify coverage details with their insurance provider before proceeding.

      What is the Ideal BMI for Arm Tuck Surgery?

      Most plastic surgeons recommend a BMI under 30 for optimal brachioplasty safety and results. Higher BMI increases surgical risks and may compromise aesthetic outcomes. Patients with BMI over 30 are typically encouraged to pursue weight loss before surgery. However, individual assessment considers factors beyond BMI alone, including weight stability, fat distribution, and overall health.

      How Long Do Arm Tuck Results Last?

      Brachioplasty results are considered permanent in that removed skin and fat will not return. However, the natural aging process continues, and significant weight fluctuations can compromise results. With stable weight and proper skincare, most patients enjoy their brachioplasty results for decades. The procedure turns back the clock on arm appearance rather than stopping the aging process entirely.

      Can I Combine Arm Tuck with Other Procedures?

      Brachioplasty is commonly combined with other body contouring procedures like breast lift, tummy tuck, or thigh lift, particularly for post-bariatric patients. Combination procedures can provide comprehensive transformation while consolidating recovery time. However, adding procedures increases surgical complexity, operating time, and recovery demands, which should be carefully considered in consultation with your surgeon.

      1. Marena Recovery Compression Garments - High-quality medical compression wear specifically designed for post-surgical use with various sleeve options
      2. ScarAway Silicone Scar Sheets - Effective silicone-based scar treatment available in sheets and gels perfect for linear arm scars
      3. BioCorneum Advanced Scar Formula - Physician-recommended scar management combining silicone and SPF protection
      4. Leonisa Shapewear - Premium compression and shaping garments that can be used during later recovery stages
      5. Murad Environmental Shield Rapid Age Spot Correction - Targeted treatment for hyperpigmentation that can help with scar discoloration
      6. VitaMedica Surgery Program - Comprehensive nutritional support system specifically formulated for surgical recovery
      7. Rejuvenique Post-Surgical Recovery Kit - All-in-one recovery package including arnica, bromelain, and healing supplements
      8. LympheDIVAS Compression Sleeves - Fashion-forward compression wear that doesn't sacrifice medical effectiveness
      9. SkinMedica Scar Recovery Gel - Premium silicone gel with advanced formulation for optimal scar appearance
      10. Mepiform Silicone Dressings - Thin, durable silicone sheets that adhere without additional tape